Build an automated Discord verification system
Uncover that member satoshi1984 is really Dorian Nakamoto.
Product Update
Common Room is a GTM and sales pipeline platform focused on unifying intent and buying signals, enriching contacts and accounts with AI-powered context, and activating precise pipeline plays. Learn more.
Community activity remains supported as one of many possible sources of intent within the broader set of GTM signals. Some resources below reflect earlier community-led examples and may be outdated.
Overview
For many, the anonymous nature of Discord is more of a feature than a bug.
In some cases (like the leakage of classified documents), the anonymity of users has caused Discord and server owners to catch heat from government officials.
It's not the fault of server owners, just a by-product of anonymous bad actors.
While the stakes are not so high for DevRels, anonymity presents hurdles to tying effort to business value. If that's you, a Discord verification bot is just what you need.
This playbook will show you how to use Common Room to quickly set up a Discord verification bot to protect your server. As a bonus, member verification will make it a lot easier to show direct business value. Here it goes.
What you’ll need
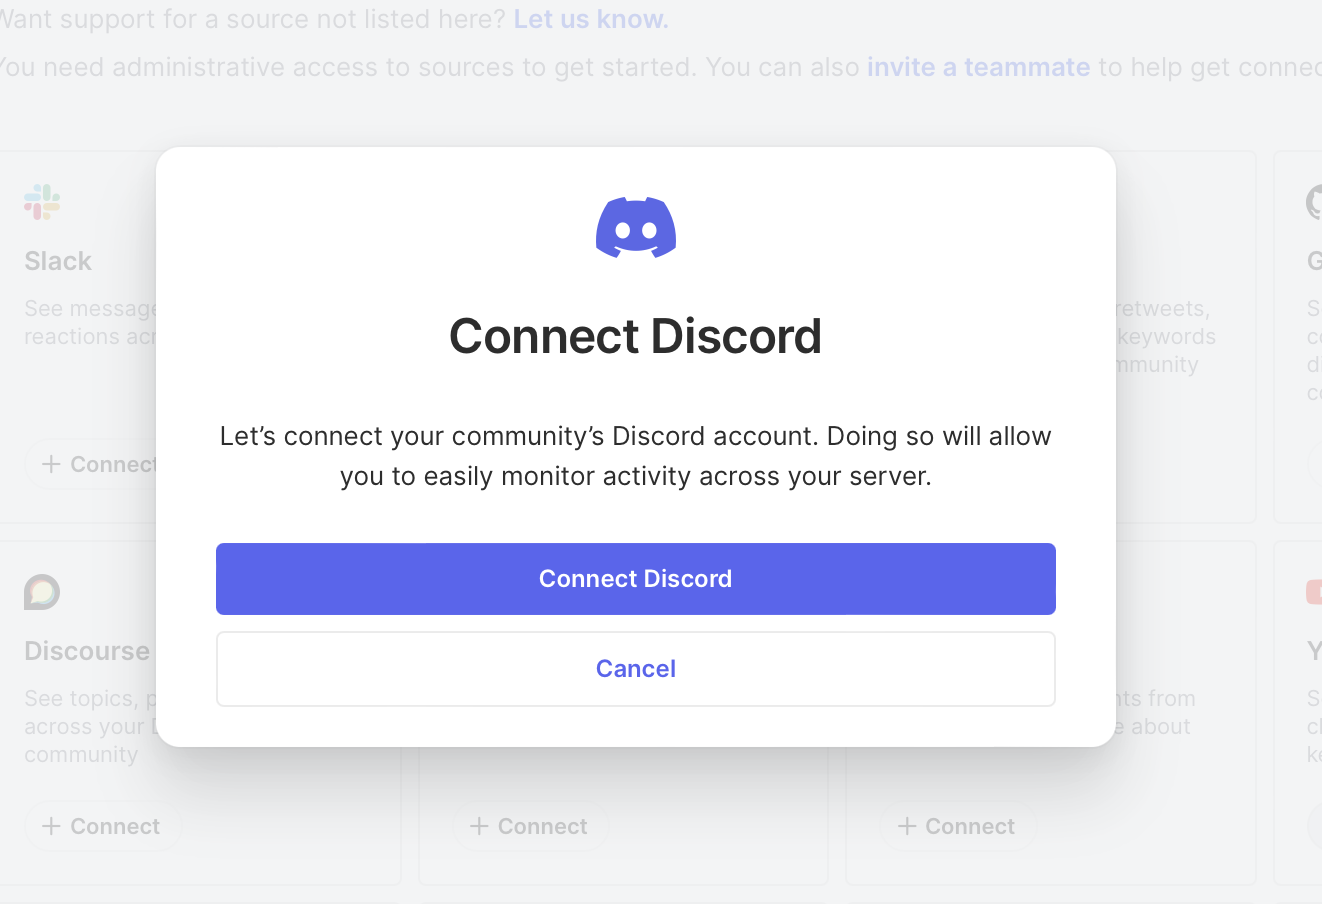
Step 1: Connect a Discord server to Common Room
We'll first want to connect your Discord server to Common Room, where we'll set up our verification system. To do that, you’ll need to log in to your Common Room account, head over to the source settings menu, and select Connect Discord.
You’ll then be prompted to confirm which Discord channels to import.
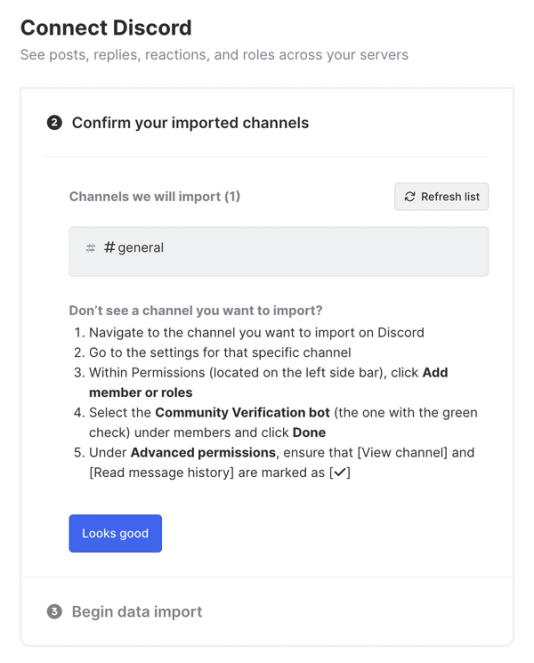
Click Looks good to begin importing messages, threaded replies, and reactions from any channel you select. Once the import begins, Common Room will create a member for every user joining your server and allow you to filter members by Discord role.
That’s it for this step. Congrats on connecting your Discord source!
Step 2: Configure "Unverified" and "Verified" Discord role permissions
For this step, we'll be primarily working from our Discord server. When you hop back into Discord, you'll see the Roomie (Common Room bot) verification bot is now added.

Next, we'll need to configure the roles of users and verified users. To do that, we can go into your server settings.
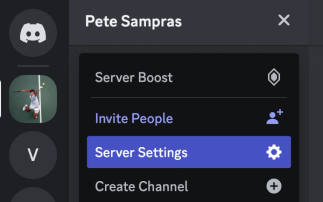
From here, we’ll click on Roles to set up new roles for unverified and verified users.
We can then click on the Roles menu item and select Default Permissions. We'll use this default for our unverified role. And it's up to you which permissions to choose for unverified members.

Next, we’ll create a new role. This will act as our verified role.
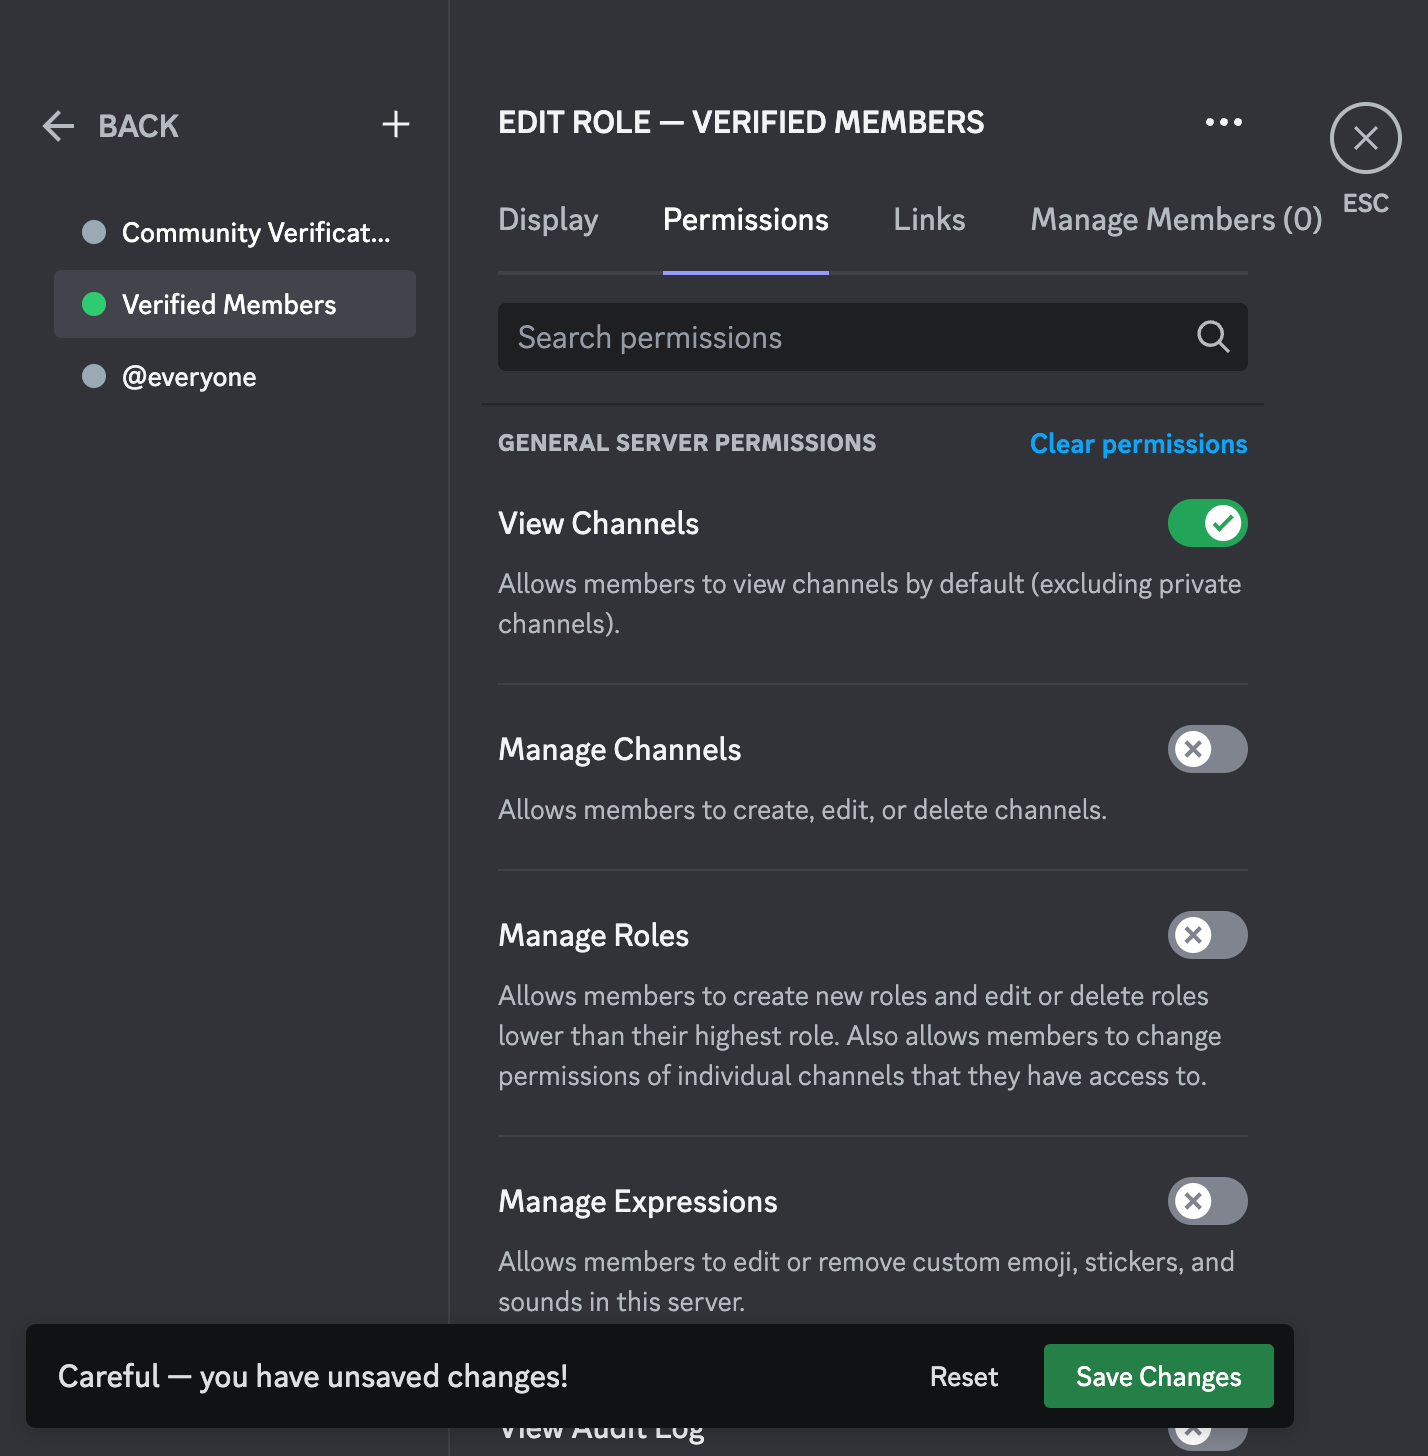
We can simply click New Role. We’ll name this something like Verified Members, choose a color or other customizations, and click Save Changes.

We’ll want to set permissions for our newly created Verified Members role. Since these members will be verified through email, we’ll give them more permissions, like viewing public channels and sending messages (whatever permissions you’re comfortable with).
Next, we can create new categories or channels for the Verified Member role. We can right-click in the left pane and select Create Channel. And we can name that channel #verify-here (or whatever you like).
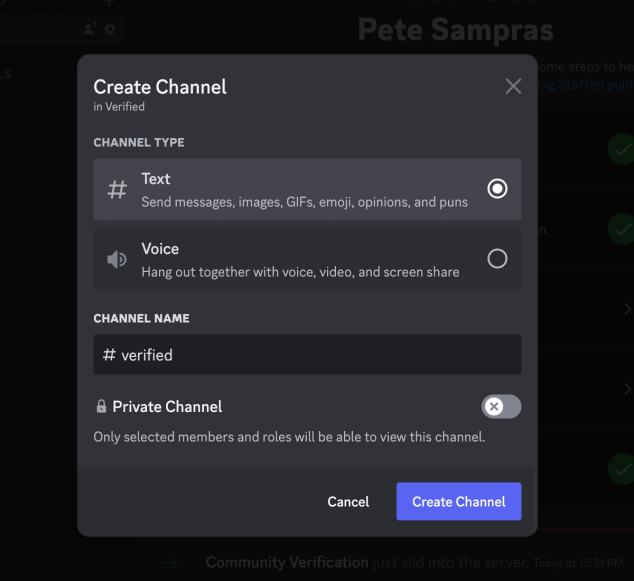
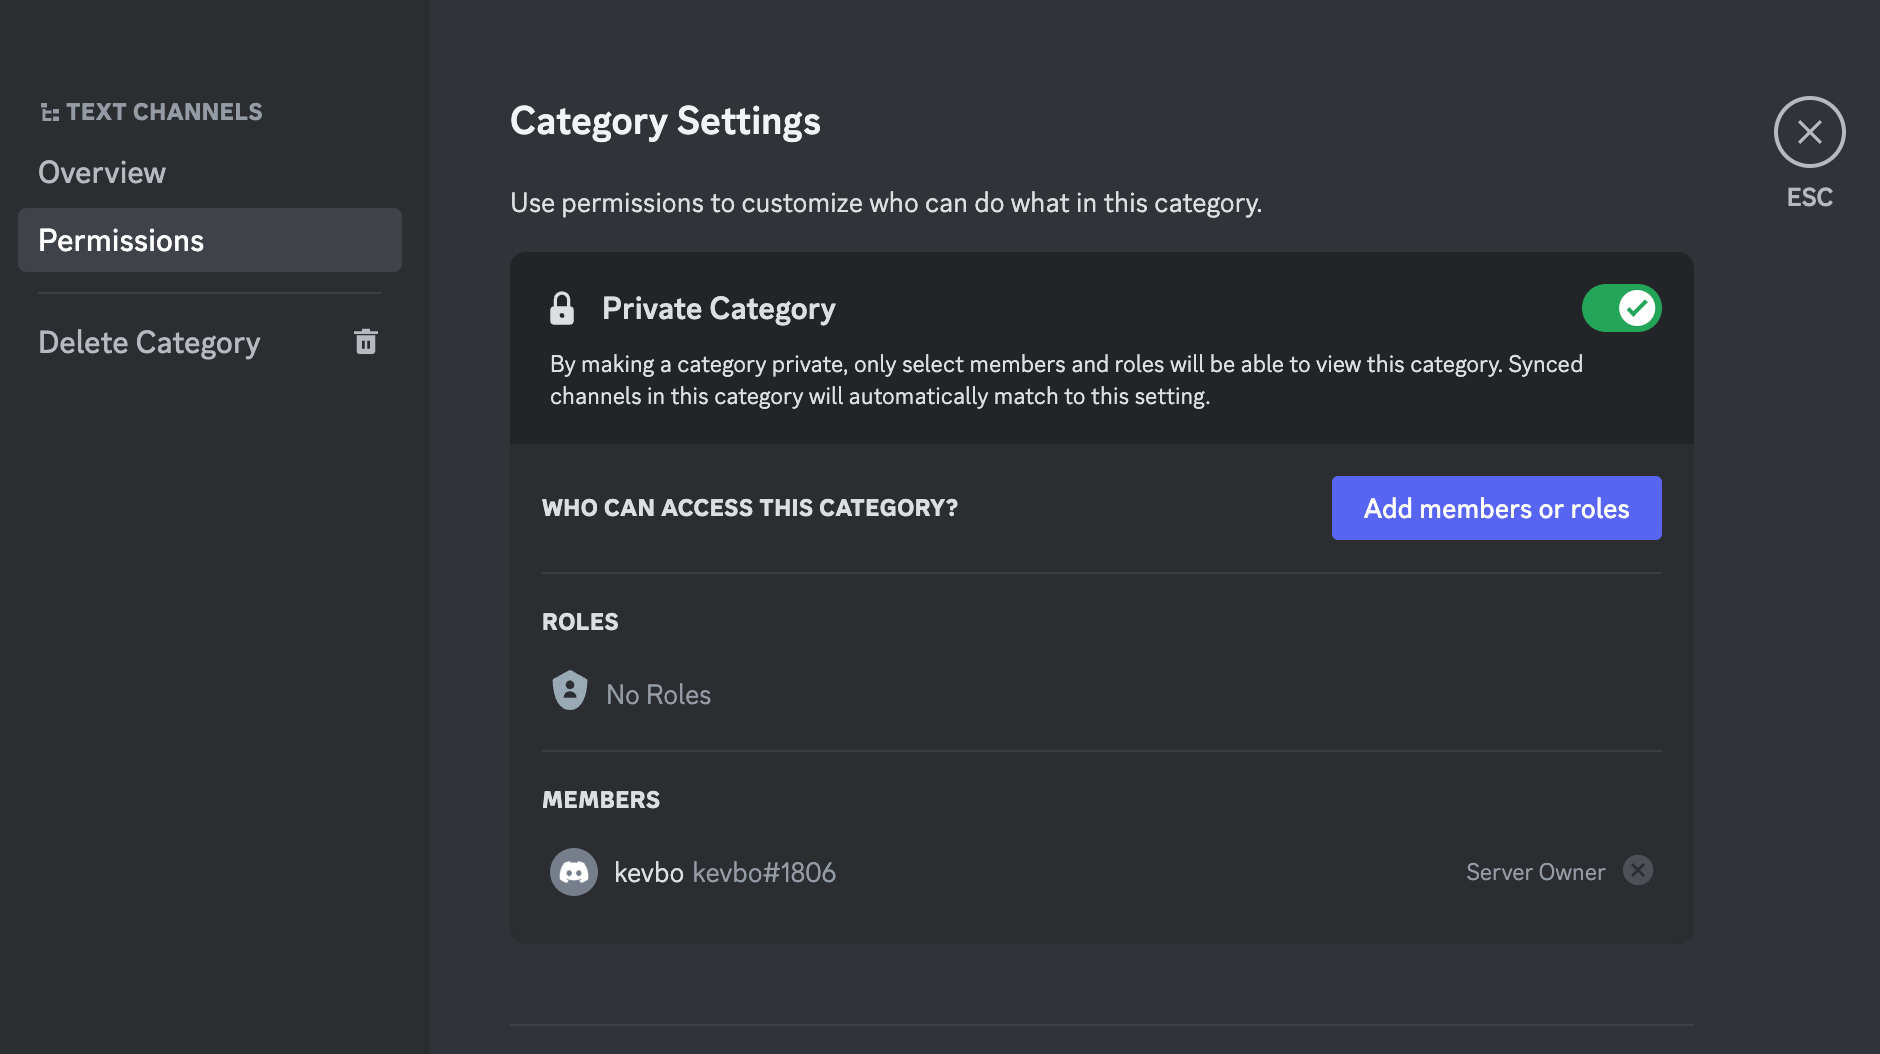
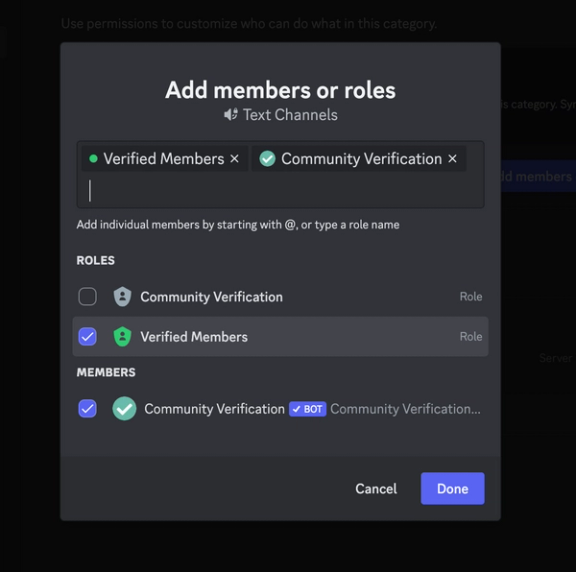
And now, we want to hide our existing channels from new members who have yet to be verified. So we’ll right-click on the channel category (TEXT CHANNELS, in this case) and click to edit the category. Then set permissions to be a 🔒Private Category with our new Verified Members role selected.
Phew! That was a bit tedious, but we now have all of the settings we need to automate Discord verification via Common Room.
Step 3: Automate member verification with workflows
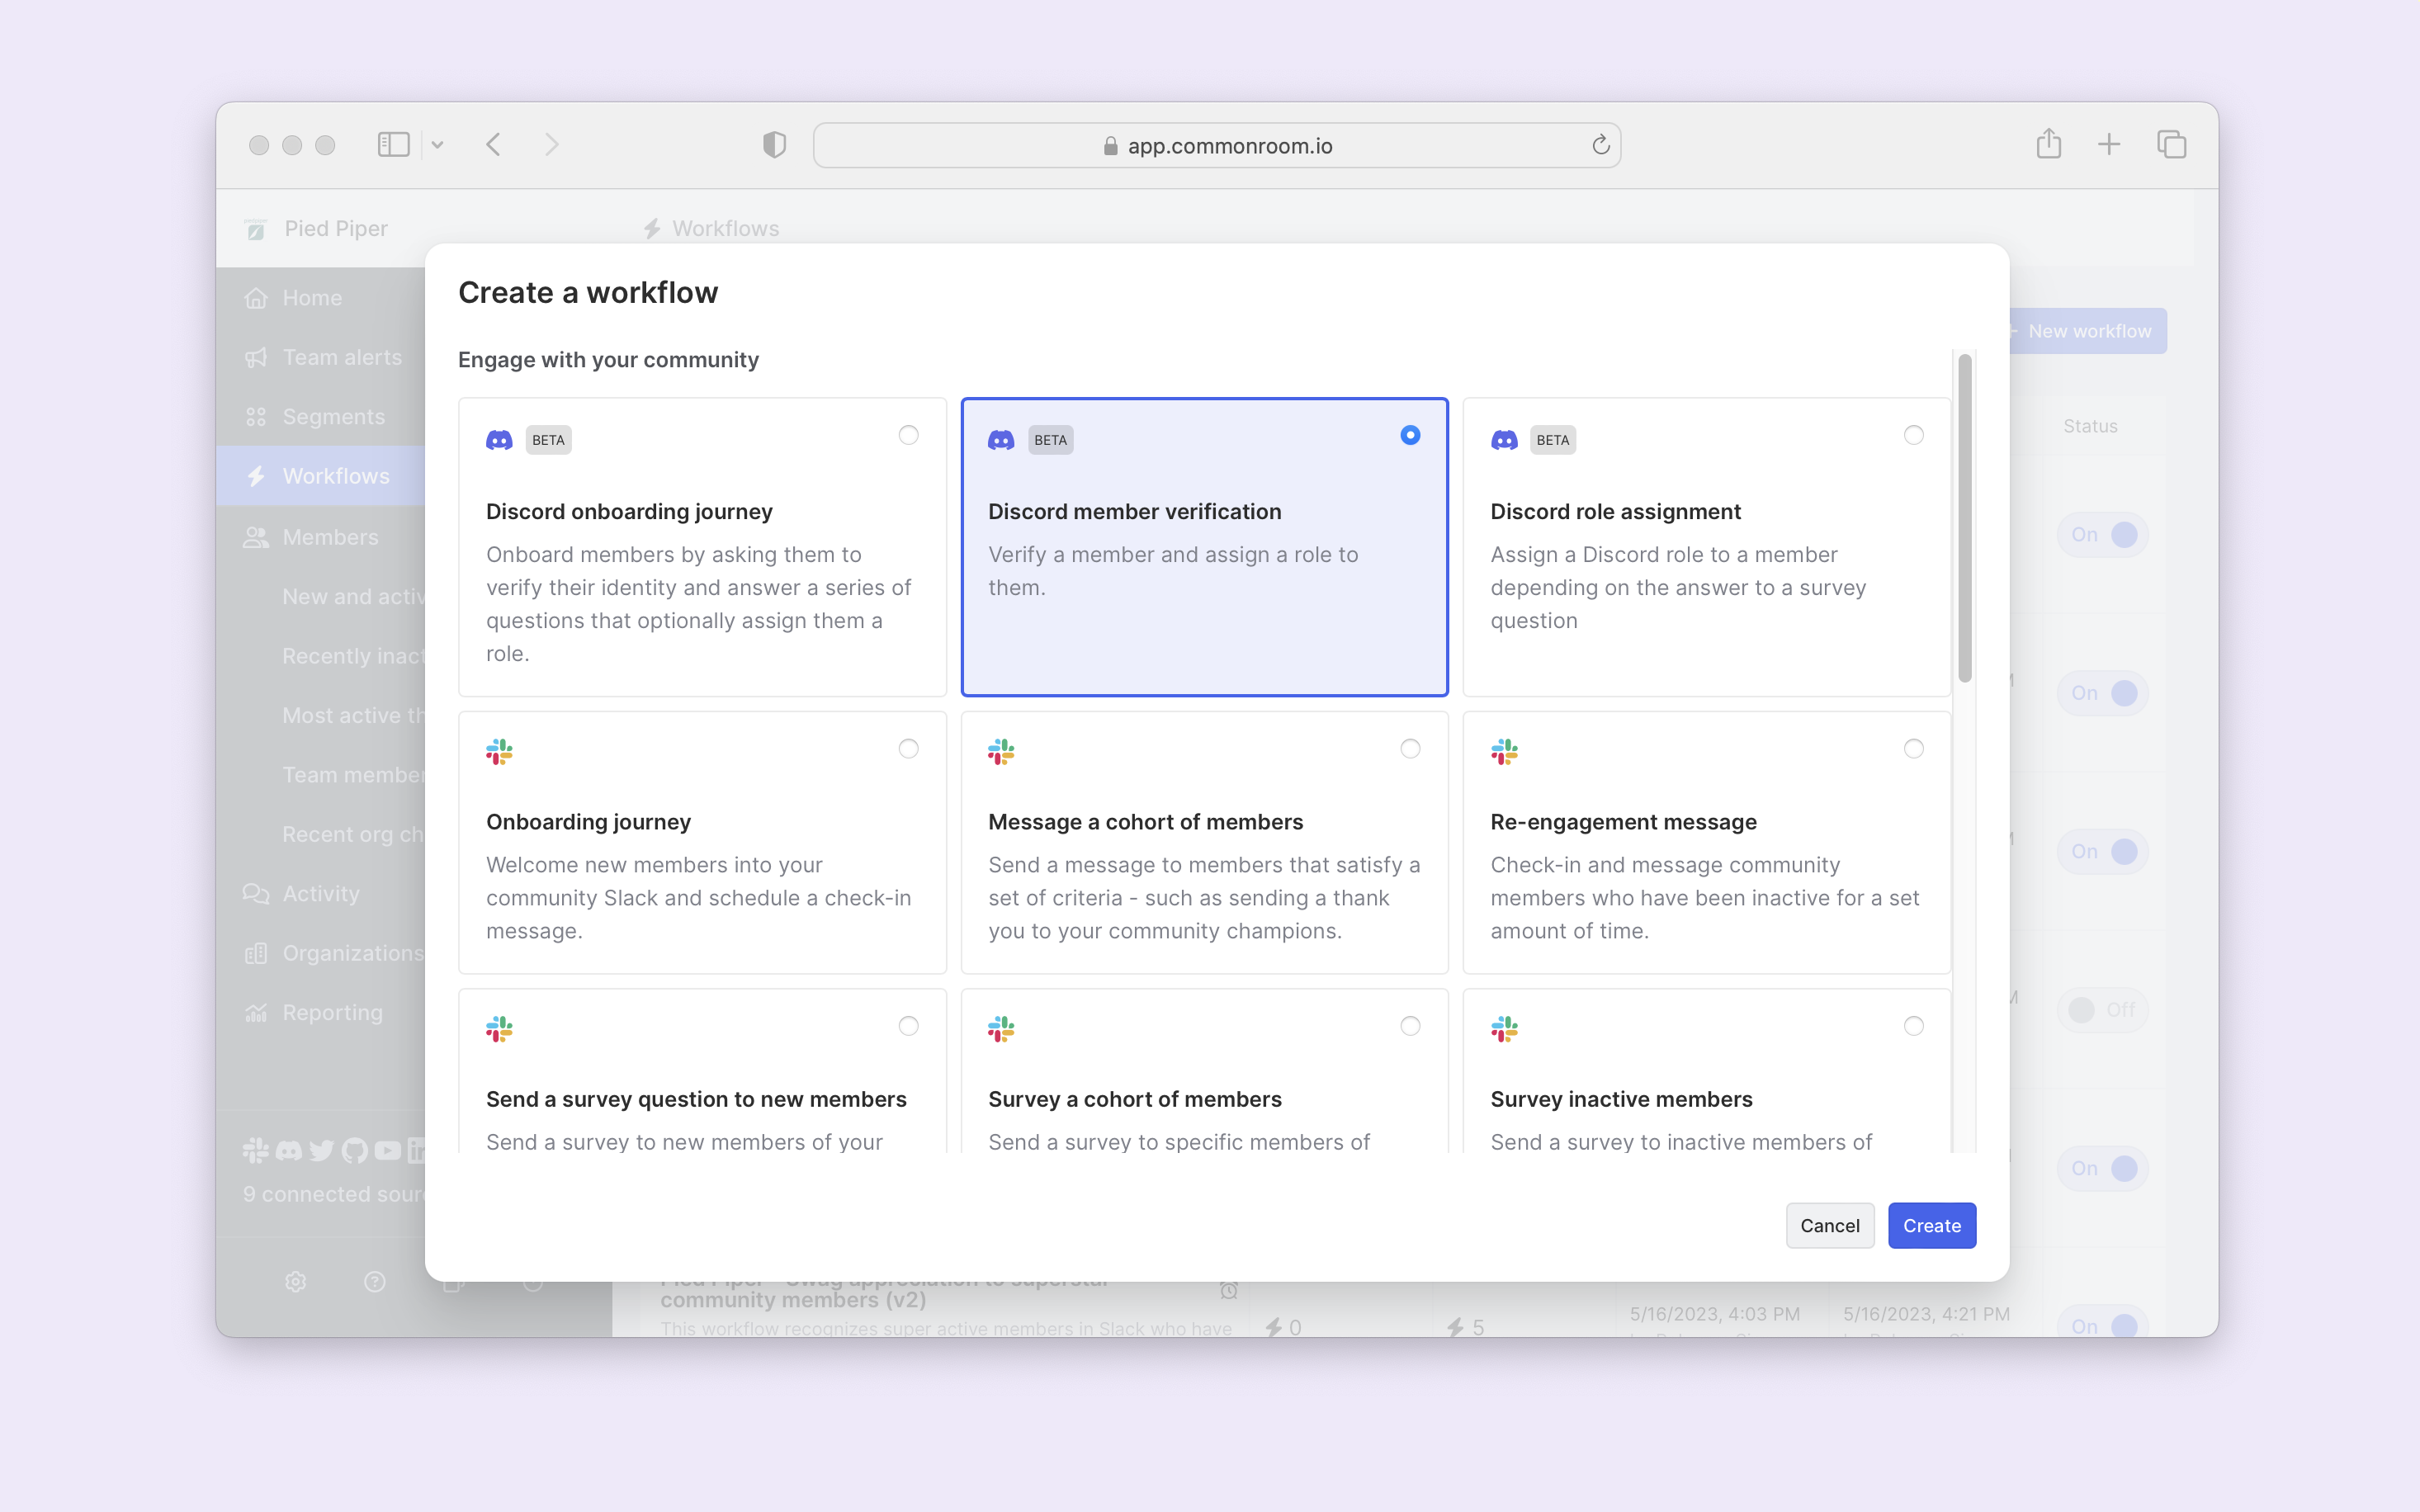
In this step, we’ll create a new workflow for Discord member verification.
Head to the Workflows menu in Common Room and click the + New workflow button. This will bring up a menu of workflows, and we’ll select the Discord member verification option.
After we click Create, we’ll see a canvas to build our verification workflow.
We’ll first select our server (which we just authenticated) and the channel we want to use for verification.
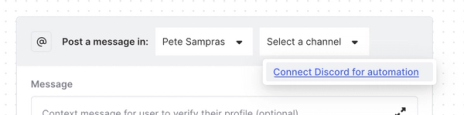
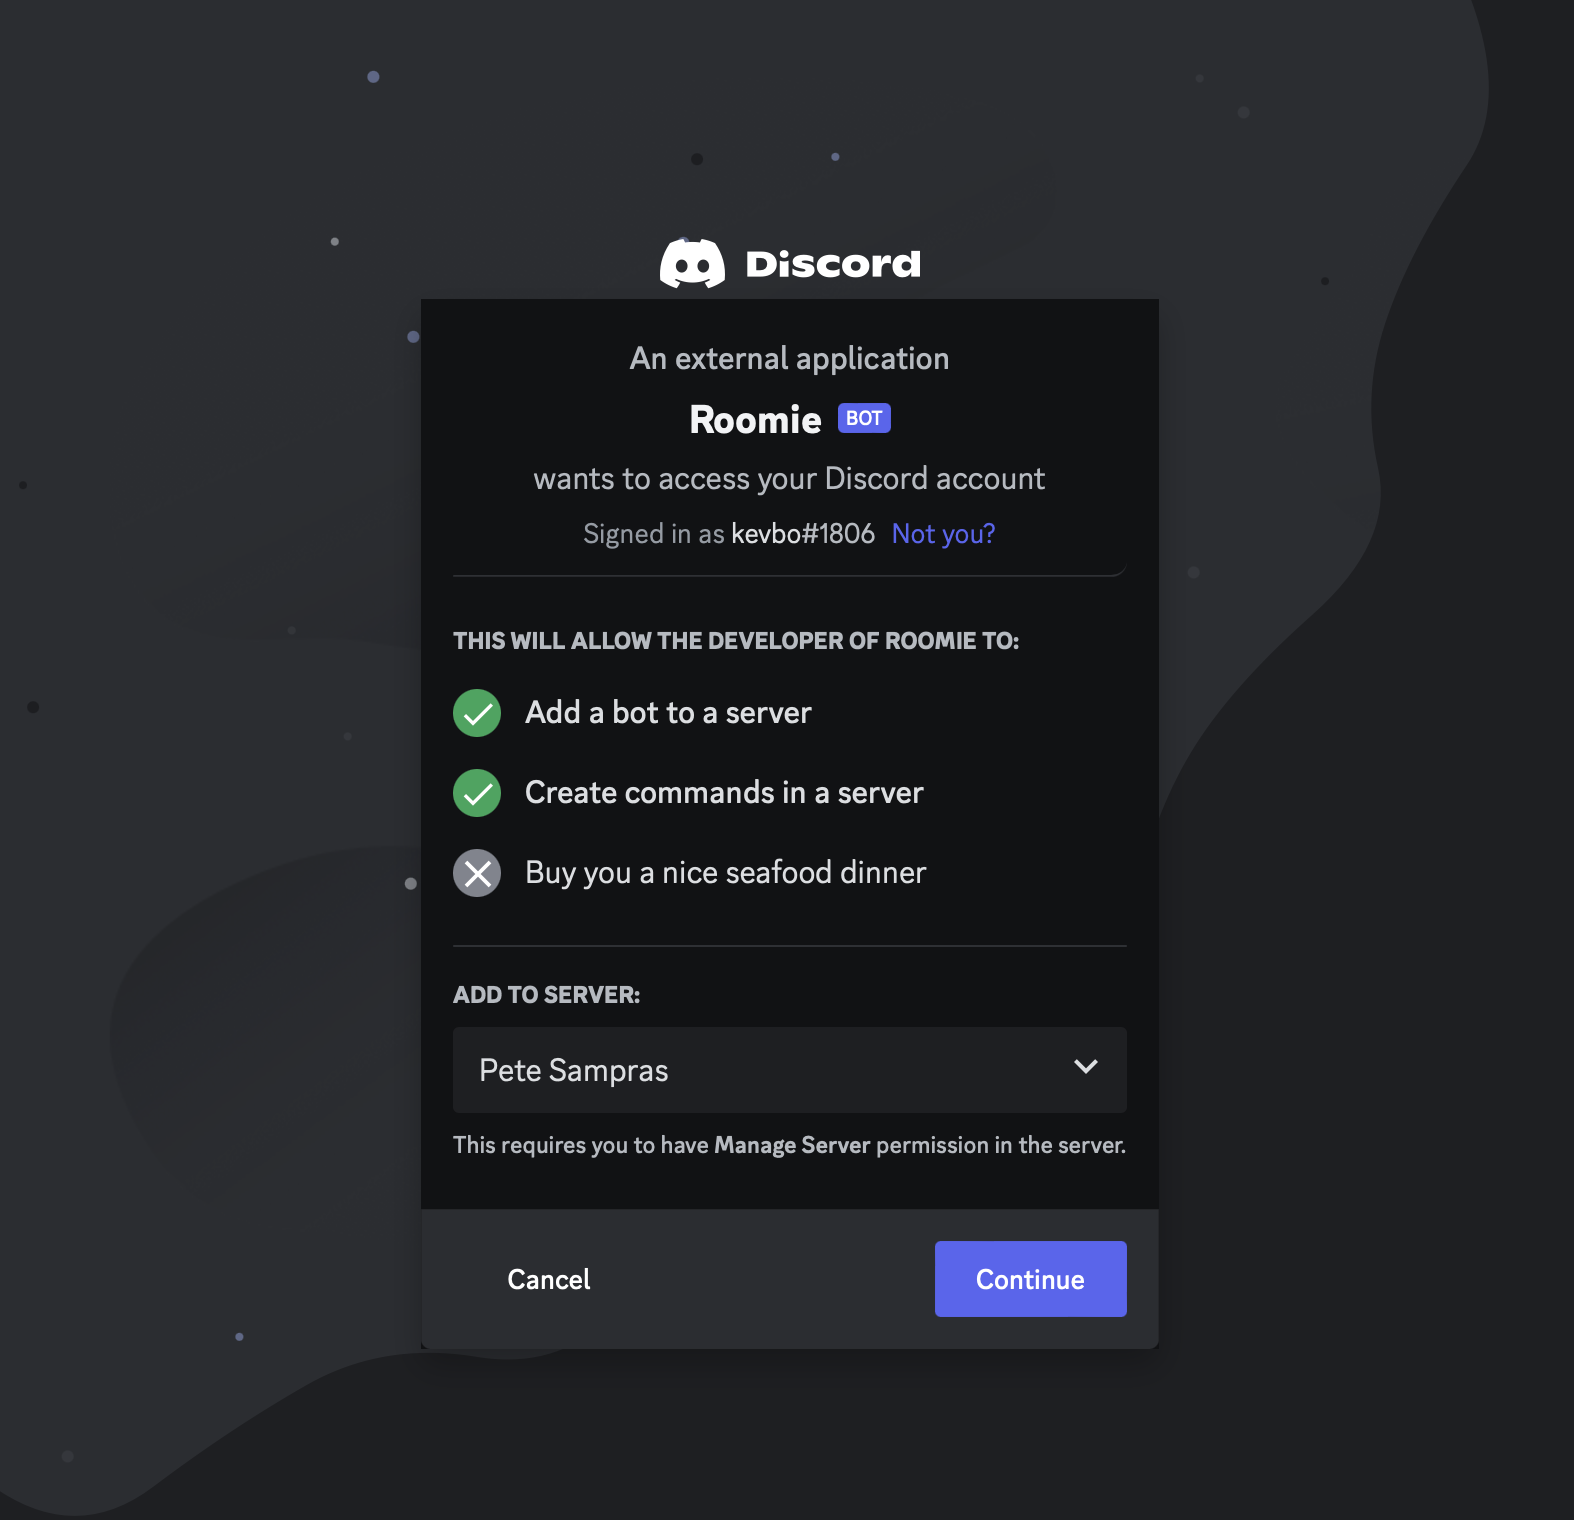
This will likely prompt a new authentication window to allow access add a bot, and create commends in your server.
After walking through the prompts and authentication, we’ll now be able to post to a channel using Common Room.
If you haven’t already, we suggest creating a verification channel and naming it something like #verify-here.
Next, we’ll want to add an automated message and button text to send new members as they join your Discord server.
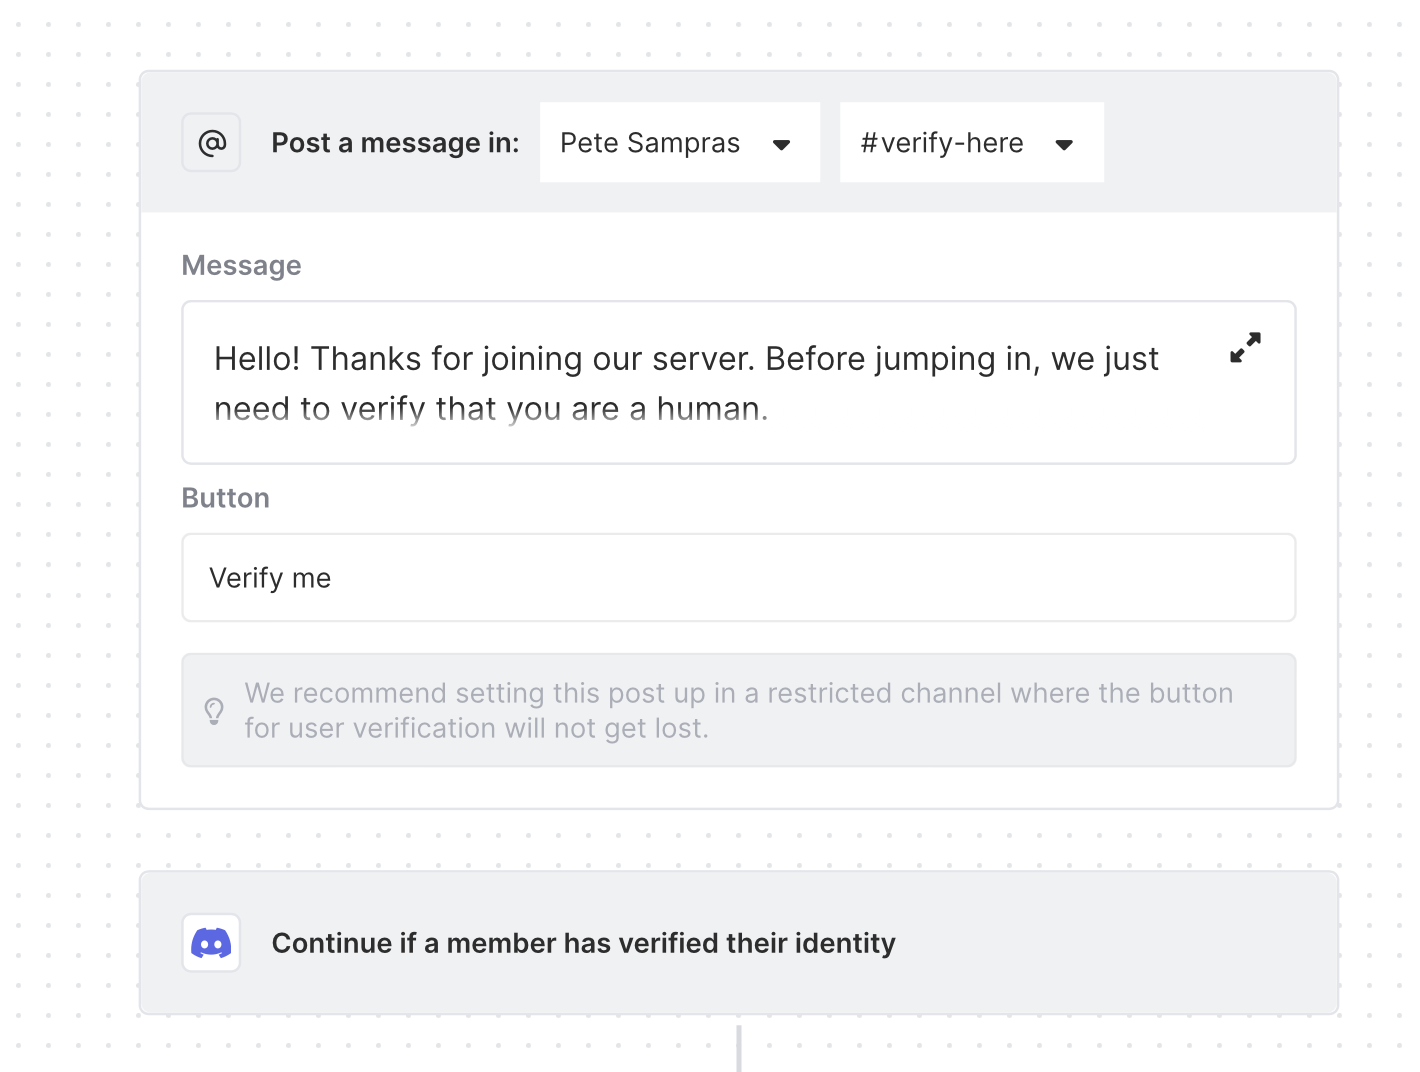
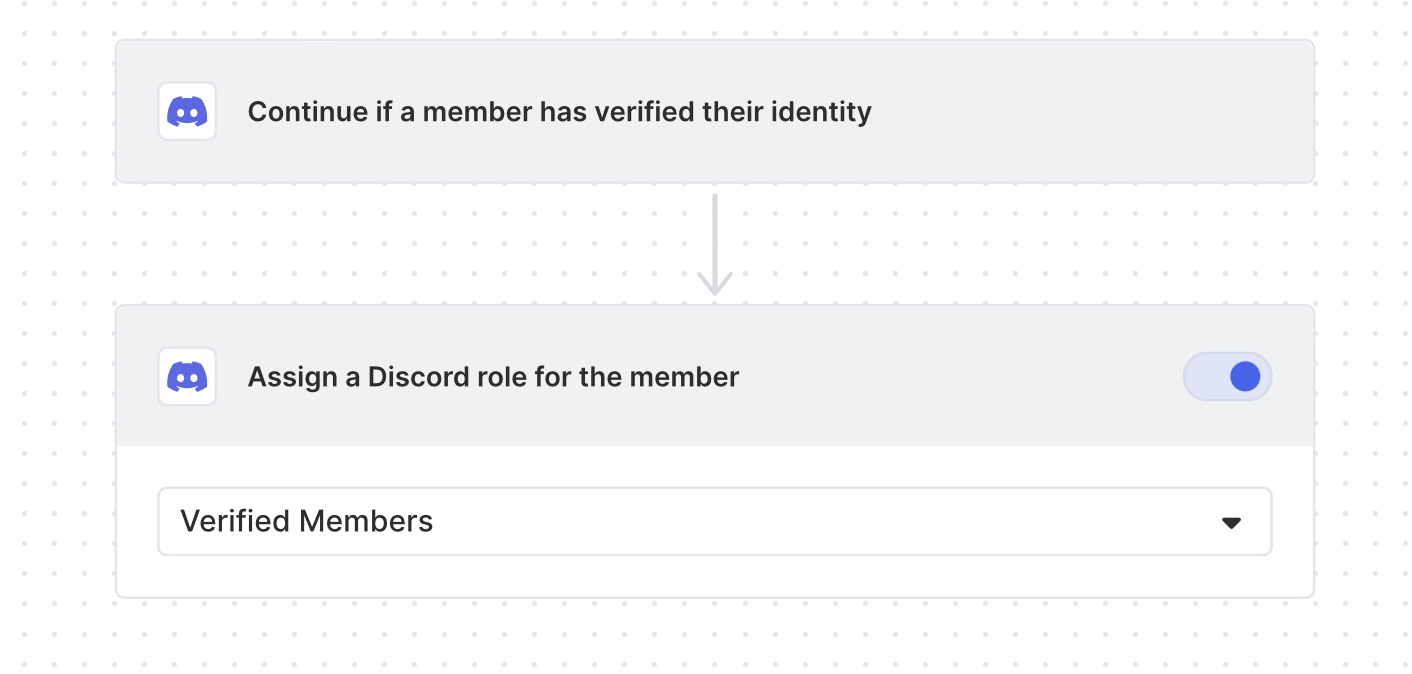
And we’ll set the role to Verified Member, which we did in the previous step.
We can click to save our workflow, triggering a prompt notifying you that a button will be posted to the selected channel.
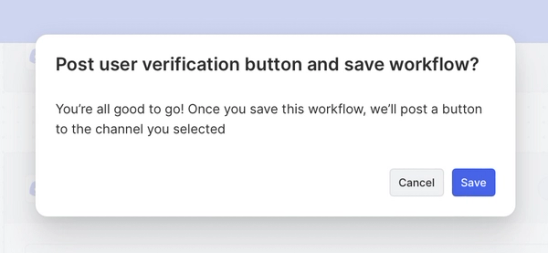
After clicking Save, you’ll see a notification in your Discord server. This is also the same message that new members will see:

Now we can click the Verify me button, which we also set in the workflow. If we set everything up correctly, we’ll see a confirmation screen.
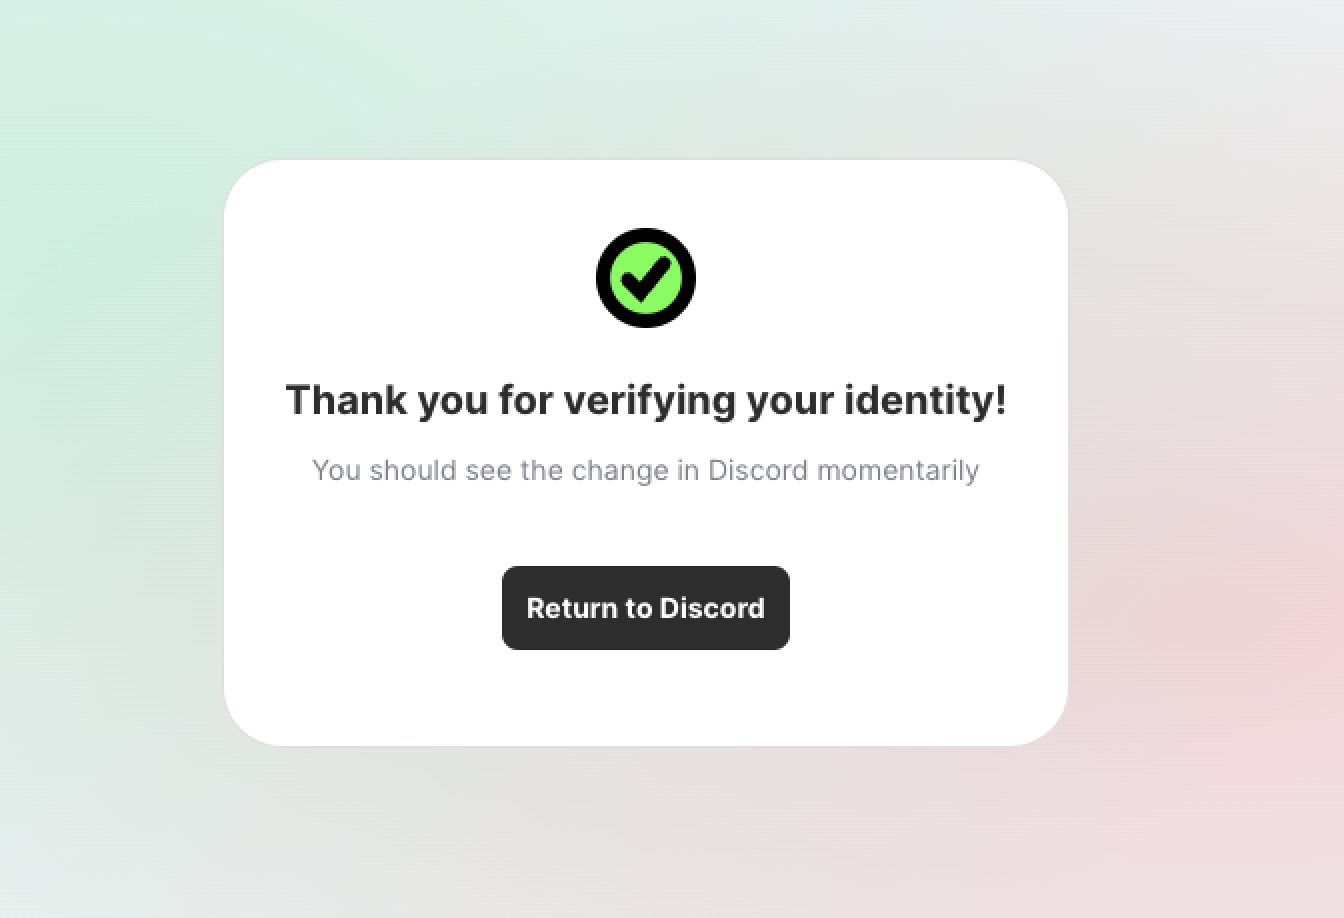
Then we can click to Return to Discord, and our work here is done!
When new members join your Discord server, they’ll now automatically be sent a verification message. And they will only get access to more channels once verified.
Wrapping up
This tutorial showed you how to verify Discord members and add protective measures to your Discord server.
But we’re just scratching the surface of what’s possible. From here, the world’s your oyster to automate welcome messages to verified members, identify advocates and champions in your community, track different stages of your funnel, and a lot more.
Drop us a note to unlock access to our Discord verification workflow. You can also Request a demo and kick the tires.
We think you'd like these
Playbook
Automated welcome messages to new community members on Slack and Discord
Community onboarding without the overhead.

Playbook
Map the stages of your dark funnel from problem-aware to engaged
Shed light on the dark funnel.


Playbook
Track activity from target accounts across digital channels
Get insane reply rates by reaching out with context.