Add community-qualified leads (CQLs) to your funnel
Introduce a new source of high-intent leads into the mix.
Product Update
Common Room is a GTM and sales pipeline platform focused on unifying intent and buying signals, enriching contacts and accounts with AI-powered context, and activating precise pipeline plays. Learn more.
Community activity remains supported as one of many possible sources of intent within the broader set of GTM signals. Some resources below reflect earlier community-led examples and may be outdated.
Overview
The way people discover products and realize value has evolved—big time.
Gone are the days of sales reps gate-keeping information. Gone are the days of keeping content behind a form. Gone are the days of buying a product before you try it.
The common thread in this evolution of the customer journey is that buyers gain more control over the process at every progression. They have more access to information. More access to the experience of peers. More access to the product.
With this shift, the channels for solution discovery have also changed. These channels foster community conversation—places like Slack, Discord, Reddit, LinkedIn, Twitter, Podcasts, and GitHub repos (for open-source product evaluation). This is commonly known as the “dark funnel,” but we like to think of it as your broader community.
This playbook will show you how to get more visibility into conversations happening across these channels. We’ll also show you how to aggregate buyer interactions into a single place (Common Room) so you can identify high-intent activity and add a new source of marketing community-qualified leads (CQL) to every stage of your funnel.
What you’ll need
Step 1: Connect to your community sources
The first thing we’ll want to do is connect to the sources where your community resides. (Feel free to skip this step if you already use Common Room and have connected sources.)
Common community sources include channels like Slack or Discord workspaces, GitHub repos, and social channels like LinkedIn or Twitter.
For this example, let’s imagine our community is run on Slack and has a lot of engagement on GitHub and Twitter.
We’ll first connect via Slack. Head over to Settings in Common Room and choose to add Slack.

You’ll be asked a few prompts to authenticate. All of this should take less than a minute.

After authenticating, data from Slack will start importing into Common Room. You’ll begin to see members and activities populate immediately, and the entire sync should just take a few minutes.
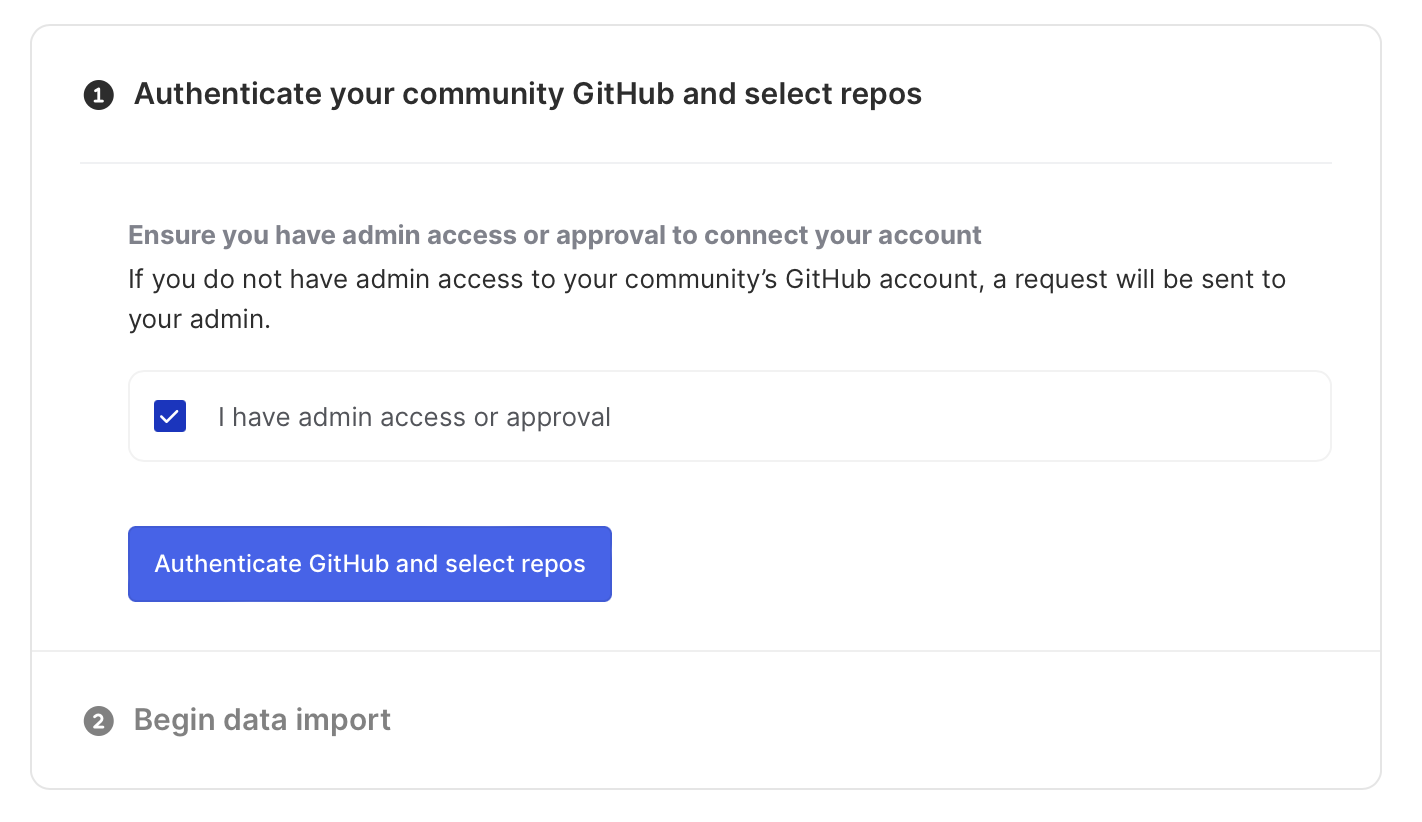
Next, we’ll follow a similar process for GitHub. Head back over to Settings and choose to connect GitHub.
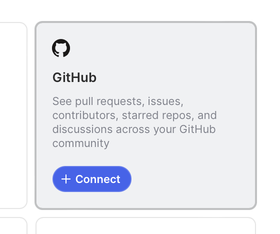
And we’ll also need to authenticate or request access to the repository to import data from our GitHub community.
Once GitHub is connected, we can follow the exact same process with Twitter or any other source you’d like to connect.
Let’s spare the redundancy connecting another source and move on to the next step.
Step 2: Set qualification criteria for CQLs
In this step, we’ll set the firmographic and activity criteria required for a member to become a community-qualified lead (CQL).
For that, we can use the Tag functionality of Common Room. Head over to Settings again, and this time select the menu item for Tags.
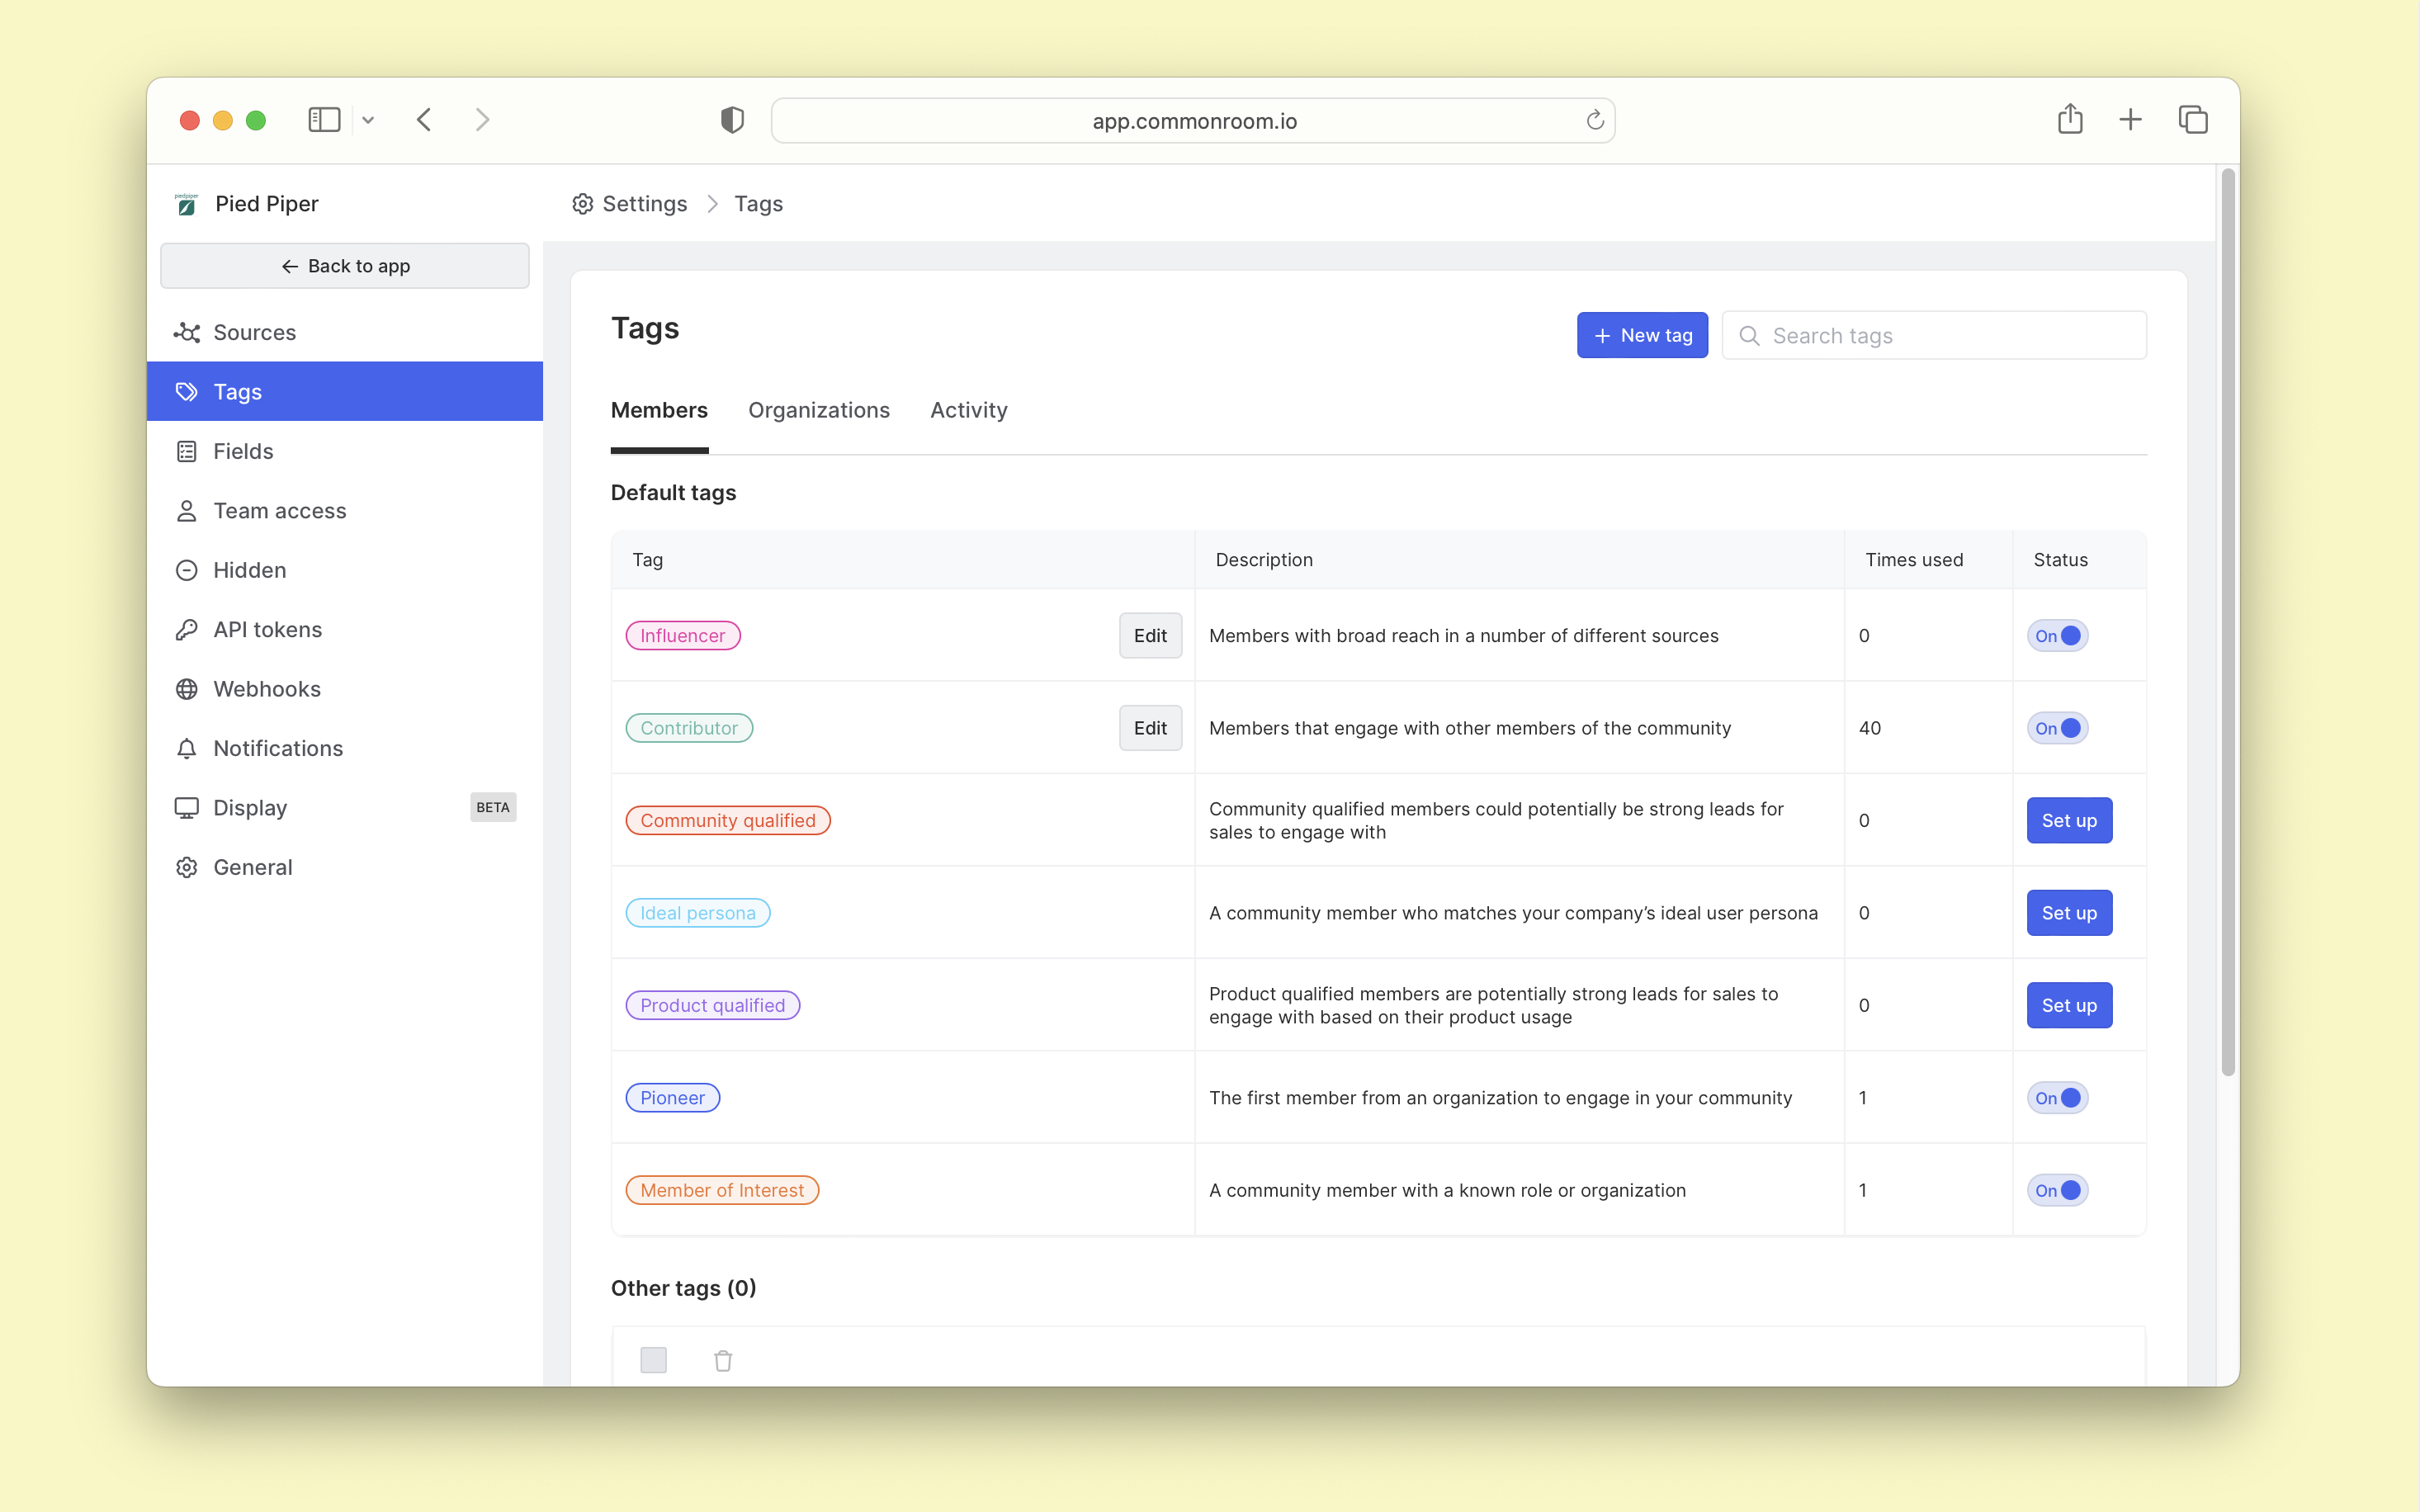
Here, we’ll see default tags for Influencer, Contributor, Community qualified, and more.
We want to set tags for CQLs, so we’ll click Set up to set criteria for our Community qualified tag. And we’ll want to apply some filters to auto-tag CQLs.
For the sake of simplicity, let’s say we want our CQL to be any member who works at an organization of more than 50 employees and is actively posting to our Slack community. We can do that by clicking the + Add filter button and applying the filters for organization size and Slack activity.
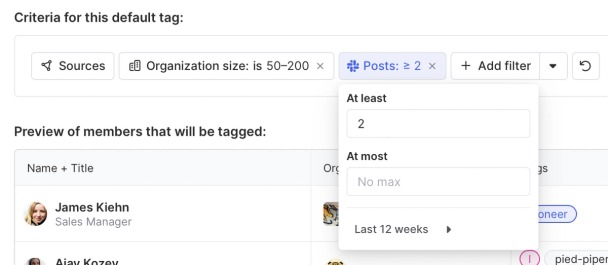
After applying filters, you’ll see a preview of qualifying members and the total number who qualify.
If all looks good, we can click Save and move on to the next step.
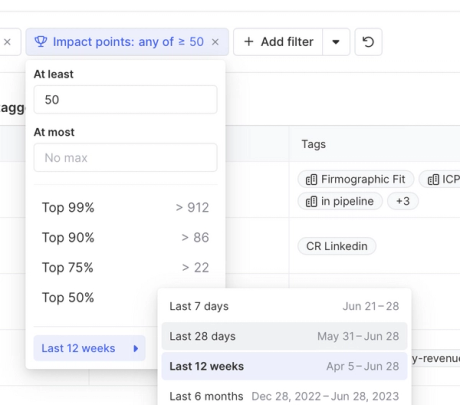
But before doing that, you might consider using an alternative and powerful filter: Impact points.
Impact points are automatically calculated and weighted based on activity across any source connected to Common Room (see the weighting here). For instance, forking a GitHub repo (high investment) is scored 10, whereas starring a GitHub repo (low investment) is only scored as 2 impact points.
To get CQLs tagged quickly, we can use impact points and set either a threshold for the top percentage of members (e.g., top 90% of members = CQL), add a minimum point value, and set a time period.
After setting our criteria and clicking Save, members who match our CQL definition will automatically be tagged with a CQ pill. And from here, we can start taking action, which brings us to the next step.
Step 3: Add new CQL fields to your CRM or Marketing Automation Platform
Before connecting to our CRM or marketing automation platform, we’ll want to add a few custom fields that we can map to.
We’ll create a couple of new fields on the HubSpot contact record.
In the HubSpot workspace, we’ll click the ⚙️ gear icon and then click the Properties item in the left sidebar menu. This will show a table of all of our properties. Because we’re creating a new property for Community Qualified Leads, we’ll click the Create property button.
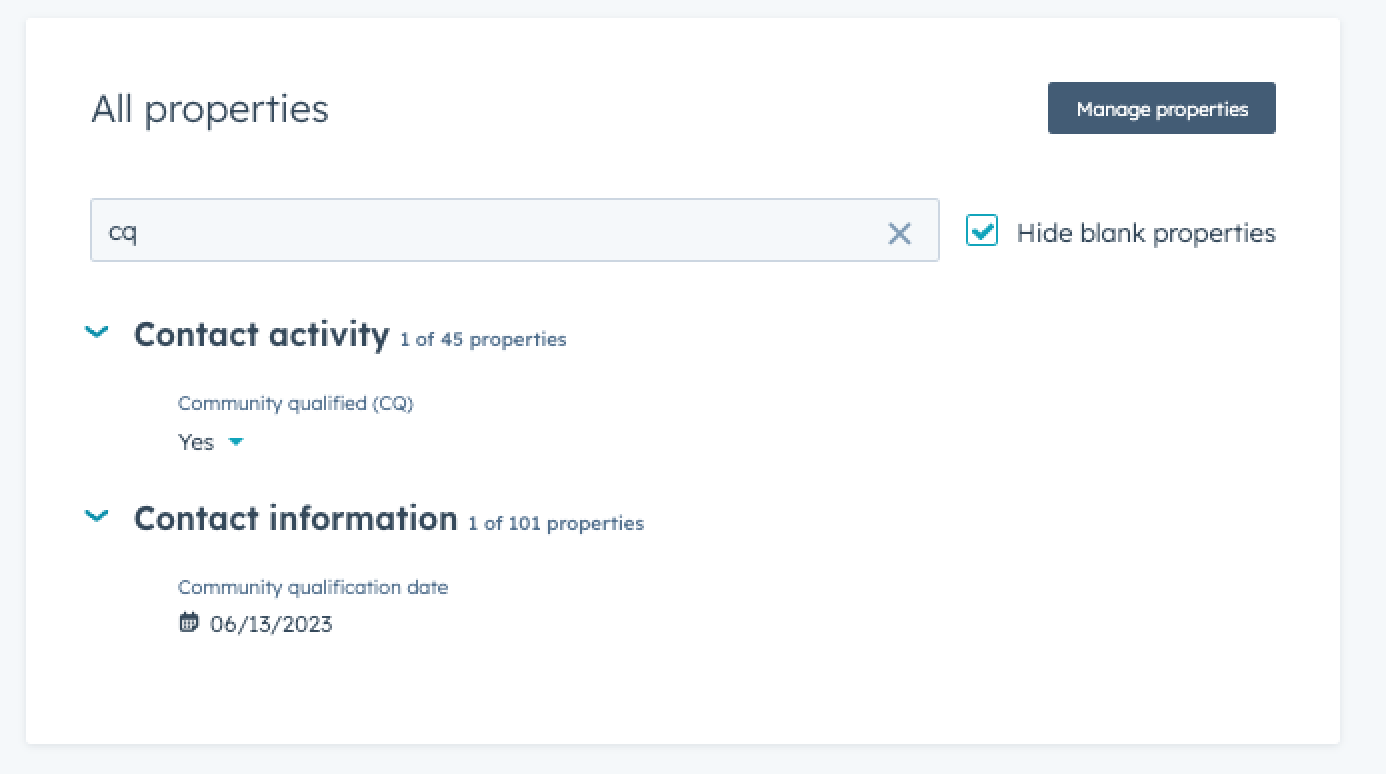
Then we’ll create a new Single checkbox property that’s grouped with Contact activity. And for our label, we’ll name it something like Community qualified (CQ) and add an internal name of cr_community_qualified.

Now, we’ll need to create one more field to track dates. Follow the same process for creating a property, and this time select Date picker as the field type. And we’ll label this field something like Community qualification date and give it an internal name of cr_cq_date.
With these two fields, we’ll be able to track and report on CQLs as we’ll have both a filterable attribute for contacts and the timestamp when that field was updated.
Step 4: Sync data from your CRM or Marketing Automation Platform
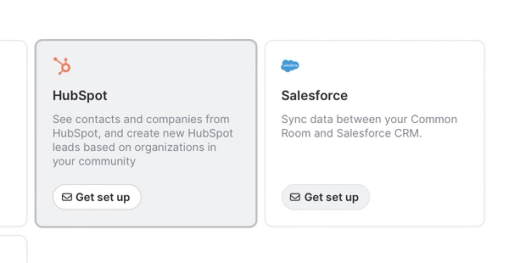
To sync our members to HubSpot or Salesforce, we can add them as a new source.
Head over to the sources menu (same place we set up Slack and GitHub above), and this time select Get set up for either HubSpot or Salesforce.
This will trigger a modal to request access to HubSpot or Salesforce.
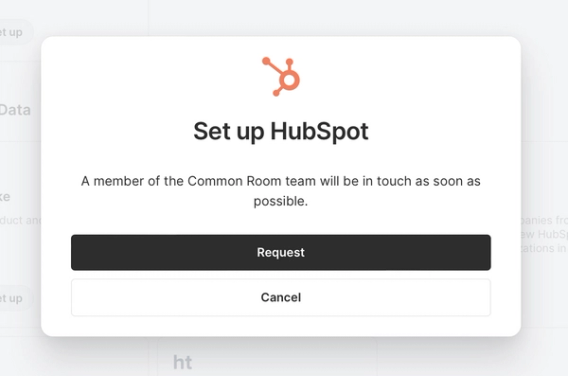
When you click Request, a Common Room team member will be prompted and assist with the setup. Setup includes admin authentication and mapping required/suggested fields for your use case. The turnaround time for syncing the two is typically 24-48 hours.
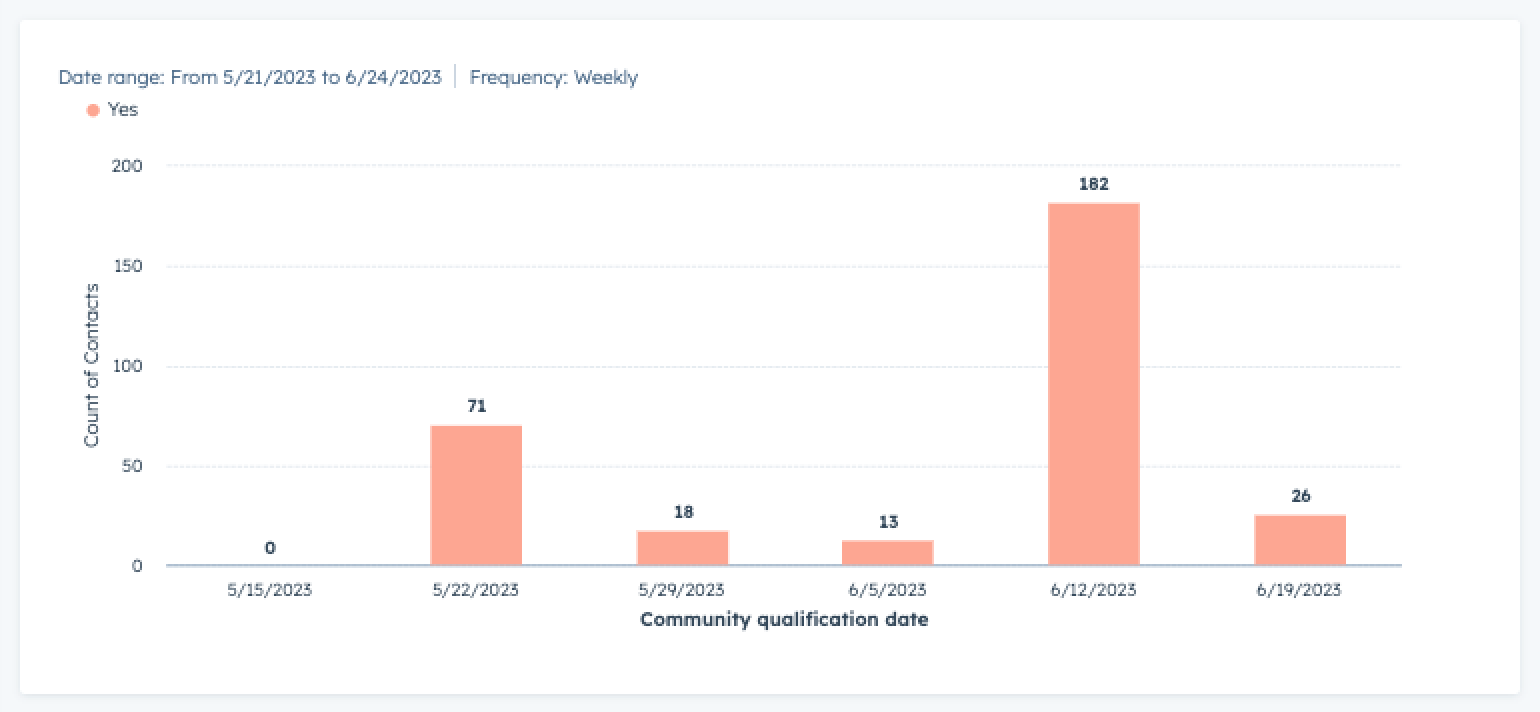
Once the integration is complete, contacts with the fields we created in Step 3 will sync with HubSpot. Here’s what that looks like on a contact record:
Step 5: Operationalize CQLs
With community-qualified contacts now tracked in a go-to-market source or record, we can take all sorts of actions. Here are a few ideas…
Change lead score: Apply more points to the lead score when Community Qualified field changes to True.
Build a report: Use our new Community Qualified fields to create a new report or a dashboard.
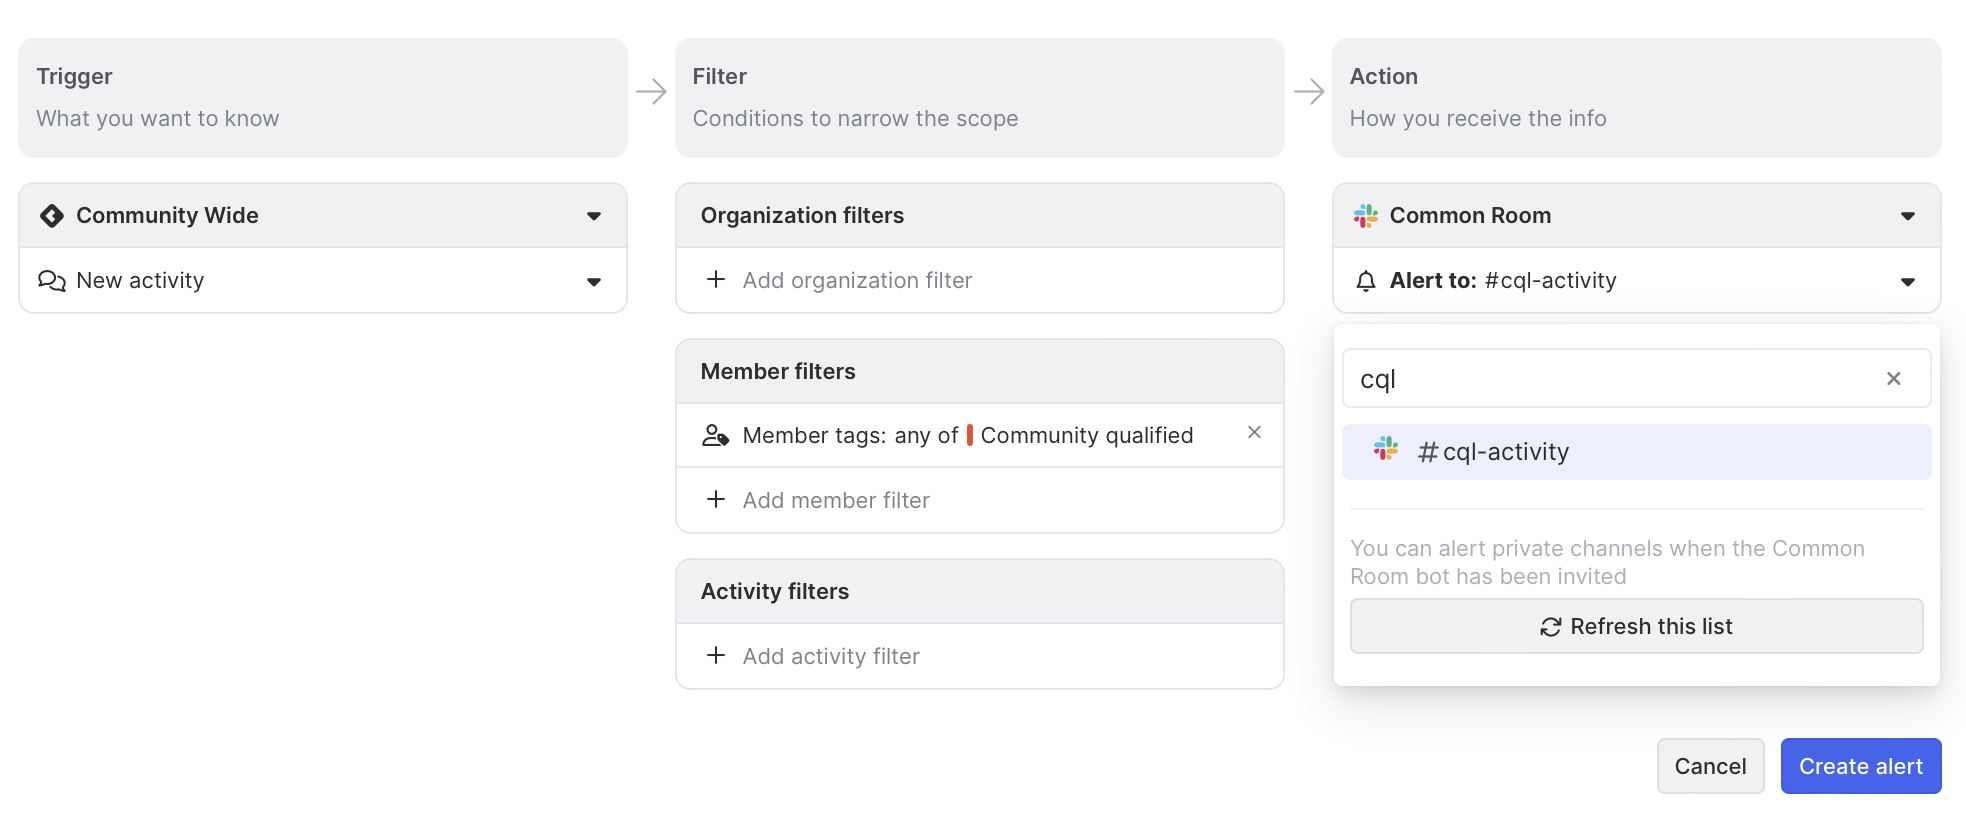
Send team alerts: Use Common Room Team alerts to send CQLs to a Slack channel or as an email notification.
Personalize emails: With CQL data flowing into your CRM, you can use it as an audience filter to personalize marketing or sales emails.
Wrapping up
By following this playbook, we’re able to do what was once thought of as impossible: score activity at the awareness stage (i.e., not on our website) of the funnel.
And with this context, our community and go-to-market teams get more of the context needed to meet customers where they are, improve their experience by being helpful, and grow their community and business as a result.
Try running this playbook yourself now. Request a demo or get some hands-on help from our team.
We think you'd like these
Playbook
Map the stages of your dark funnel from problem-aware to engaged
Shed light on the dark funnel.


Playbook
Track job changes of customers and key contacts
Fuel efficient growth and reduce churn at the same time.


Playbook
Find champions, influencers, and VIPs in your Slack community
Get a better pulse on your Slack community by adding firmographic data.