Find champions, influencers, and VIPs in your Slack community
Get a better pulse on your Slack community by adding firmographic data.
Product Update
Common Room is a GTM and sales pipeline platform focused on unifying intent and buying signals, enriching contacts and accounts with AI-powered context, and activating precise pipeline plays. Learn more.
Community activity remains supported as one of many possible sources of intent within the broader set of GTM signals. Some resources below reflect earlier community-led examples and may be outdated.
Overview
Do you really know who’s in your Slack community? Can you identify customers? How about influencers?
Whether you’re just spinning up your Slack community or already have a thriving one, it’s helpful to understand who is in it.
With knowledge of member traits—where they work, where they’re located, if they’re a customer or not, their Twitter follower count, etc.—you can unlock all sorts of use cases to activate and grow your Slack community. For example, you could send customized messages to new members based on their role or incentivize members with a large follower count to amplify your next event.
The problem is that Slack doesn’t provide much helpful contextual member information by default. And even if a member joins your Slack community using their work email, it’s not so easy to group them without manual work (i.e., updating spreadsheets by hand).
Let’s fix that for you.
This playbook will show you how to use Common Room to identify VIPs (think champions, customers, influencers, advocates, etc.) in your Slack community. And from there, you can unlock an infinite number of use cases.
What you’ll need
Step 1: Connect to Slack
This is a Slack-specific playbook, so we’ll first connect Slack to Common Room.
With Slack connected, we’ll be able to see our members, their activity, info about where they work, and a whole lot more.
To connect to Slack, we can head over to Settings in Common Room and choose to connect to Slack.

After moving through a few integration prompts, you’ll be asked to confirm that you’re an admin to authenticate.

Once authenticated, data will start importing into Common Room. You’ll begin to see members and activities populate immediately, and it should just take a few minutes for the full import to complete.
Now, onto the next step.
Step 2: Set your criteria for member cohorts
In this step, we’ll want to define the criteria of the cohorts of members we want to track. For this example, let’s create three groups—ideal customers, contributors, and influencers.
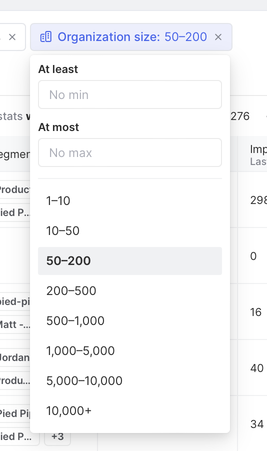
We’ll start with ideal customers, defined as any member who works at a company with more than 50 people and is also in an engineering role.
To do that, we can click on the Members menu. This brings us to an overview of all members in our Slack community.
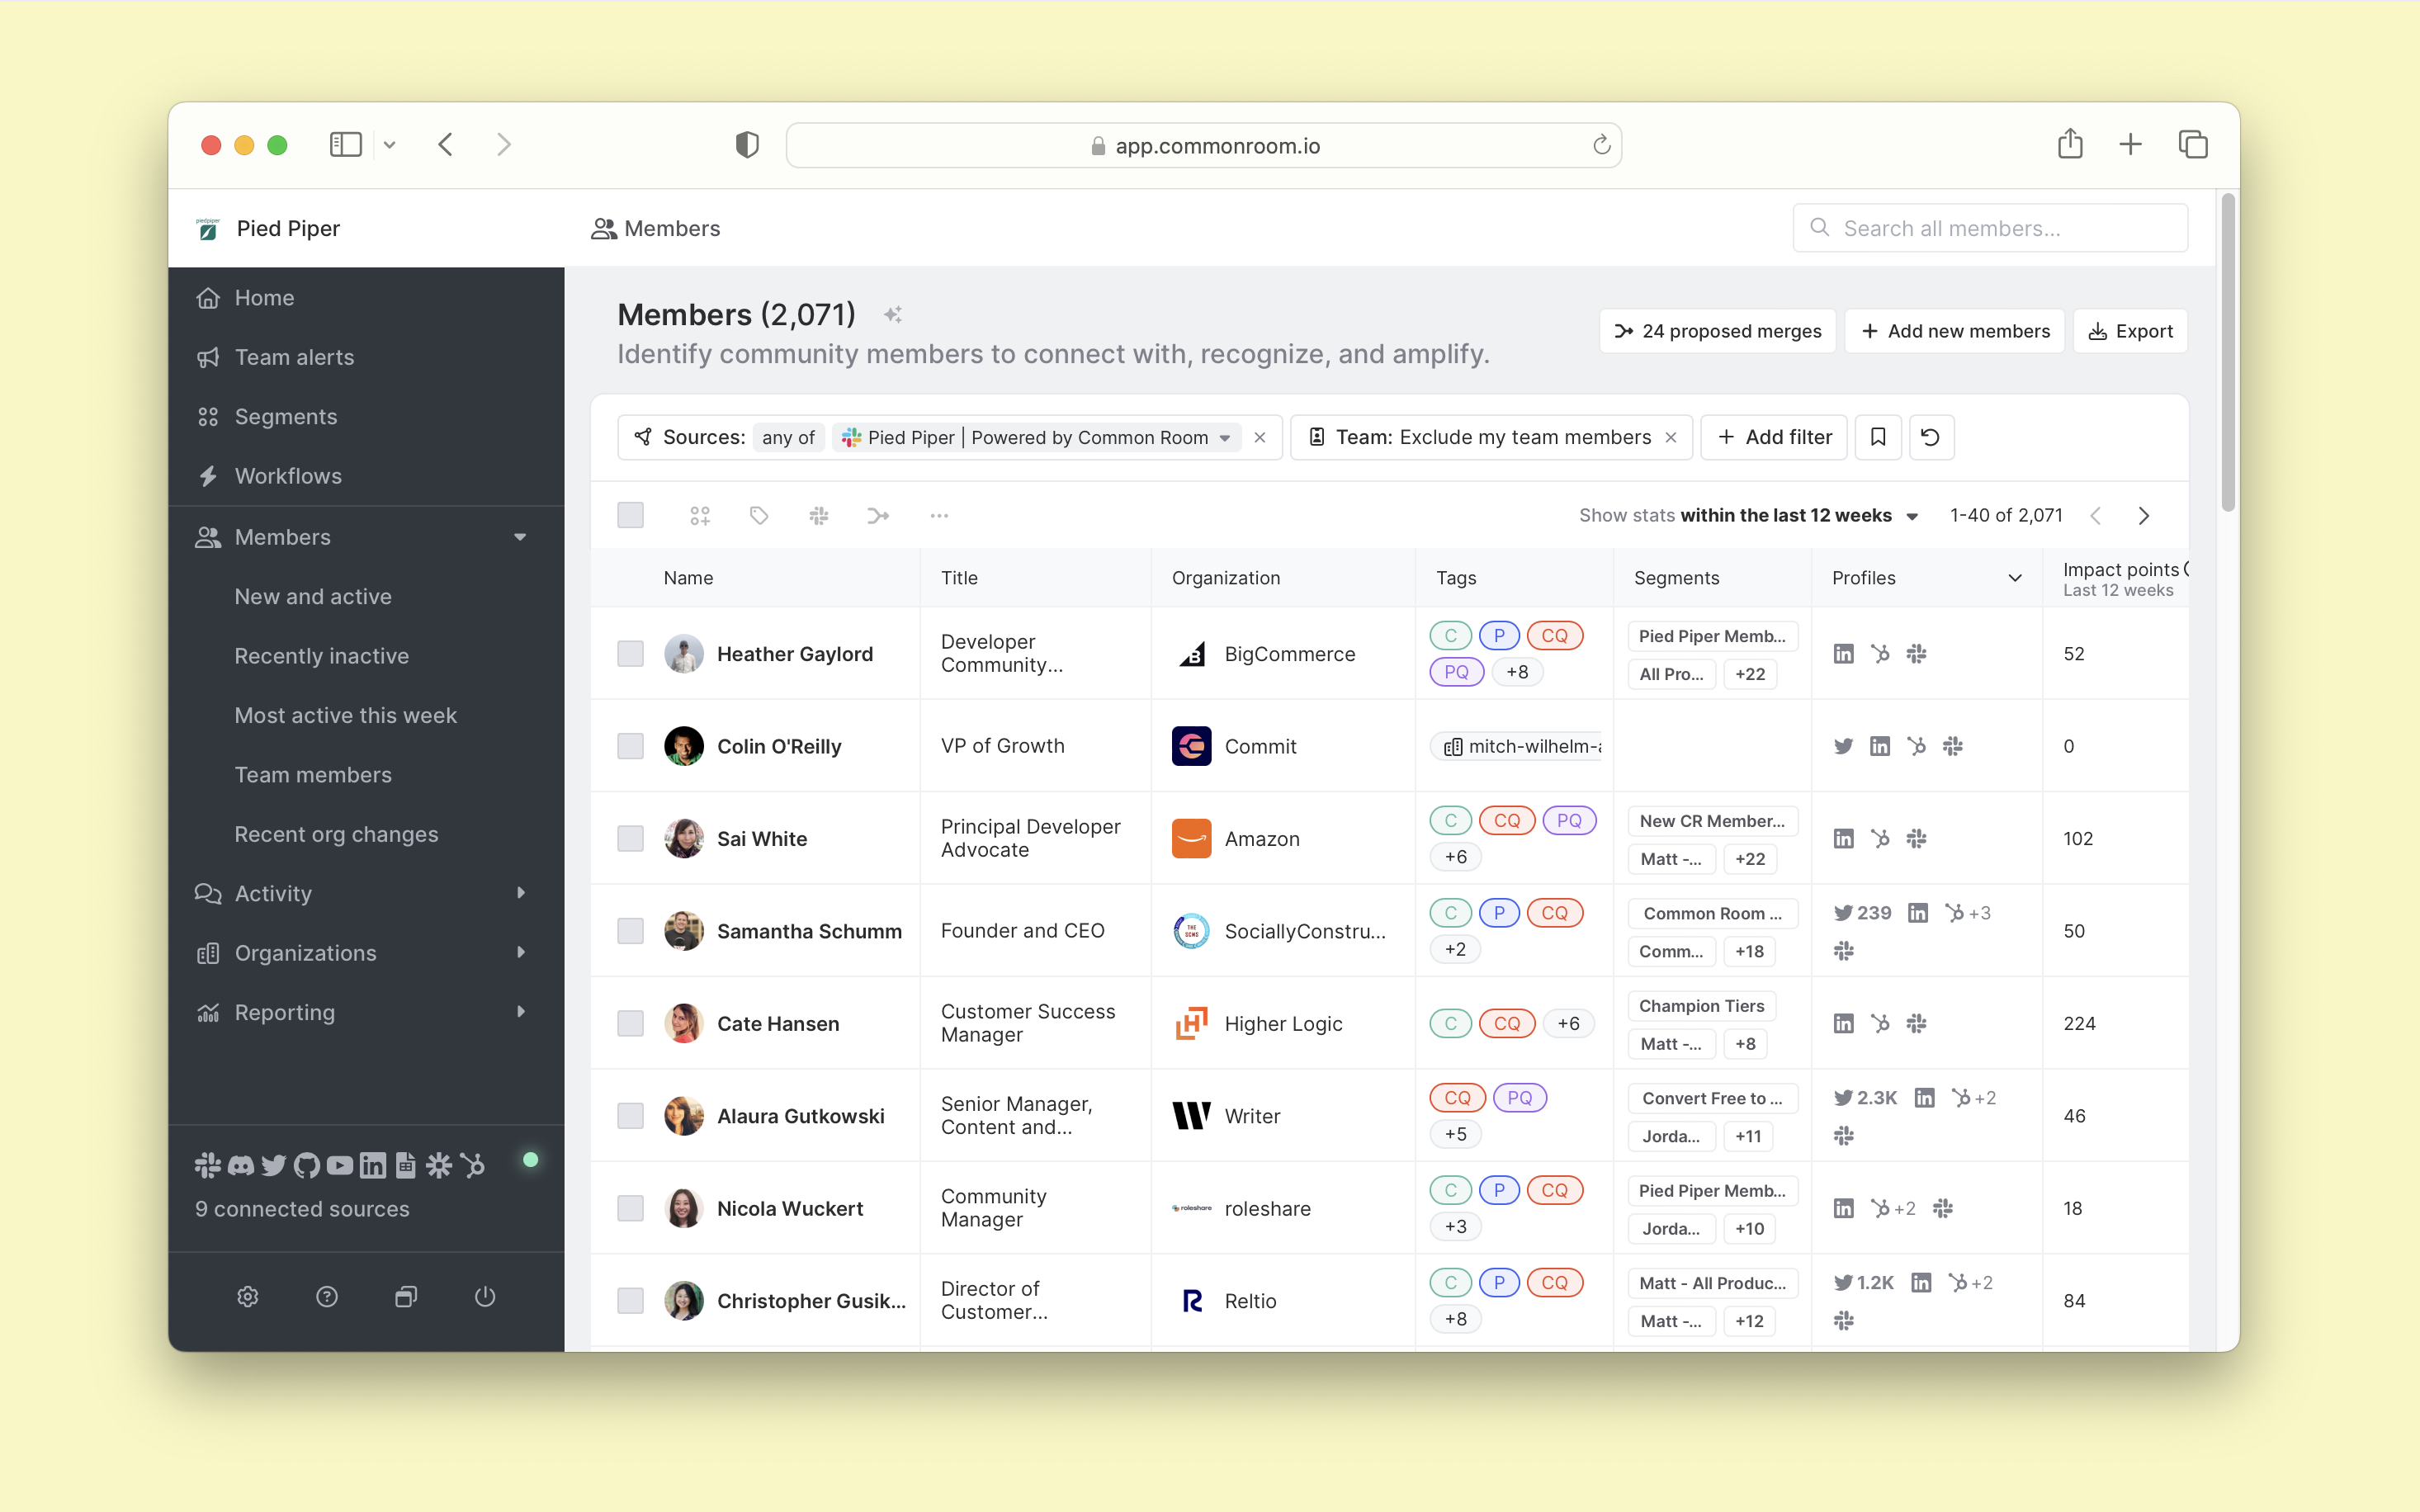
And from here, we’ll want to add filters to match our criteria for ideal customers. So we’ll click on the + Add filter button and select Organization size. And we’ll select to include only organizations with more than 50 employees.
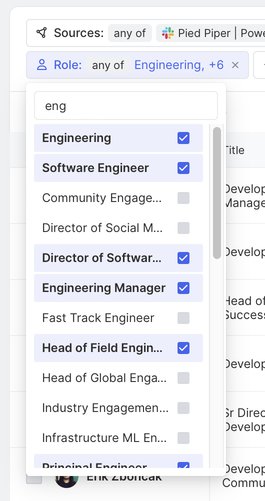
After that, we’ll click the + Add filter button again, this time selecting Role. We can type “eng” into the search box and select engineering roles that apply.
Adding these filters gets us down to a smaller, more manageable list. With this view alone, we can share with our go-to-market teams or export to a CSV. But we have bigger ambitions than that, like automating workflows, sending messages, and tracking the growth of this group over time.
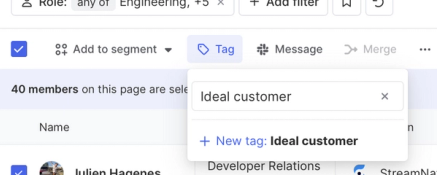
We’ll want to tag this group with something like ICP to do all of the above and more. And we can simply do that by clicking the select all checkbox and then the Tag button.
And just like that, we can now see and keep track of all members in our Slack community who match our ideal customer profile.
Step 3: Automatically tag members
In the step above, we added an “Ideal customer” tag to members. But it was pretty manual and wouldn’t automatically new members who qualify.
Fret not! In this step, we’ll show you how to tag members automatically.
We can head back to our admin settings by clicking the ⚙️ icon and then locating the Tags menu in the left sidebar.
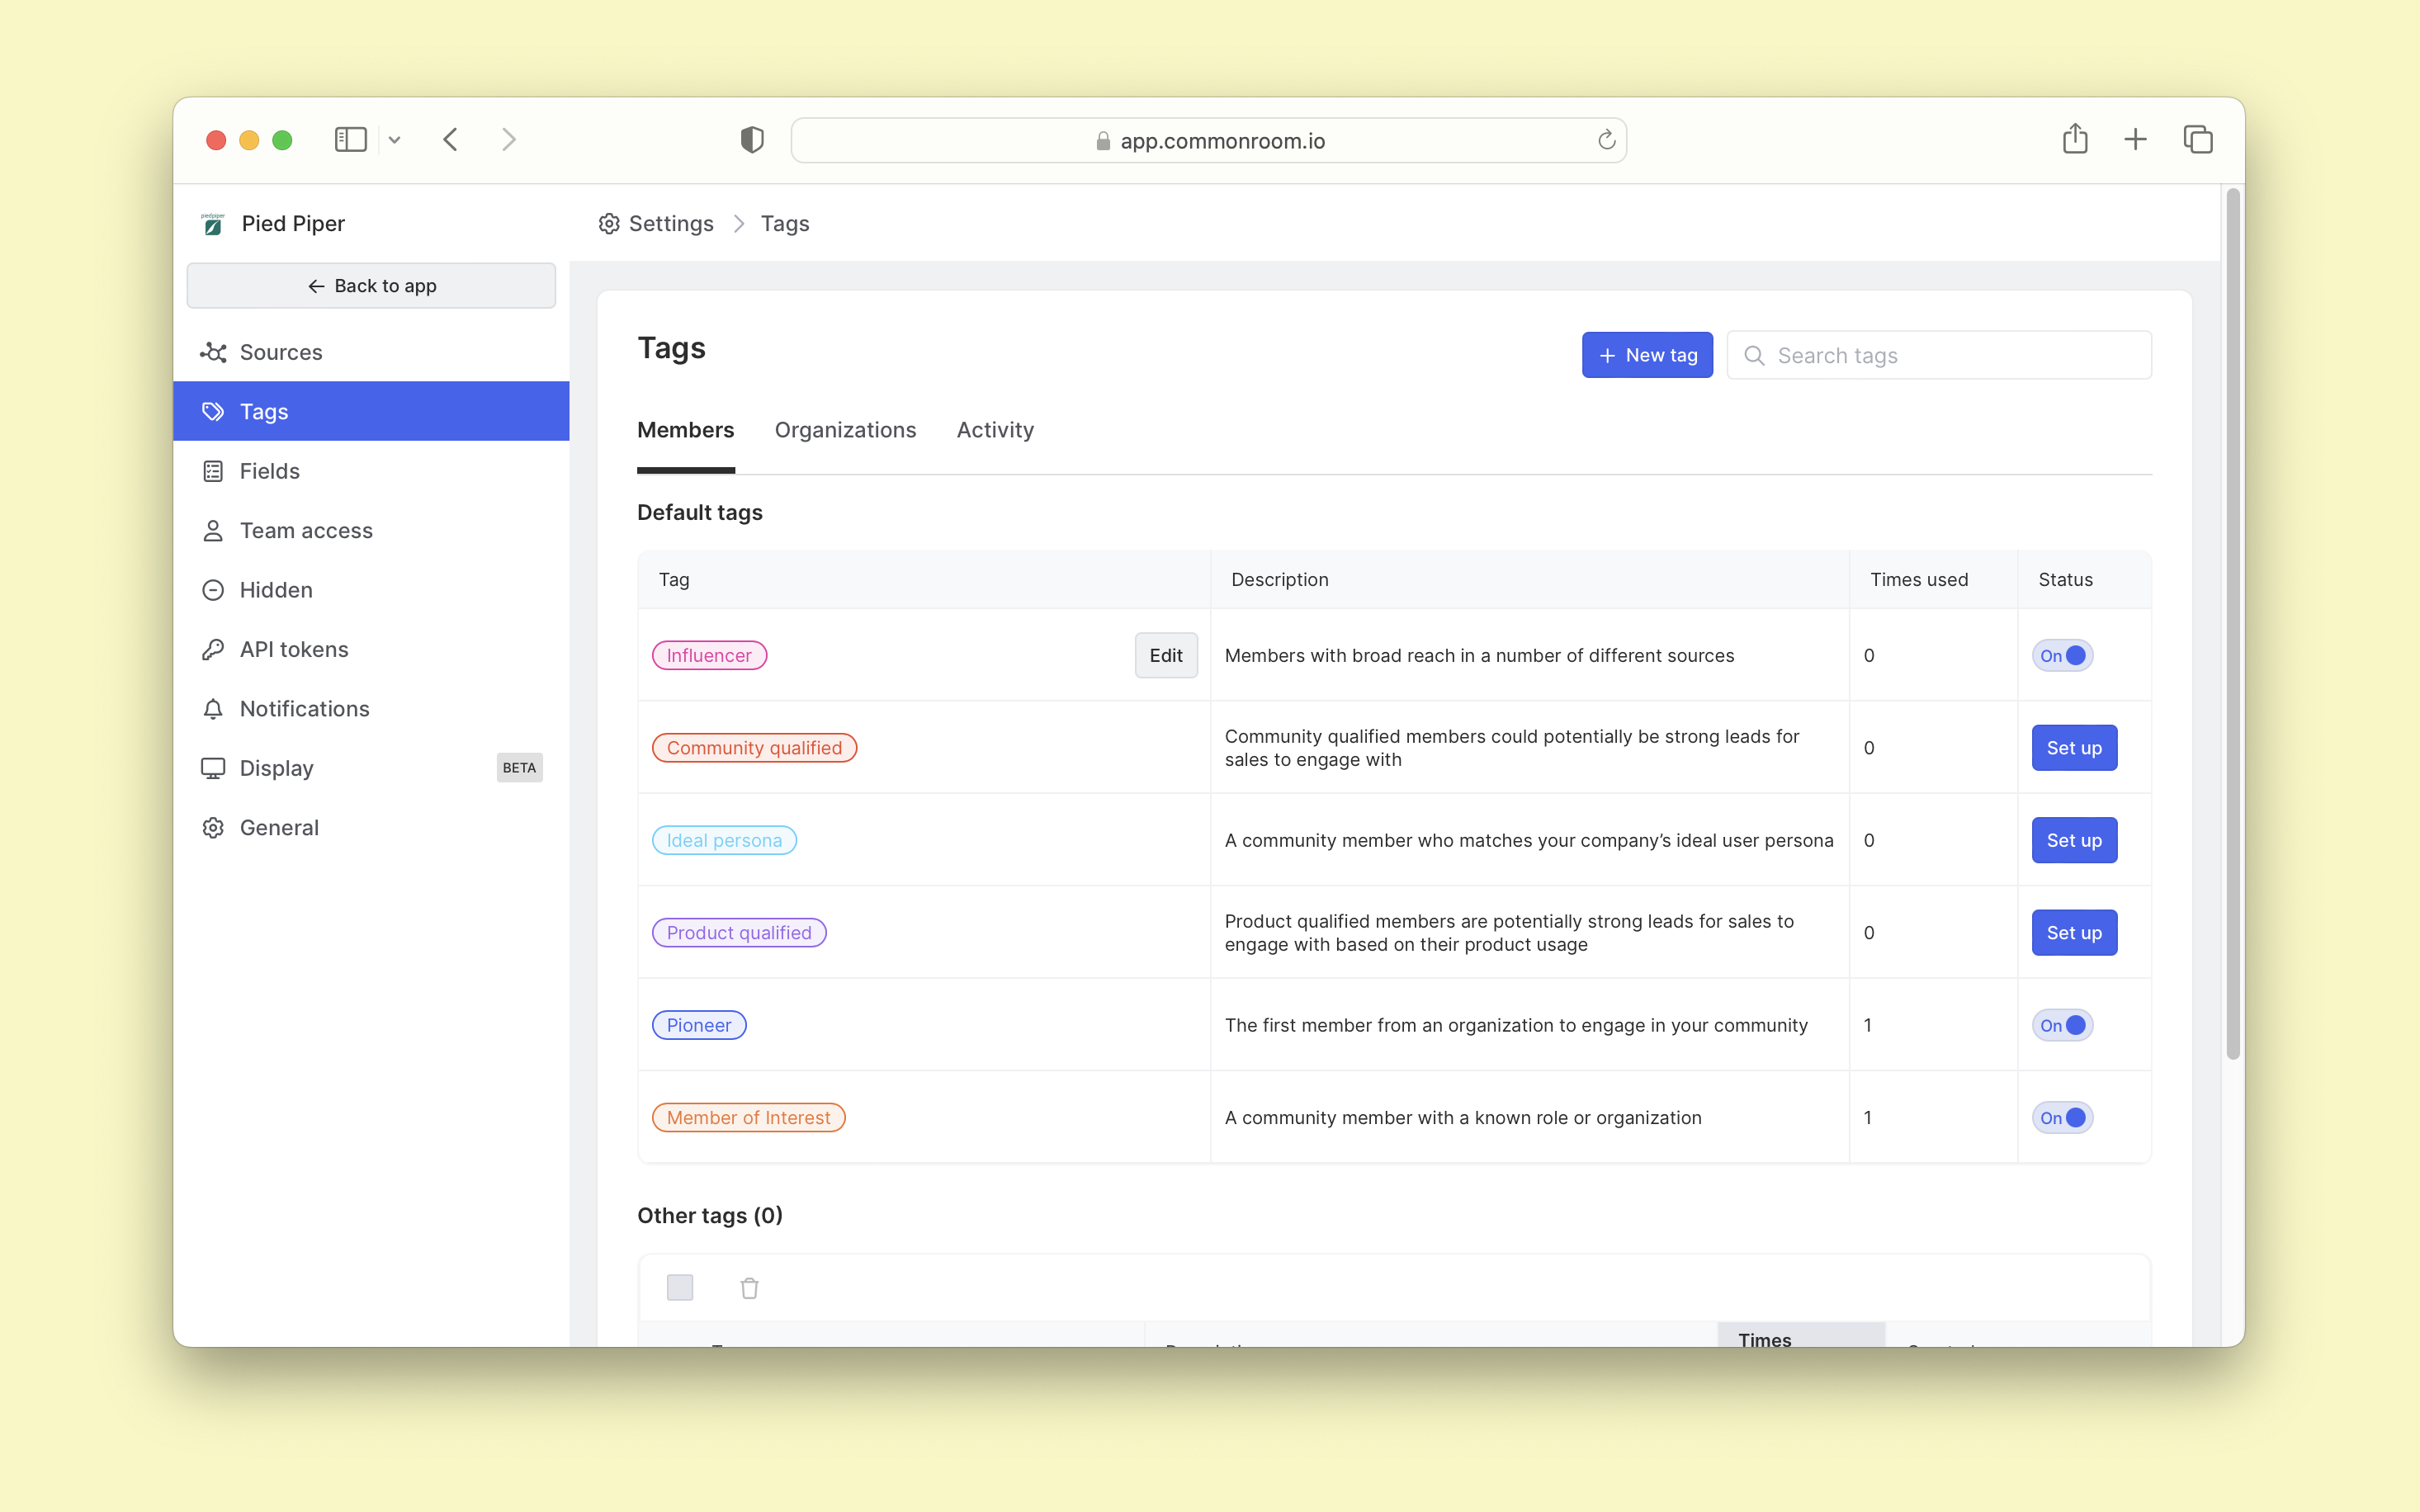
By default, you’ll see tags like Influencer and Community qualified.
We also want to tag and track Influencers in our community. Because this is a default tag, we can click the Edit button and configure our criteria.
Our target audience is on Twitter and GitHub, so we’ll want to track influencers with over 3000 Twitter followers and over 100 GitHub followers.
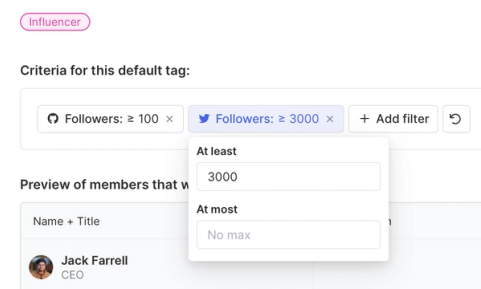
We can also set the filter criteria to match any or all filters. We want any requirements to be true in this case, so we’ll just leave that as is.
Now, we’ll just click Save and confirm the status is toggled to on. And with that, we’ve now tagged all members in our Slack community with an Influencer tag.
Step 4: Create a new tag and set criteria for automation
We still need to tag Contributors (members of our Slack community who are actively posting and replying), which we can do from the same Tags menu.
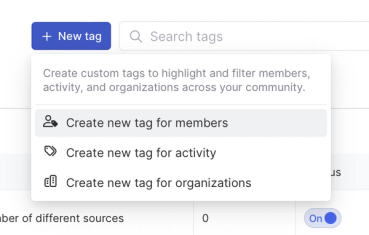
Instead of editing a default tag, this time, we’ll add a create a new Contributor tag. Click on the + New tag button and select to create a member tag.
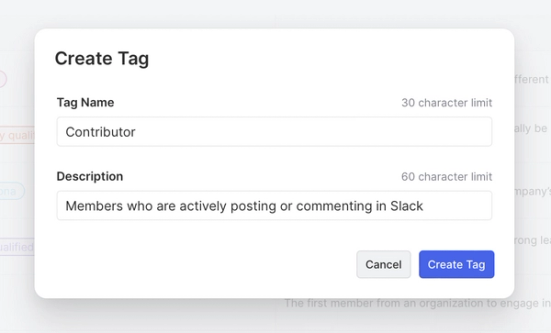
We’ll name this tag accordingly and add a description for context.
With our tag created, we’ll need to add filters to set the criteria. We want to include members who have replied or posted across Slack for this tag. We can click the + Add filter button and locate the source-specific Slack filter. Then click # of Posts and set it to at least one.
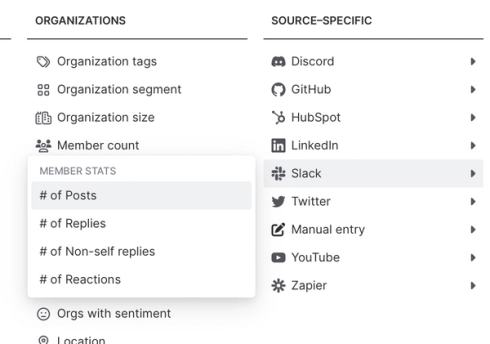
Then just follow the same process as the last step, this time using # of Replies. And set that to at least one.
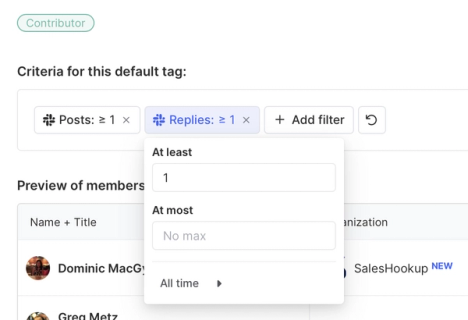
Now we’ll just click Save, and Common Room will add our new Contributor tag to all members who qualify now and in the future.
Now we’ll just click Save, and Common Room will add our new Contributor tag to all members who qualify now and in the future.
Step 5: Take action with automated workflows
With our three groups now tagged, we can start to take action and use reporting to see how these cohorts are trending in our Slack community.
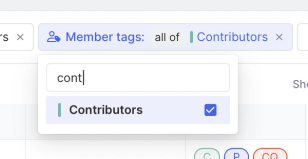
One simple way to get started is to return to the Members view. Now that we’ve already added tags, we can click + Add filter and choose the new Contributor tag we just created.
From here, we can take all sorts of actions like export a CSV, add them to a Segment for our go-to-market team to follow up with, message them, and much more.
Let’s pretend we just want to select a handful and test some messaging. We can do that by checking all (or a random selection) boxes next to members. Then click the Slack icon to message them.
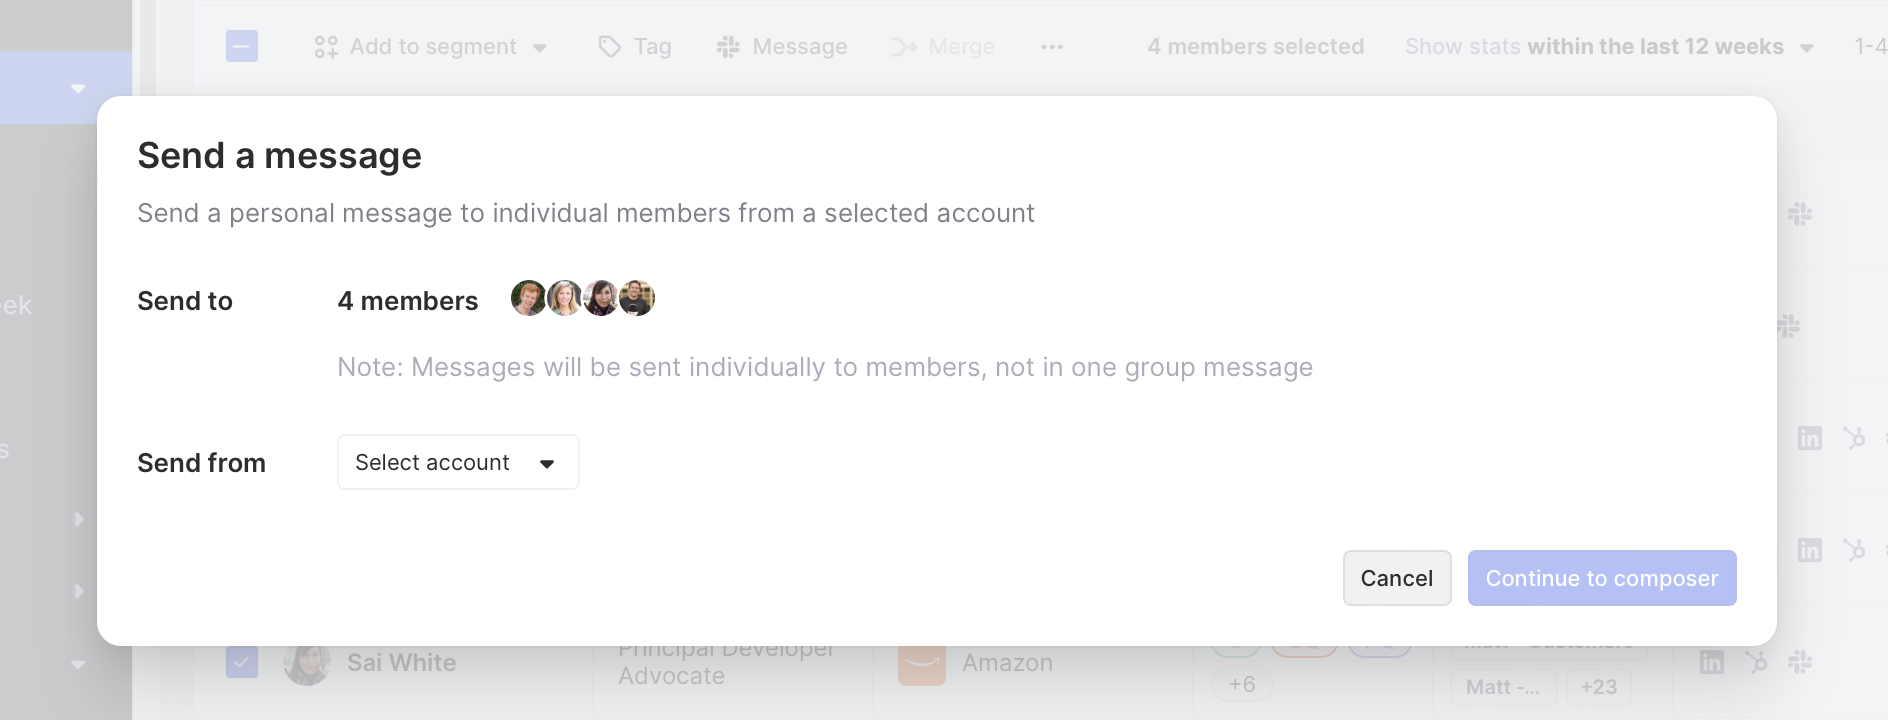
We can draft, preview, and send our message—all within the Common Room Slack composer!

Everything looks good, so we’ll send it and see what happens!
Wrapping up
With powerful filters and tagging features, you can start to take action and cultivate your Slack community. This playbook is really just getting started on what’s possible. From here, you can automate welcome messages, reward members when they reach milestones, get automated alerts when meaningful activity happens, and a lot more.
Check out our entire playbook library for more ideas.
Nothing is stopping you from running this playbook for your Slack community. Jump in and get started by Request a demo.
We think you'd like these
Playbook
Track job changes of customers and key contacts
Fuel efficient growth and reduce churn at the same time.


Playbook
Map the stages of your community from observer to champion
Finally track your community funnel.


Playbook
Automated welcome messages to new community members on Slack and Discord
Community onboarding without the overhead.