Track job changes of customers and key contacts
Fuel efficient growth and reduce churn at the same time.
- Overview
- Step 1: Import a CSV or connect a data source
- Step 2: Add more sources (optional)
- Step 3: Apply a filter to track job changes
- Step 4: Create a segment to track contacts
- Step 5: Set automated alerts
- Step 6: Create custom views
- Wrapping up
Pipeline powered by buyer intelligence.
Request demoOverview
Tracking job changes of VIP contacts helps go-to-market teams feed three birds with one scone.
When a customer joins a new company, it gives your team an opportunity to celebrate milestones, it gives your sales team an opportunity to reach out and and see how your solution serves your customer's new context, and it helps success teams by enabling them to track when a customer moves jobs so they can better identify and avoid potential churn.
Instead of being surprised at the time of renewal, your teams can work hand-in-hand with the new points of contact on deck to ensure a smooth transition. Not to mention, it’s a lot more likely that a customer at a previous company will become a repeat customer at their new company.
This playbook will show you how to keep tabs on meaningful job changes using Common Room. It’s just a few steps and should only take about 20 minutes (not a bad time-to-value tradeoff)!
Here’s a preview of the job change activity you’ll be able to see across every tracked contact when we’re done:
What you’ll need
Step 1: Import a CSV of contacts (or connect a data source)
We’ll first want to connect to sources where your customer data resides (e.g., Salesforce, LinkedIn, Slack) to identify cohorts of contacts we want to track.
One super easy way to get customer data into Common Room is through CSV import.
After Request a demo, you can click to jump into the Contact view.
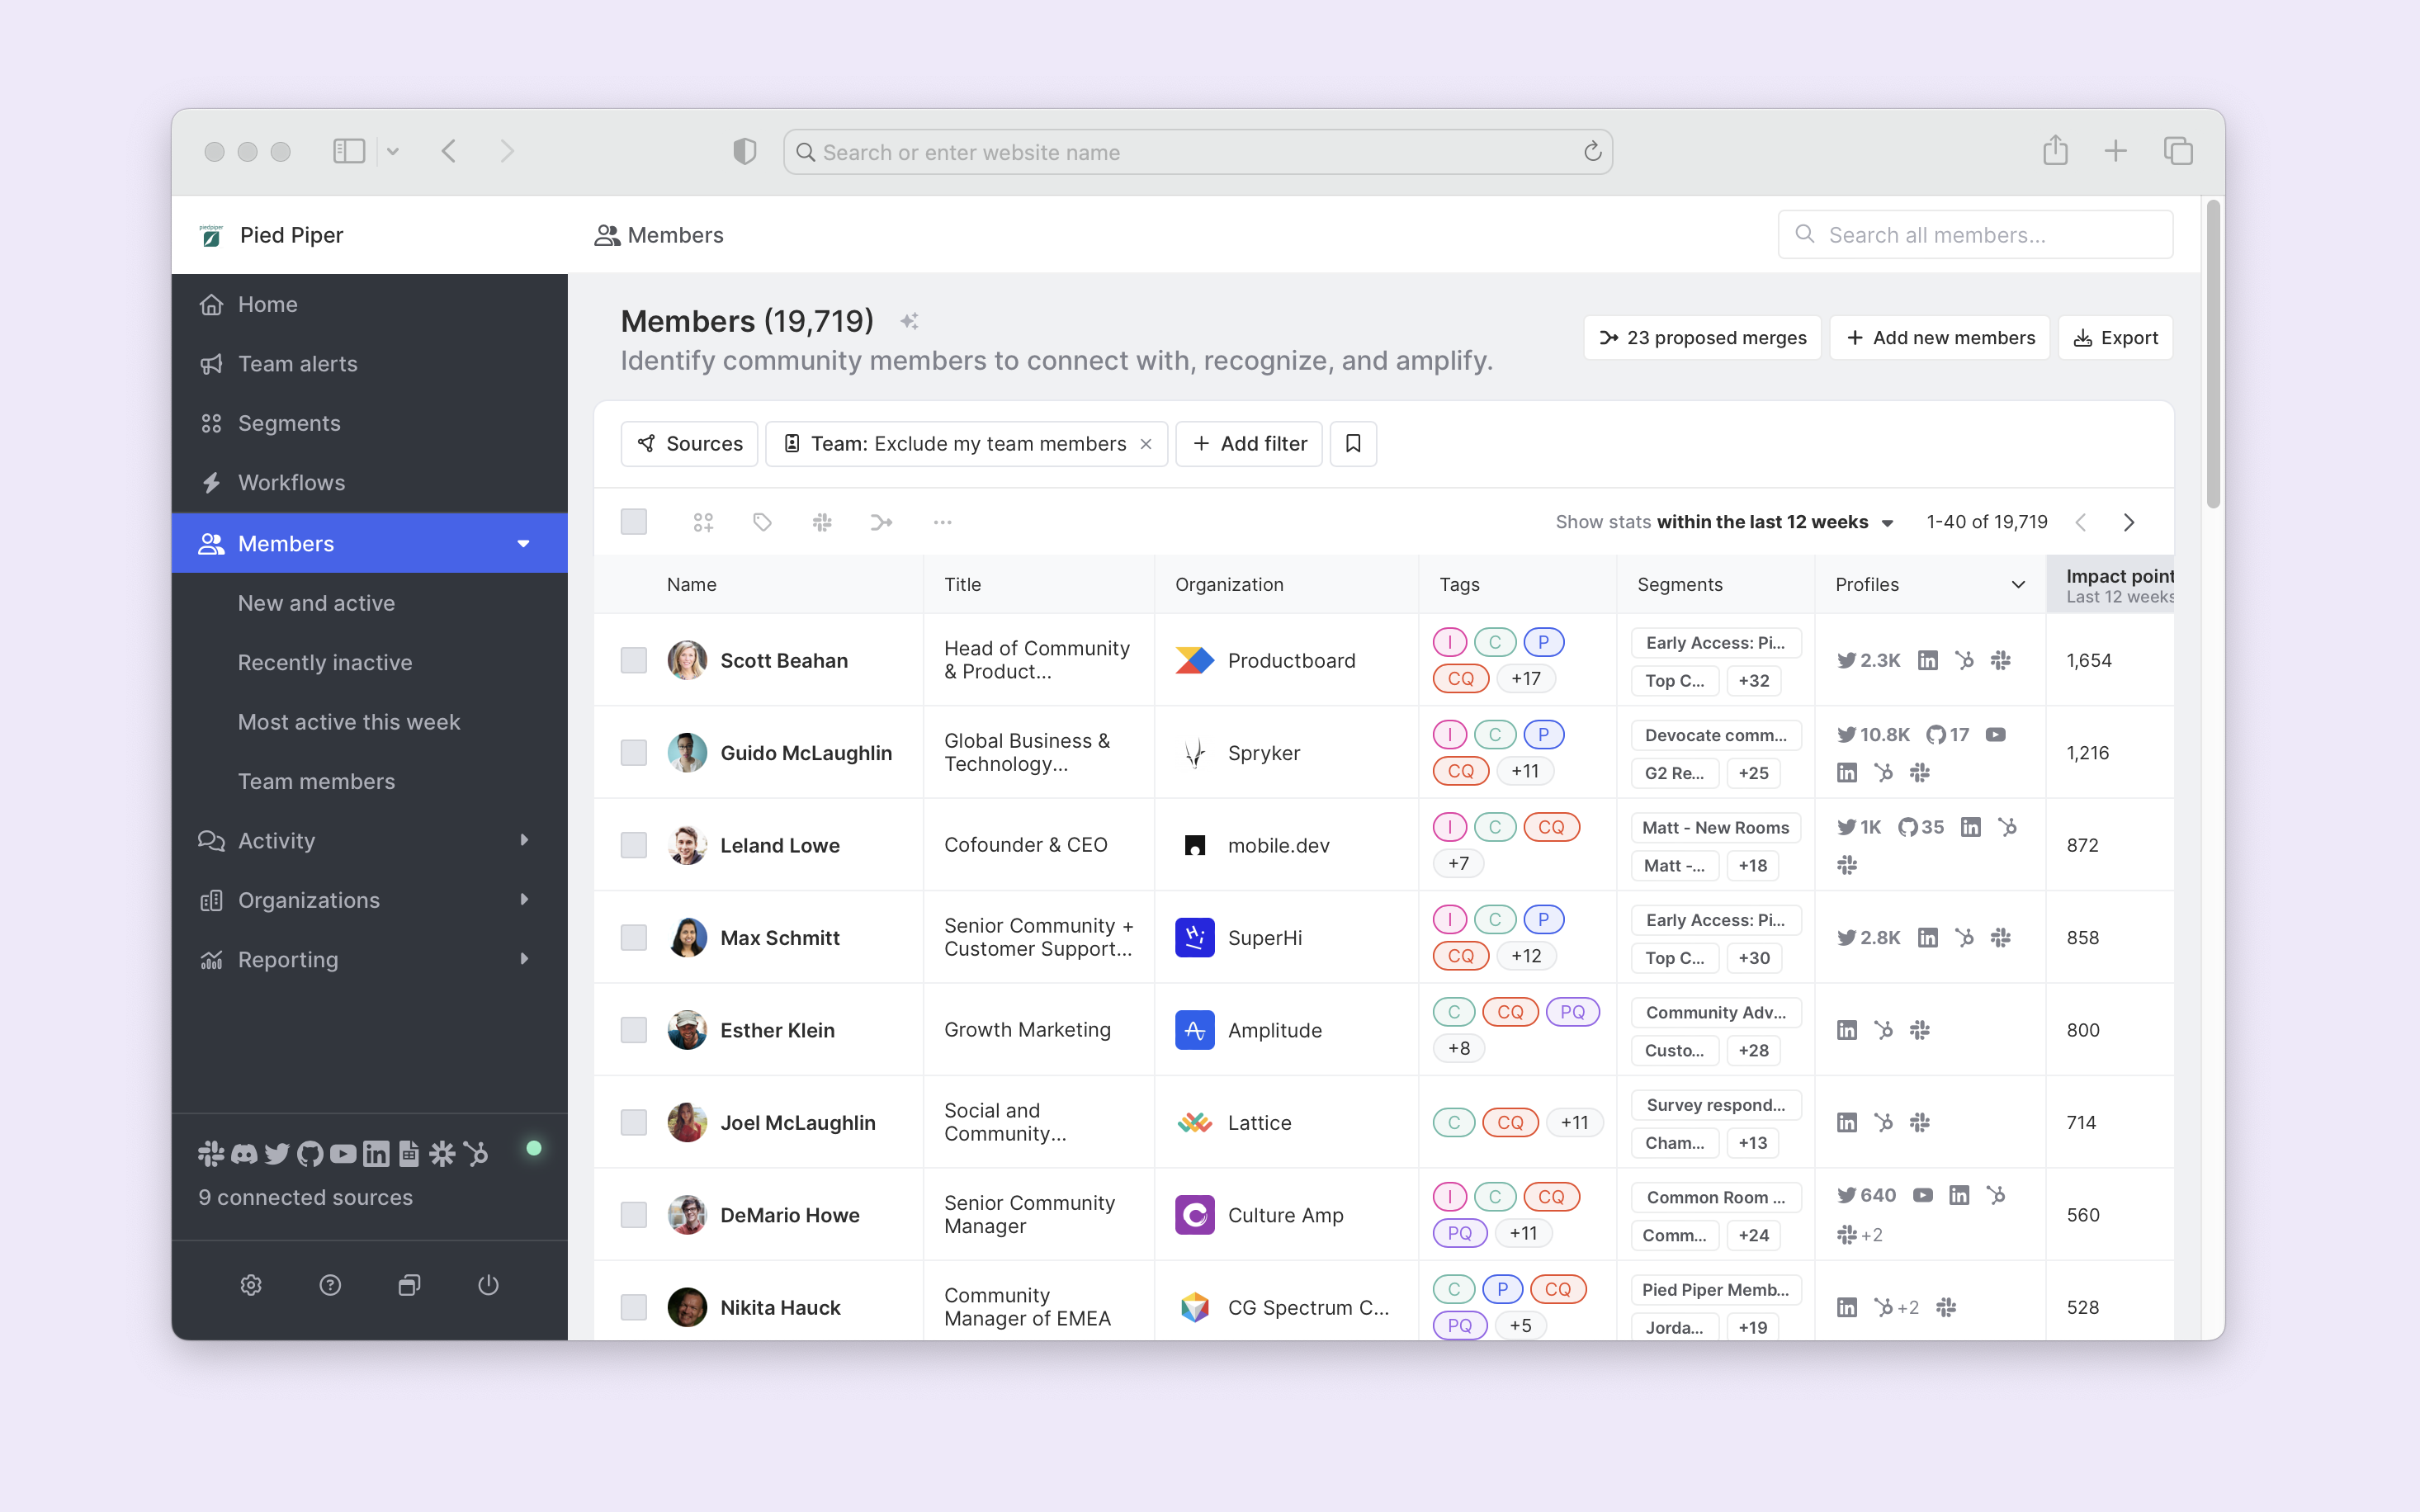
The screenshot above shows what that looks like when many sources are connected. If you’re starting from a blank slate, this will be empty. But we can quickly fix that with a quick CSV import.
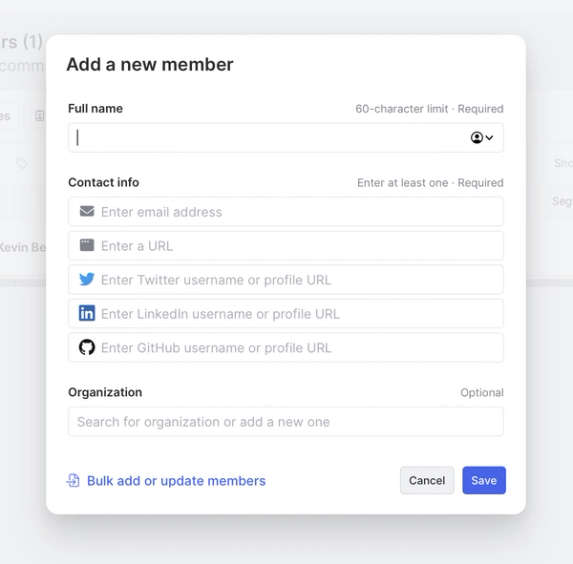
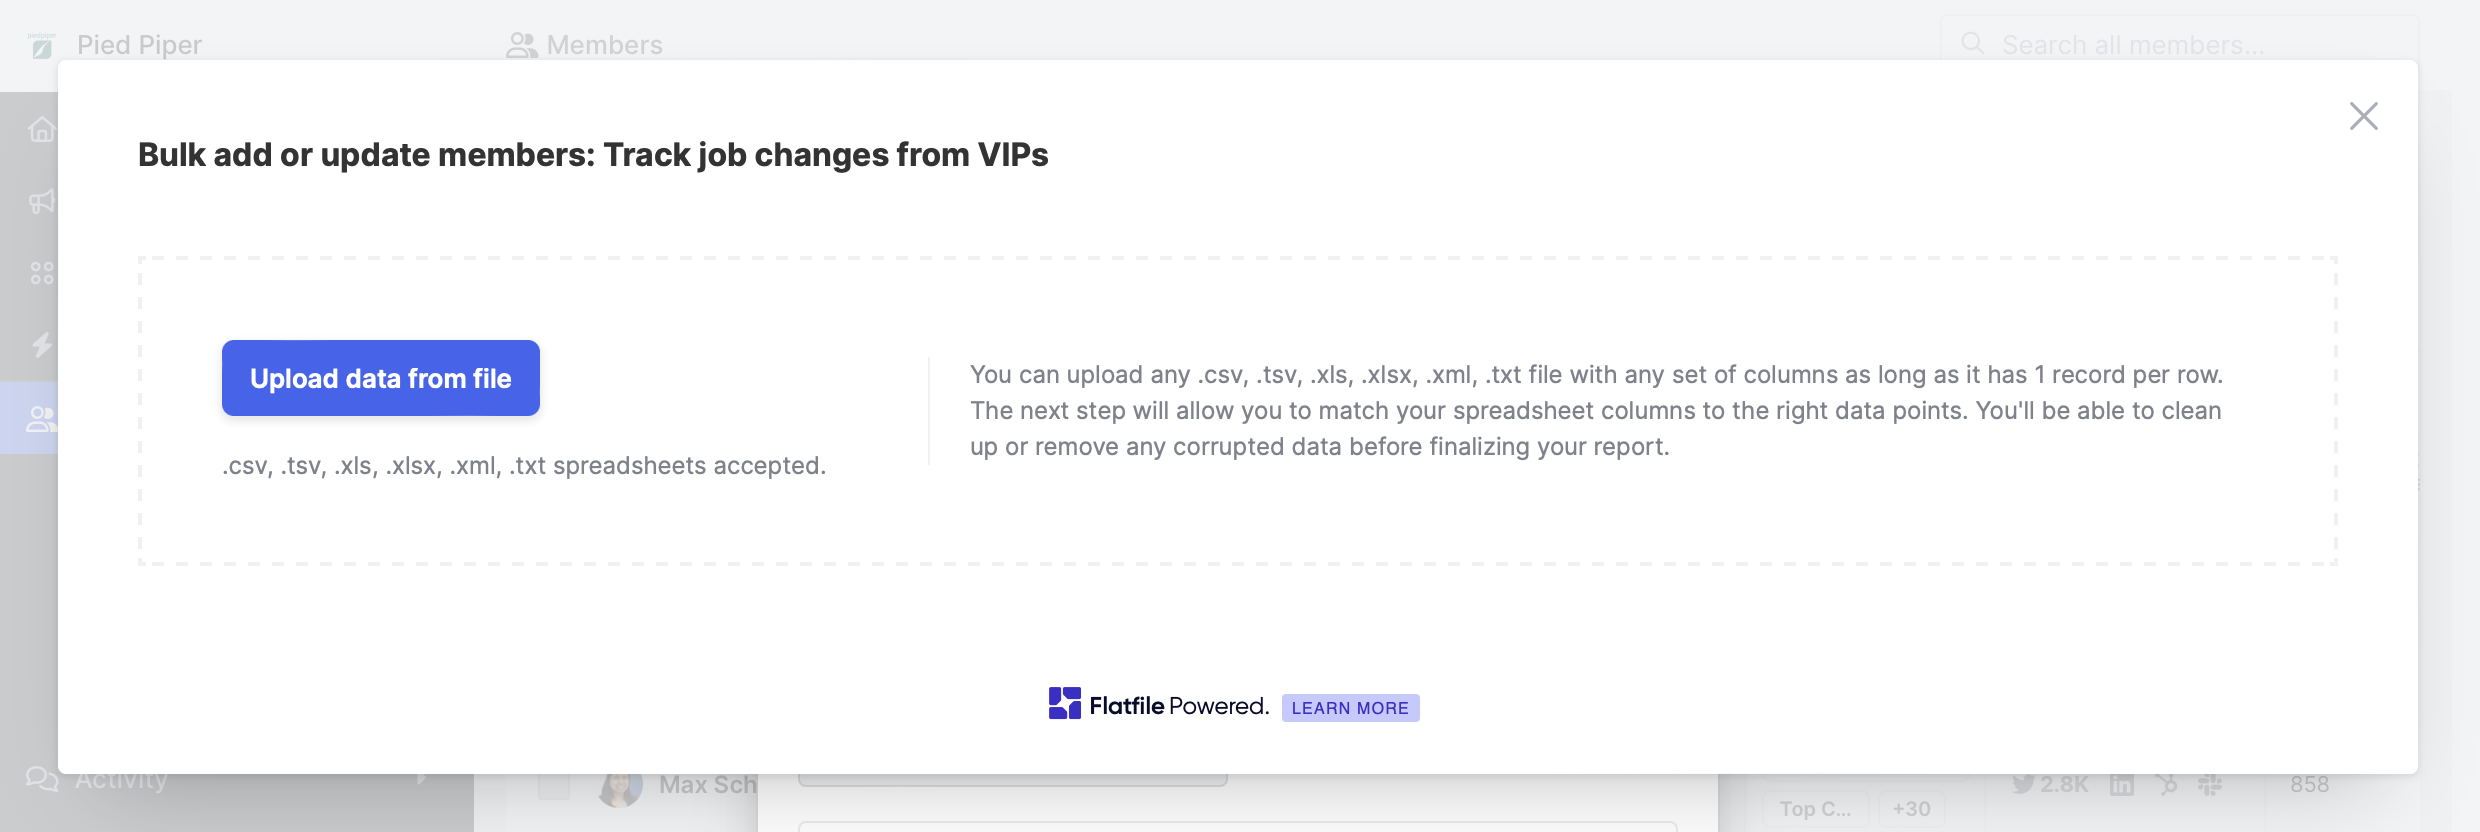
Click on the + Add new contact button in the top right. Clicking triggers a menu to import new contacts. This feature allows us to import contacts of our community and customers by email, Twitter handle, LinkedIn URL, or GitHub username individually or in bulk.
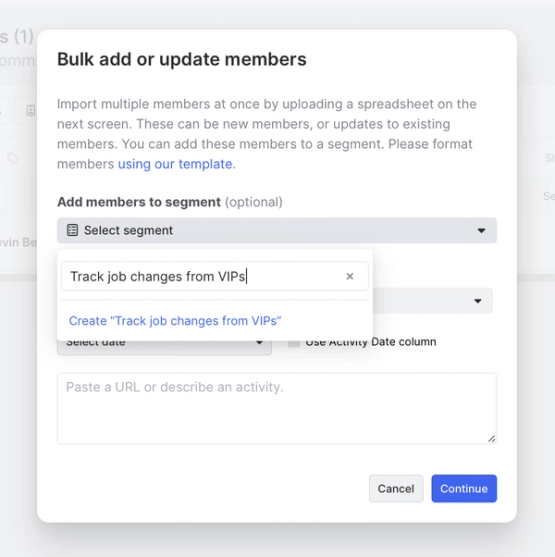
We want to import many contacts, so we’ll select the Bulk add or update contacts link.
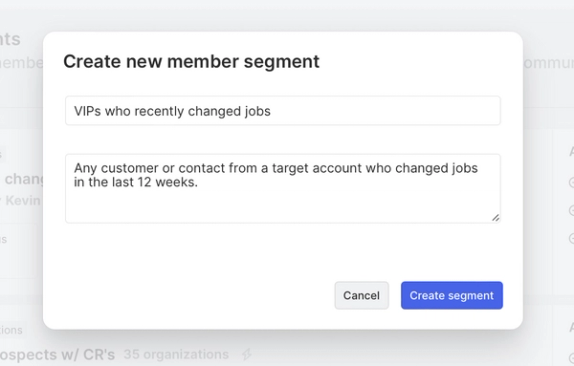
We’ll then see a menu that gives us options to add contacts to a segment and add activity. Let’s add these contacts to a new segment and name it something with context.
We can click Continue to import our CSV with our new segment created.
After uploading the file, you’ll be asked to confirm field mappings, review, and complete the import.
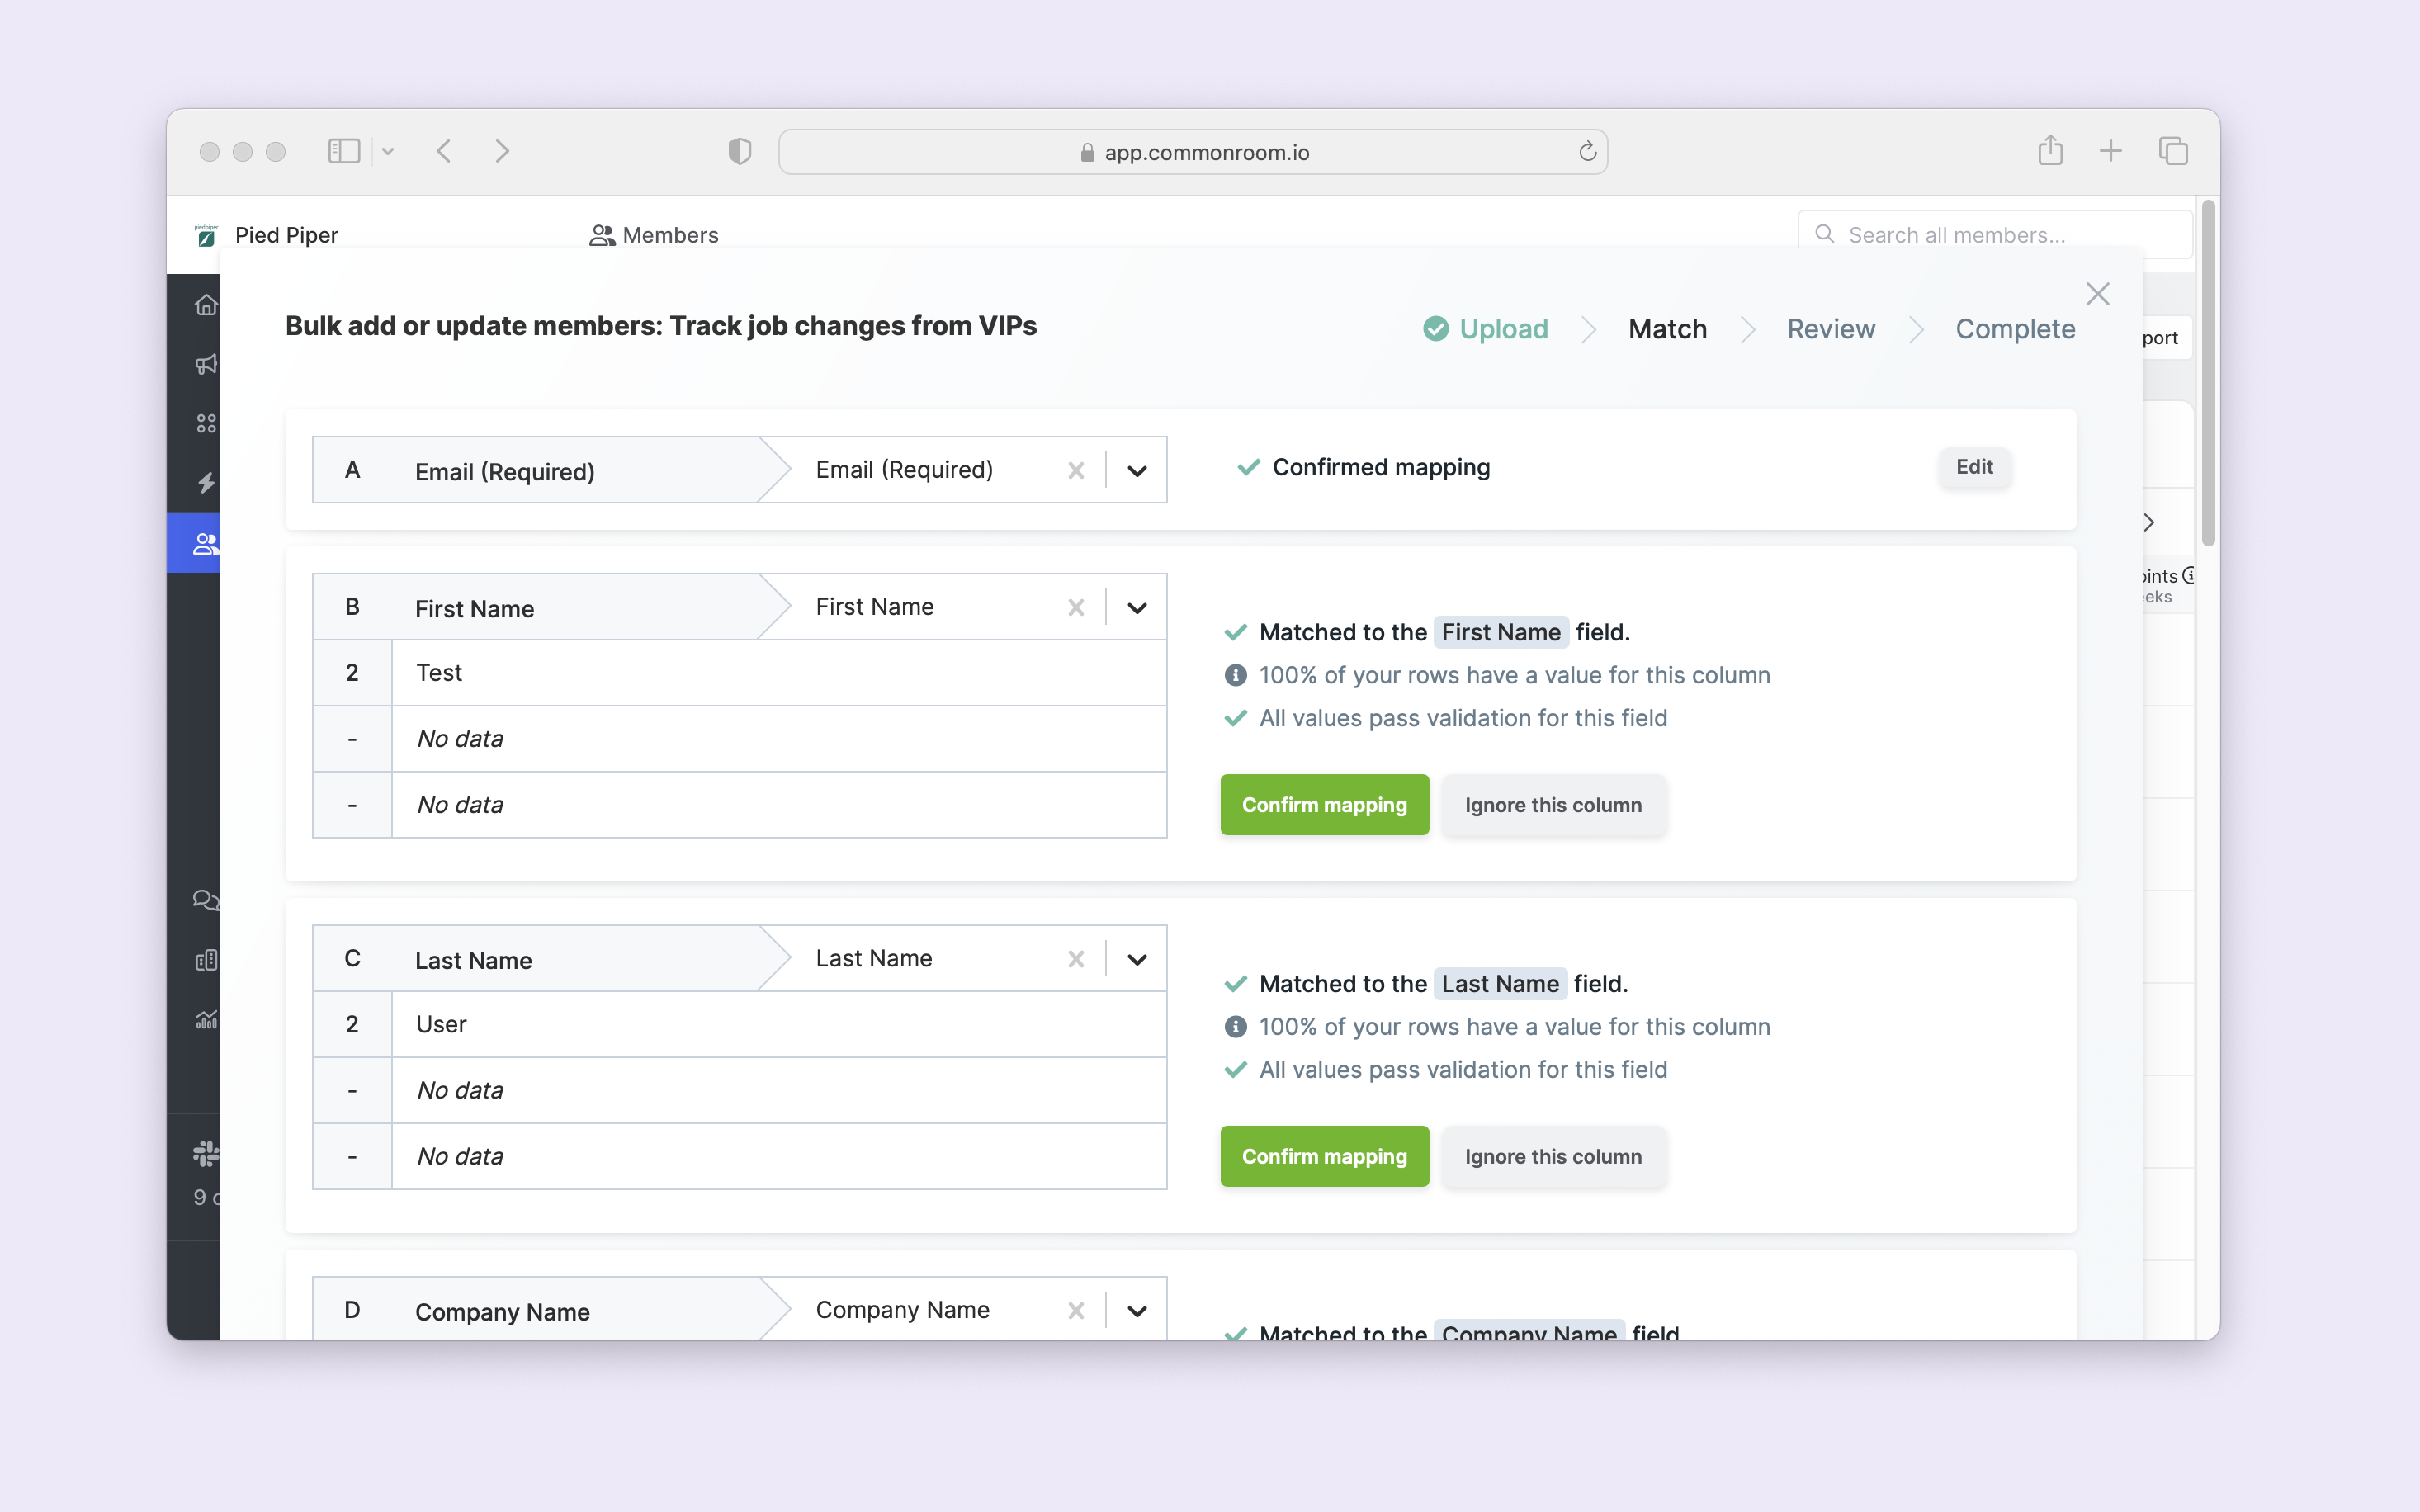
After confirming your field mapping, your list will begin to import. This might take a few minutes, depending on the size of your list.
Step 2: Connect more sources to improve match rate
In addition to CSV import, we suggest connecting to additional customer data sources as it helps with match rates and future use cases. (Feel free to skip this step if you are satisfied with only importing a CSV.)
Out of the box, Common Room connects with dozens of customer data sources like LinkedIn, Slack, HubSpot, Salesforce, Snowflake, Zapier, and many more.
Connecting to a new source takes just a few clicks. For example, to connect LinkedIn, we can jump to the Settings menu and choose Connect LinkedIn.
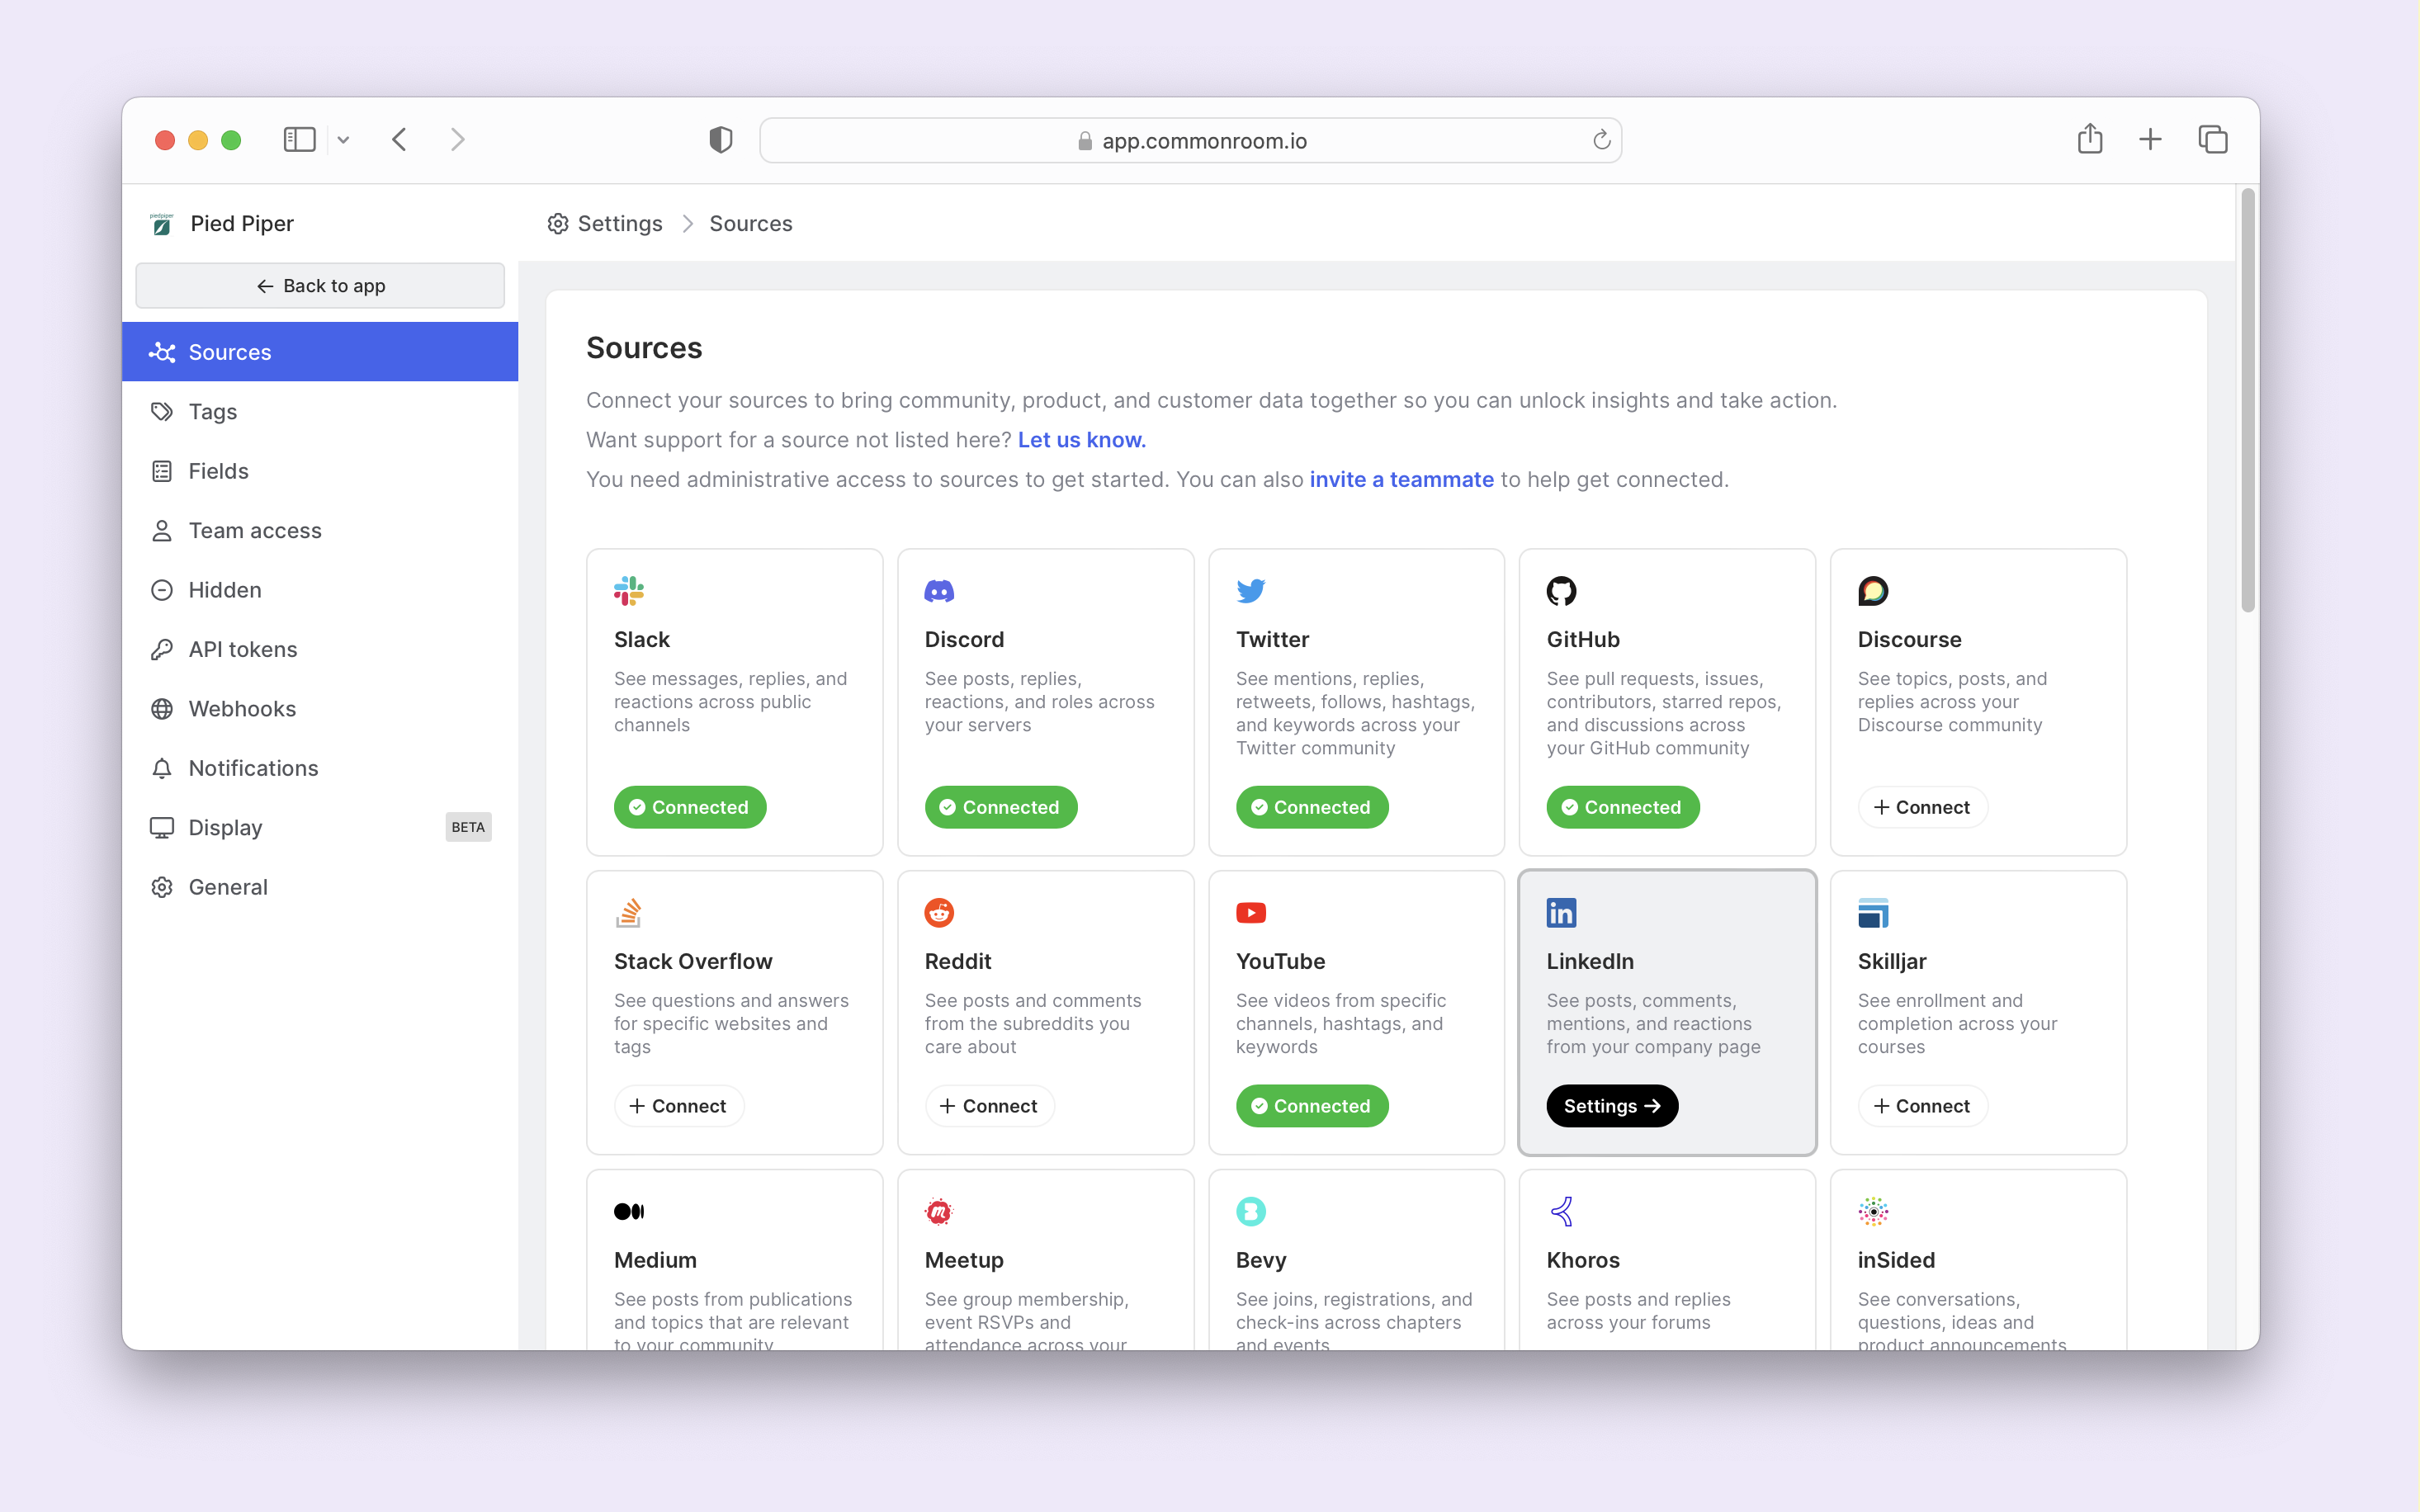
Once LinkedIn is authenticated, data import will begin, and contacts will import into Common Room along with contact activity related to your handle.
We can repeat a similar process to add more sources like Slack or Twitter.
Before jumping onto the next step, let’s review how to connect to customer data since that’s likely where your customer attributes are updated and fresh.
You can do this through native CRM integrations (Salesforce or HubSpot), data warehouse / ETL (Snowflake, Census, Hightouch), Zapier, or API.
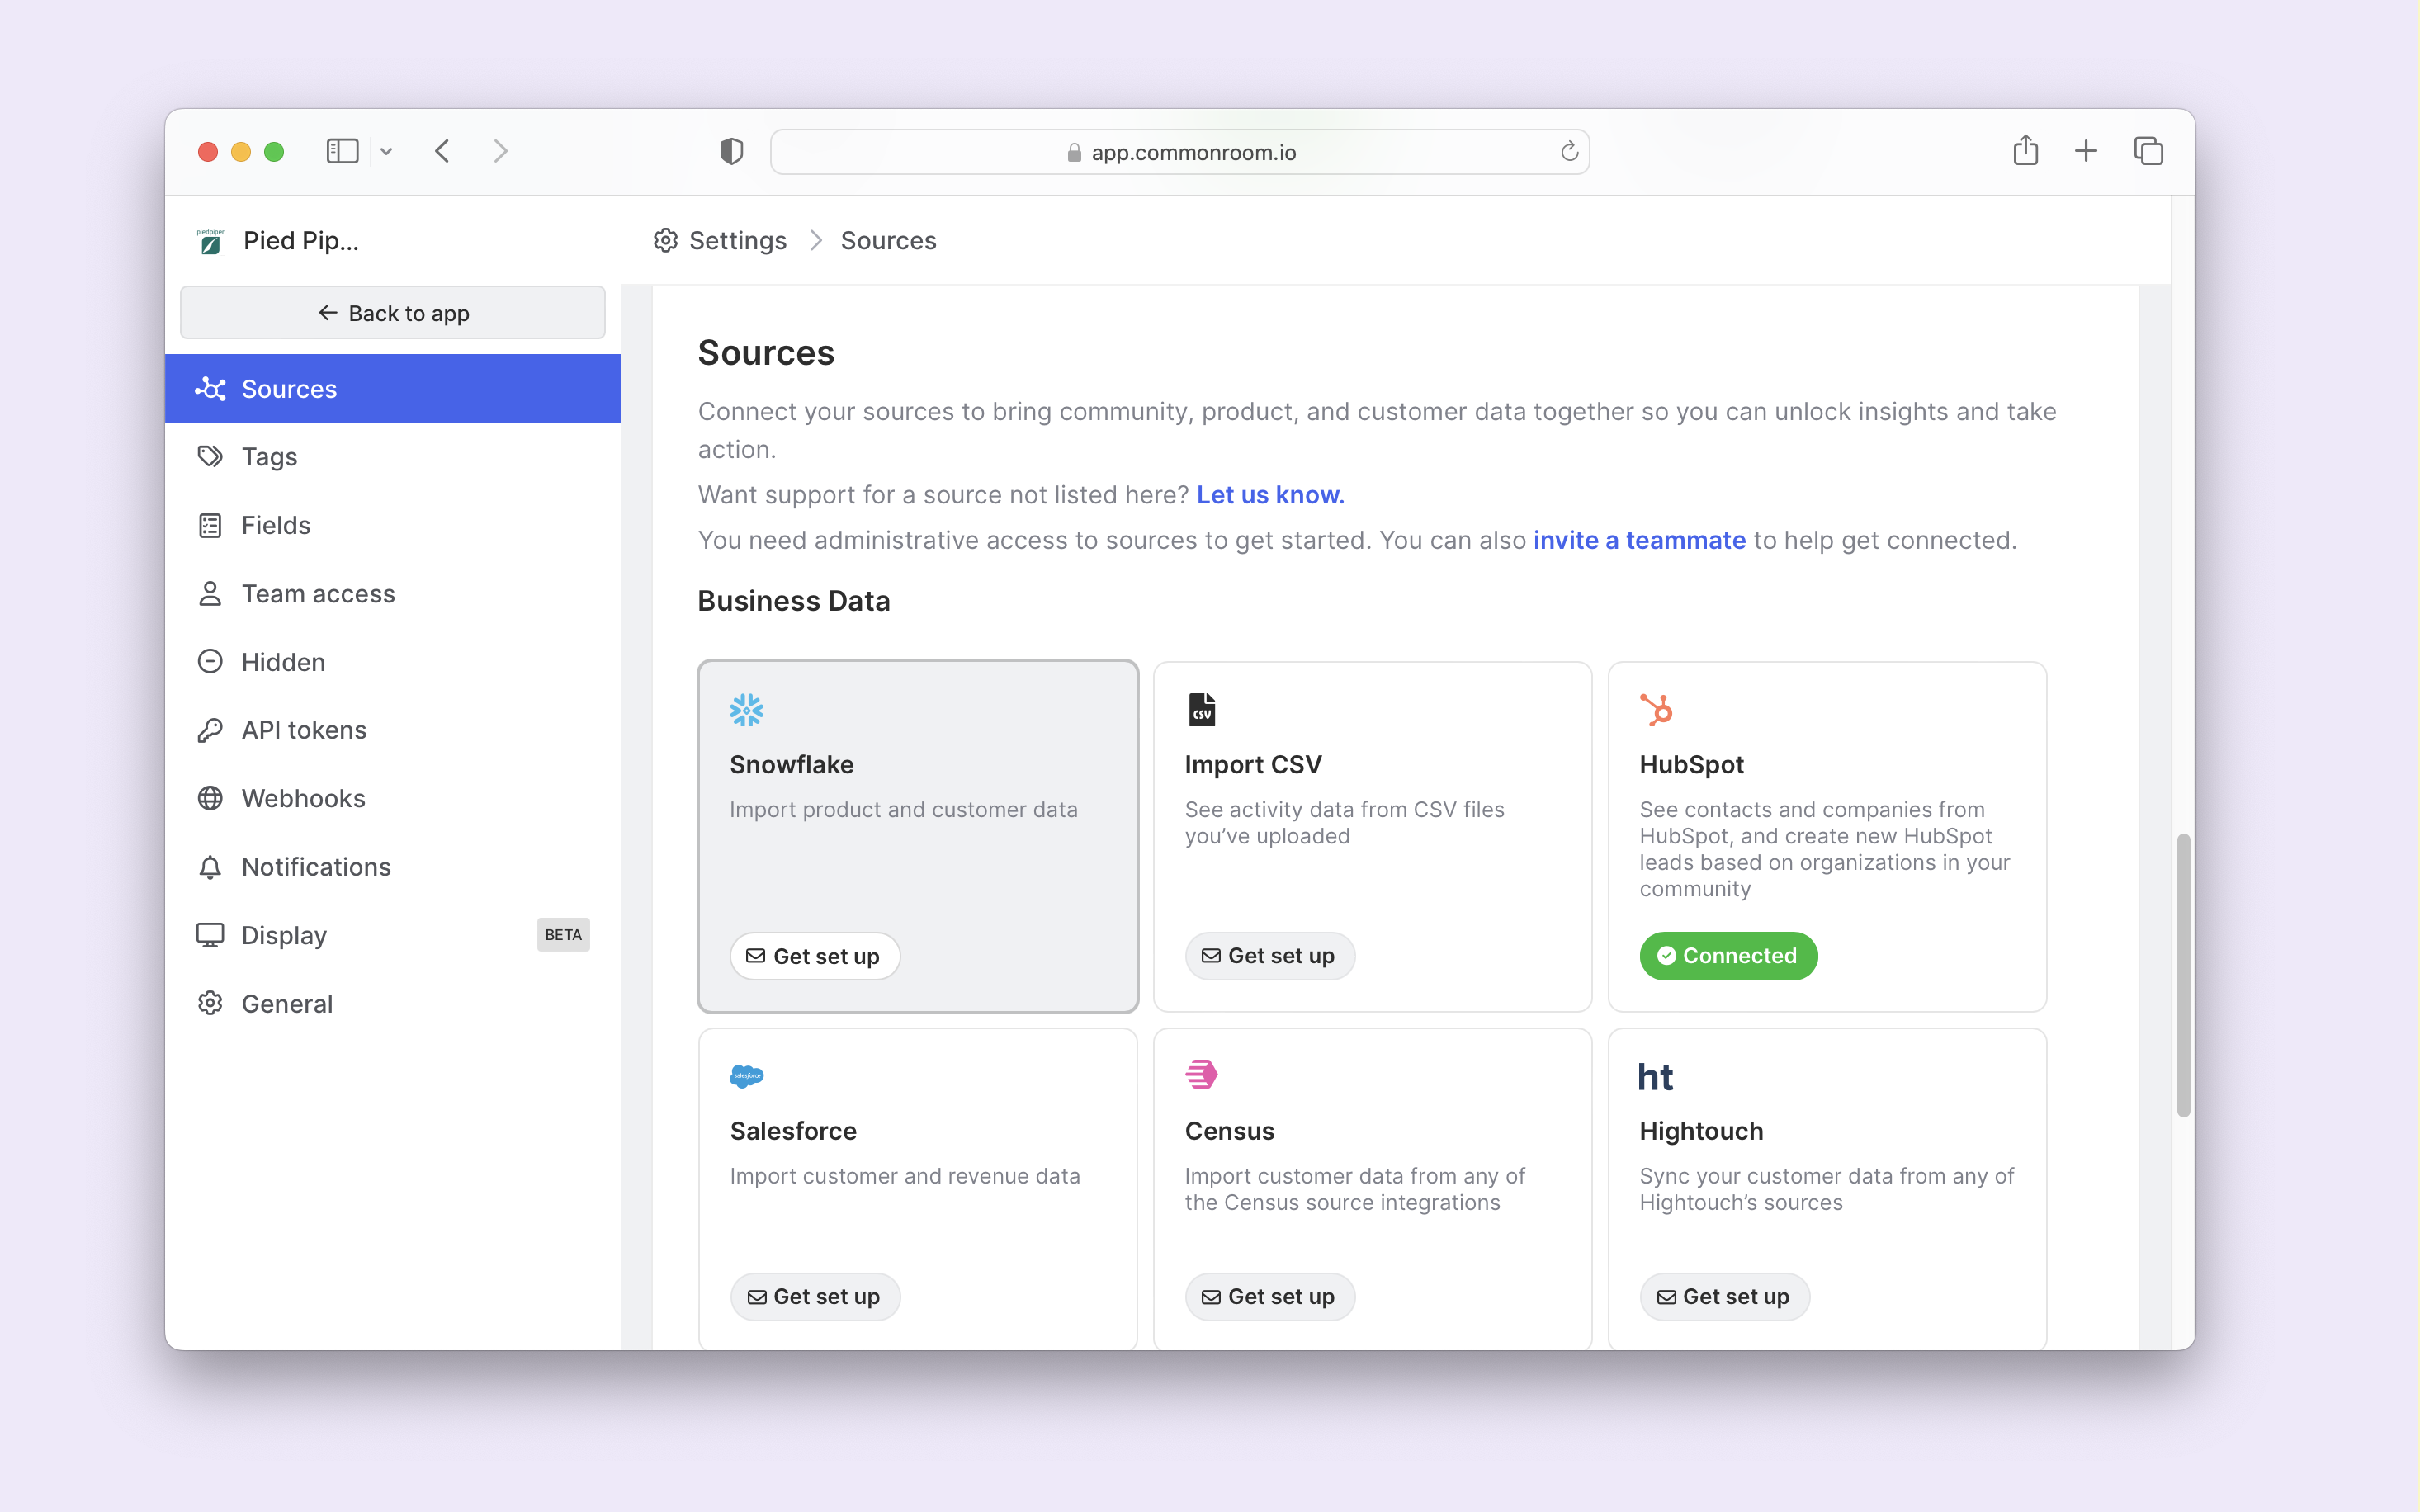
Our business data integrations take a touch more customization than the others. You’ll have to get the help of a Common Room pro to get one of these sources enabled.
Step 3: Apply a filter to track job changes
With our high-priority contacts and customers now added to Common Room, we can start tracking (and sending alerts to our team) when they change jobs.
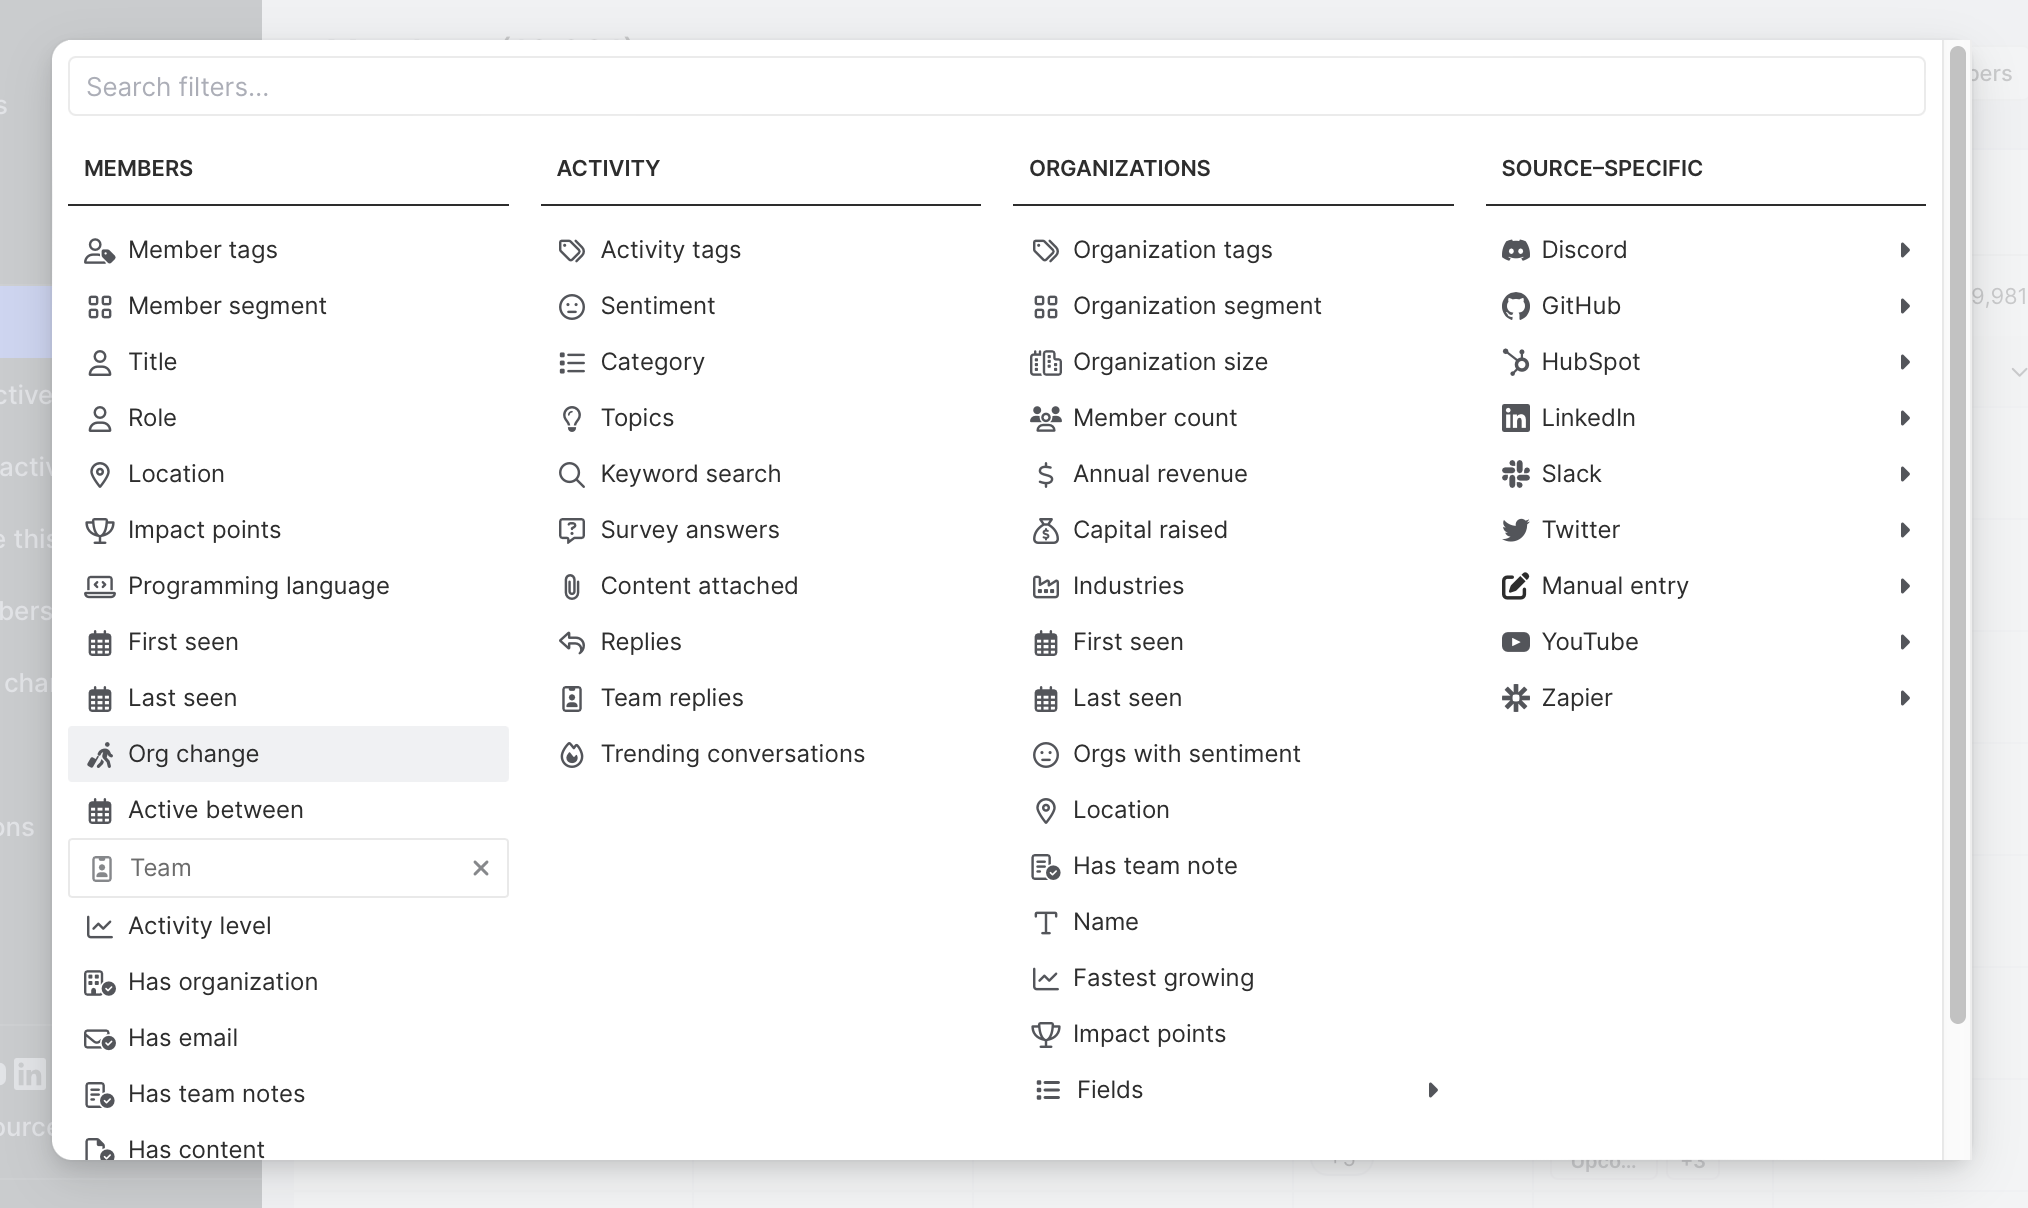
Let’s click over to the Contact menu and apply a filter by clicking the + Add filter button.
Now this is where the magic happens! 🪄
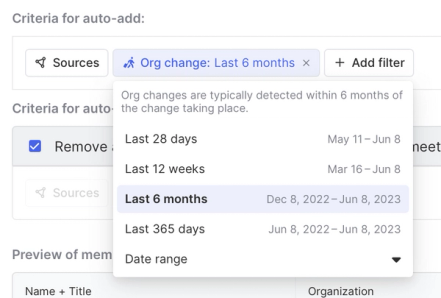
We can locate and select the Org change filter.
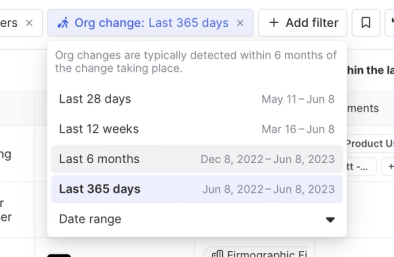
This gives us a view of every contact who has changed their job in the last 365 days by default. Let’s narrow that down a bit to the previous six months.
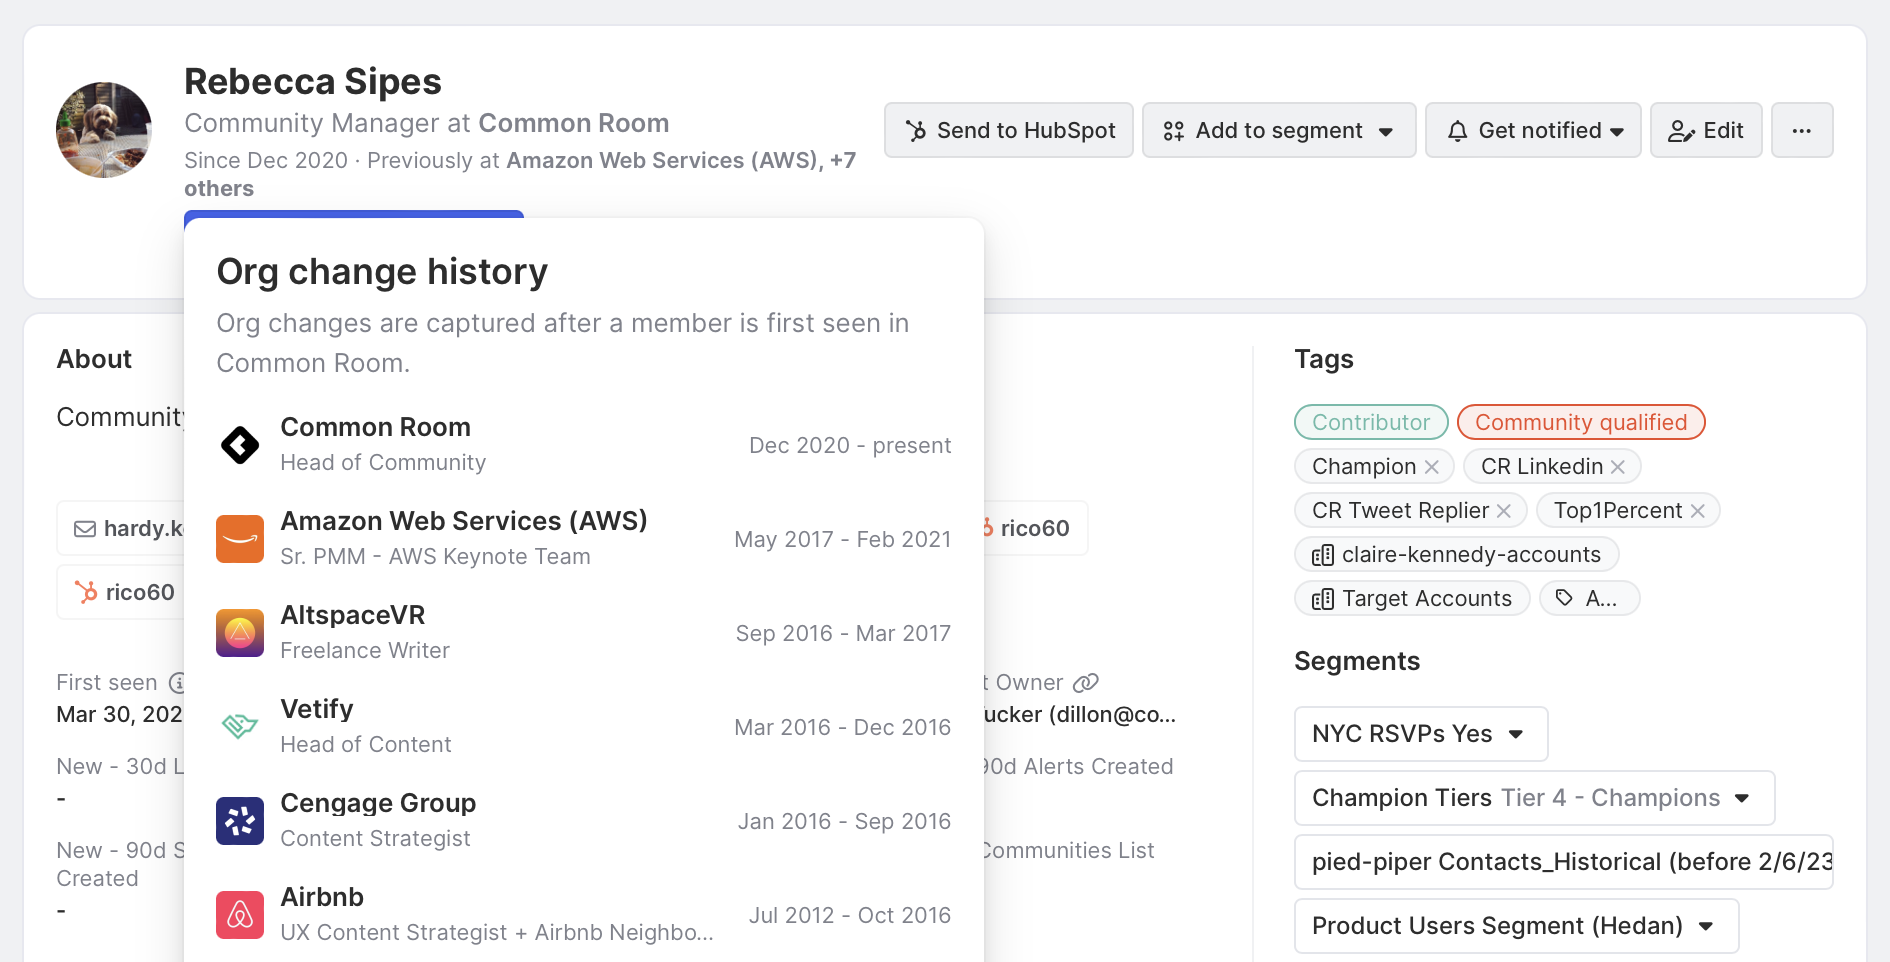
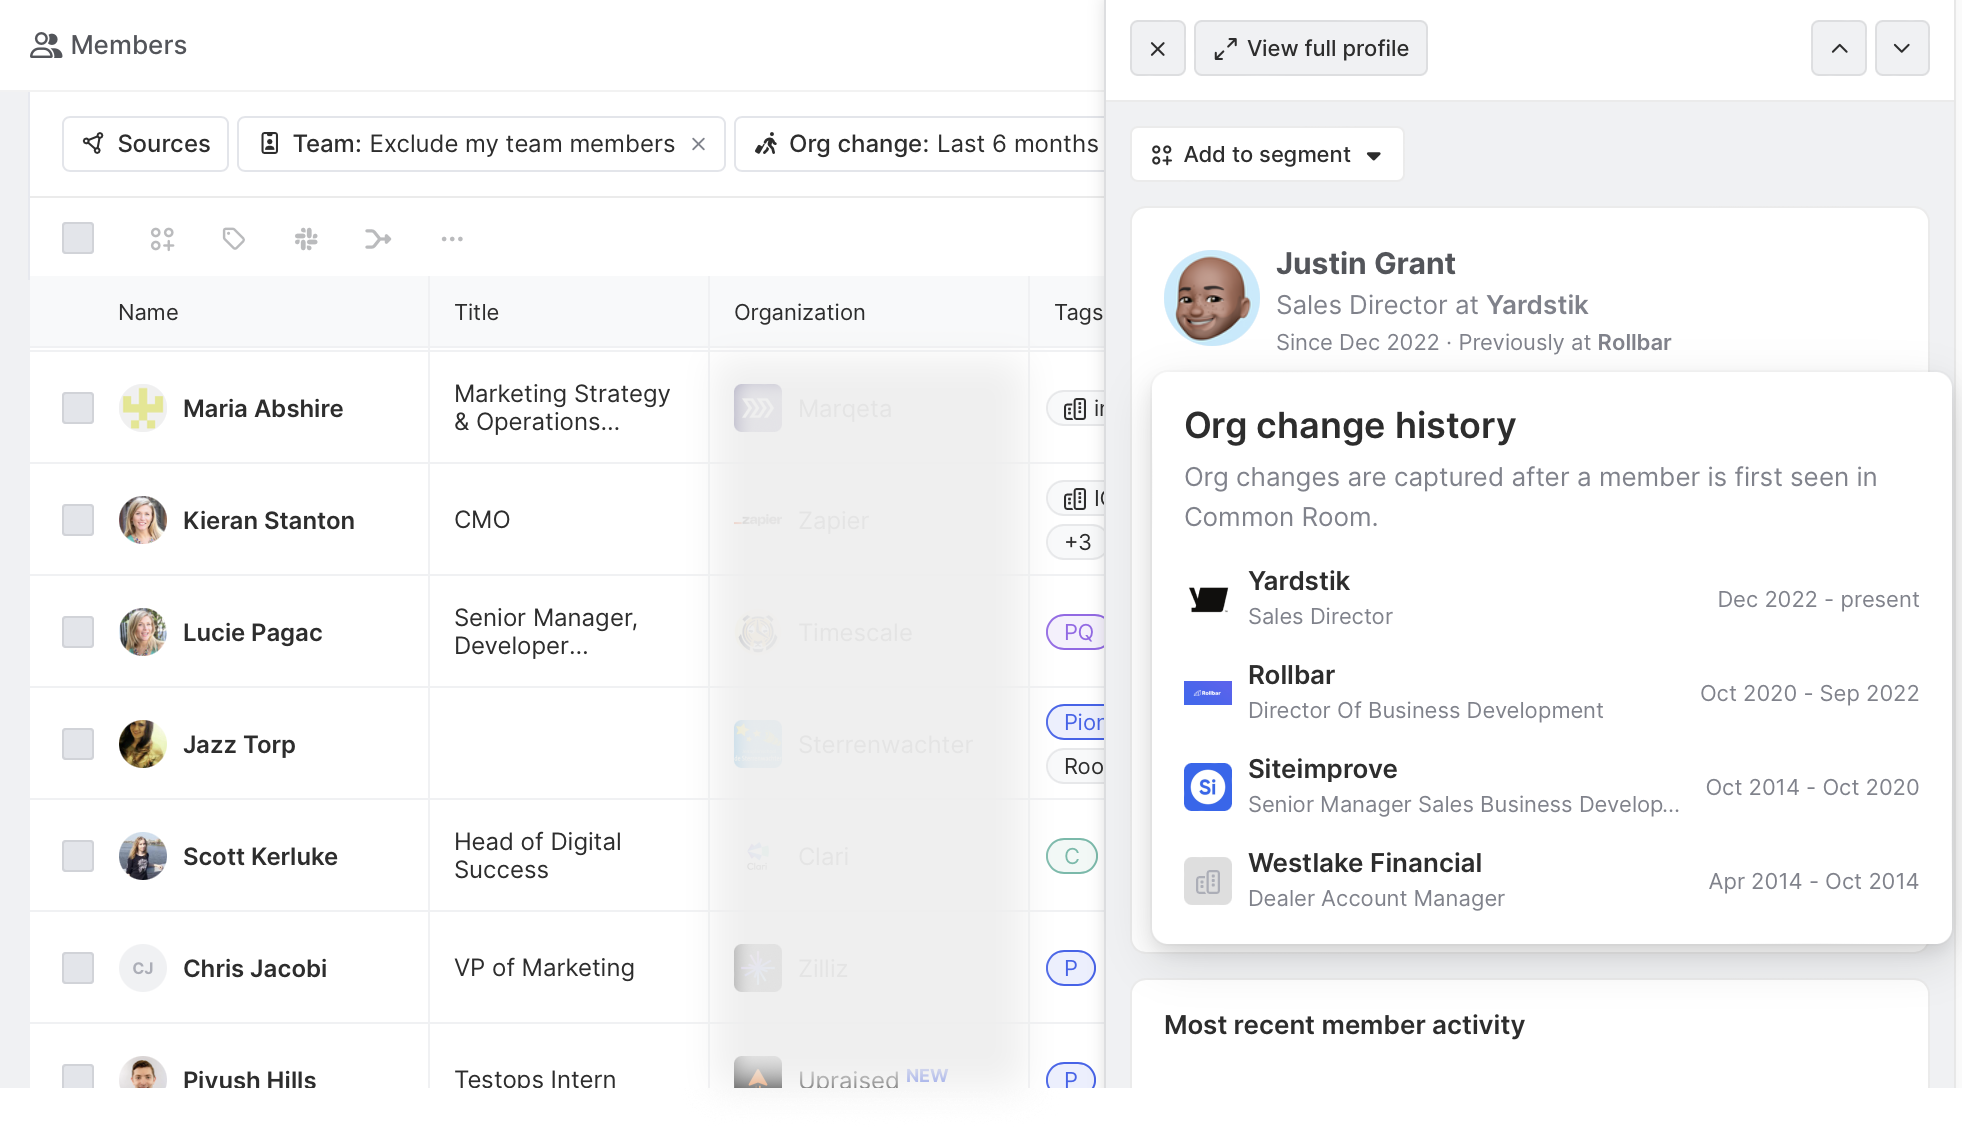
Just like that, we now have a view of any contact who has recently changed jobs! And when we click into each contact, we can hover over their previous org to see the history of job changes over time.
That’s all for this step. In the next few steps, we’ll show you how to take action!
Step 4: Create a segment to track new and existing contacts who qualify
Now that we can track when our key contacts change jobs, we’ll want to add those contacts to what we call Segments so our go-to-market teams can take action.
To do that, head over to our Segment menu in the left sidebar and create a view to add contacts when a job change is detected. Once there, click + New segment to create a new segment.
And we can automatically add contacts by clicking the Settings tab, locating the Contact management area, and selecting Set criteria.
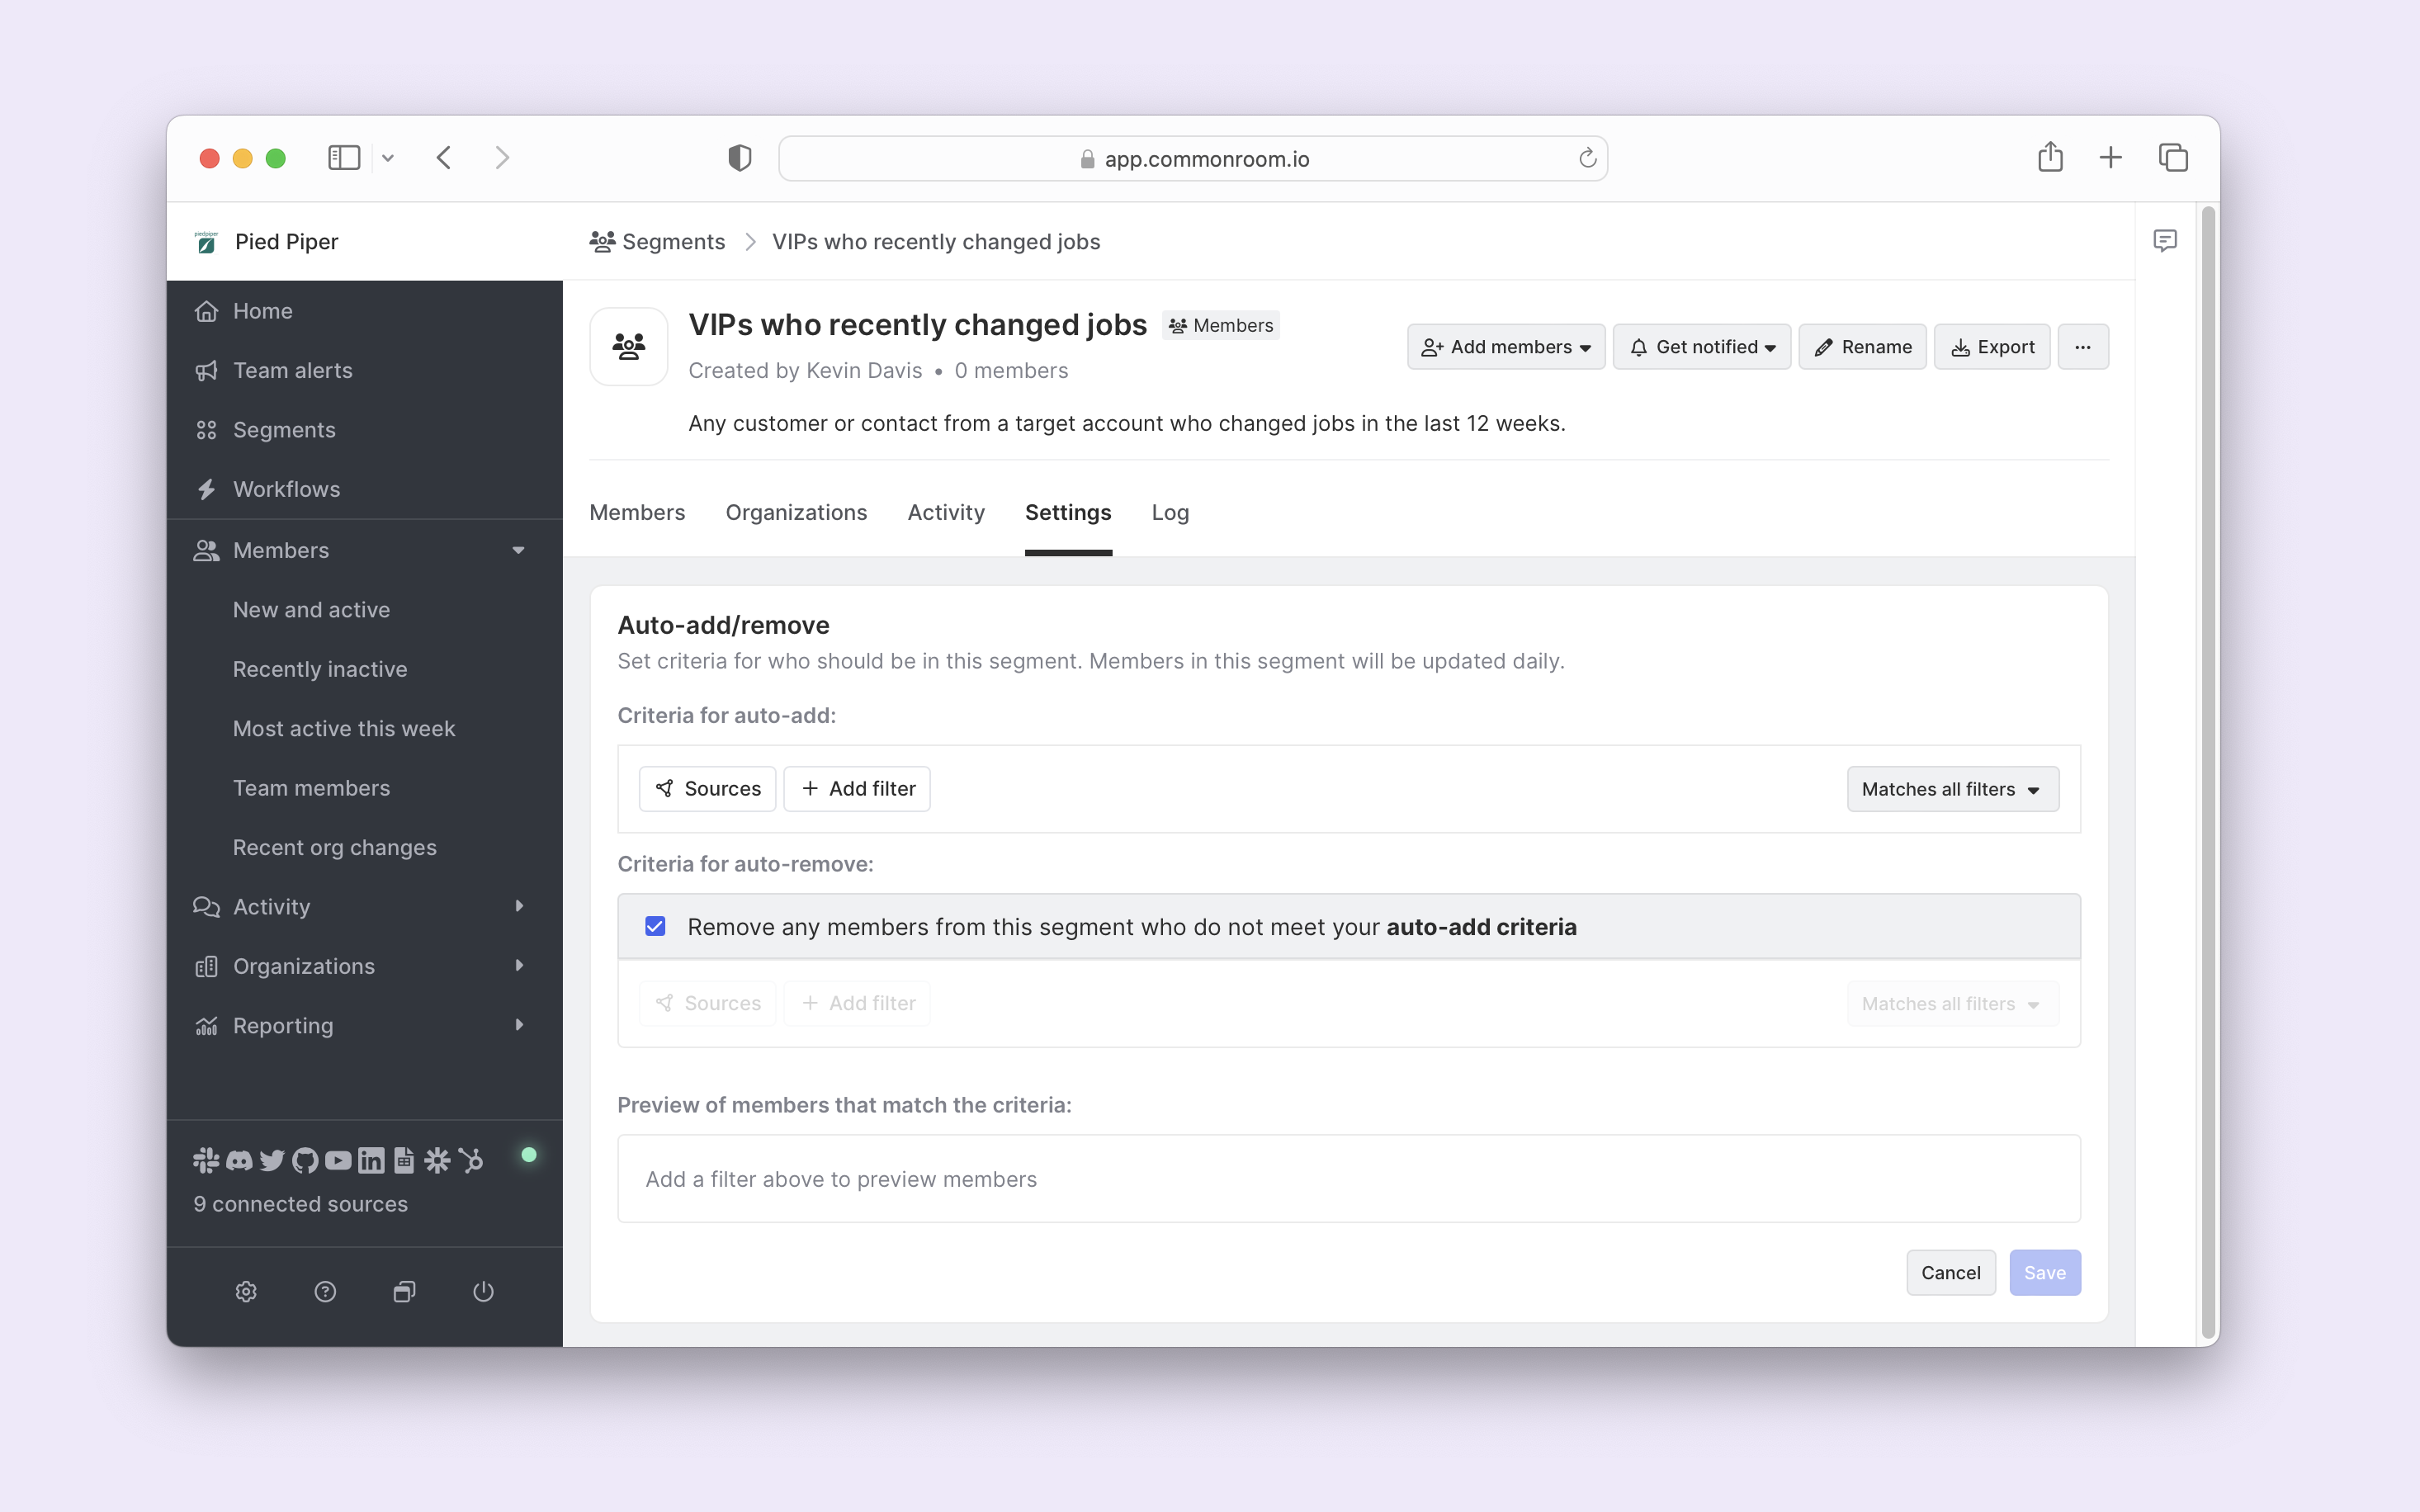
We can click the Add filter button and select the Org change option. A year is longer than we want, so we’ll want to narrow the date range to the last six months.
And we could further refine this by adding more filters for company size or region if we wanted.
All looks good, so we can click Save, and now qualifying contacts will start populating.
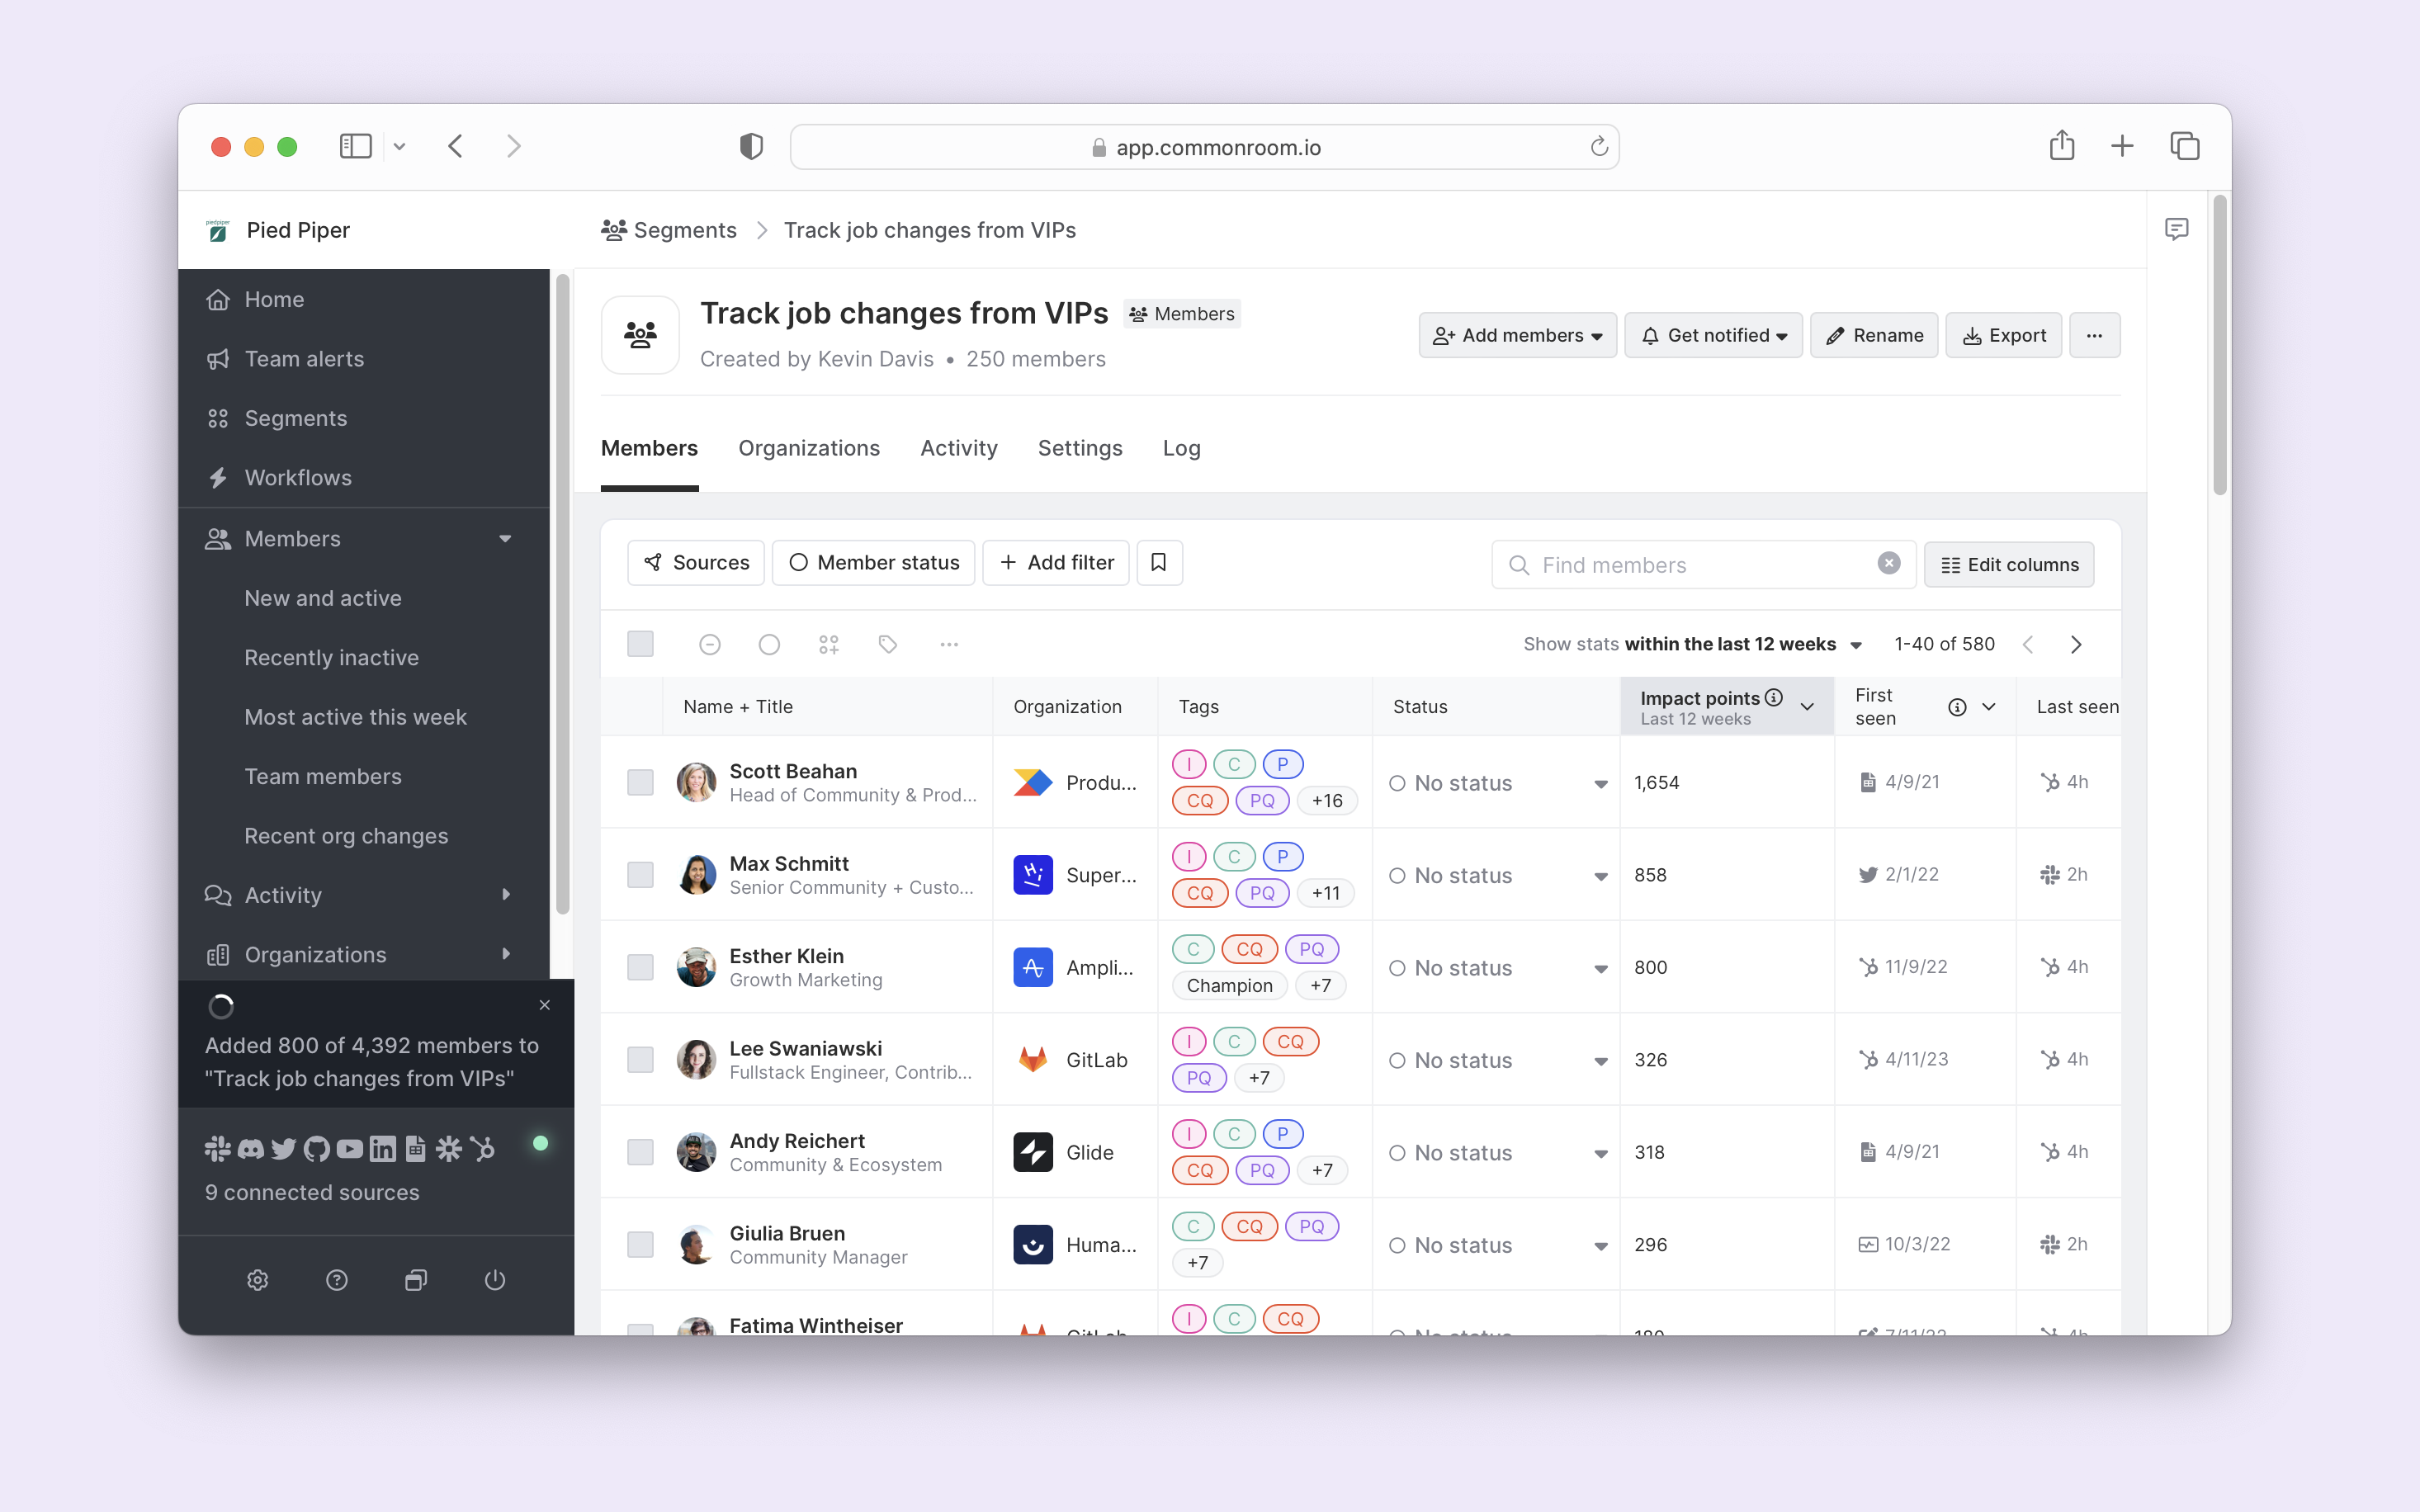
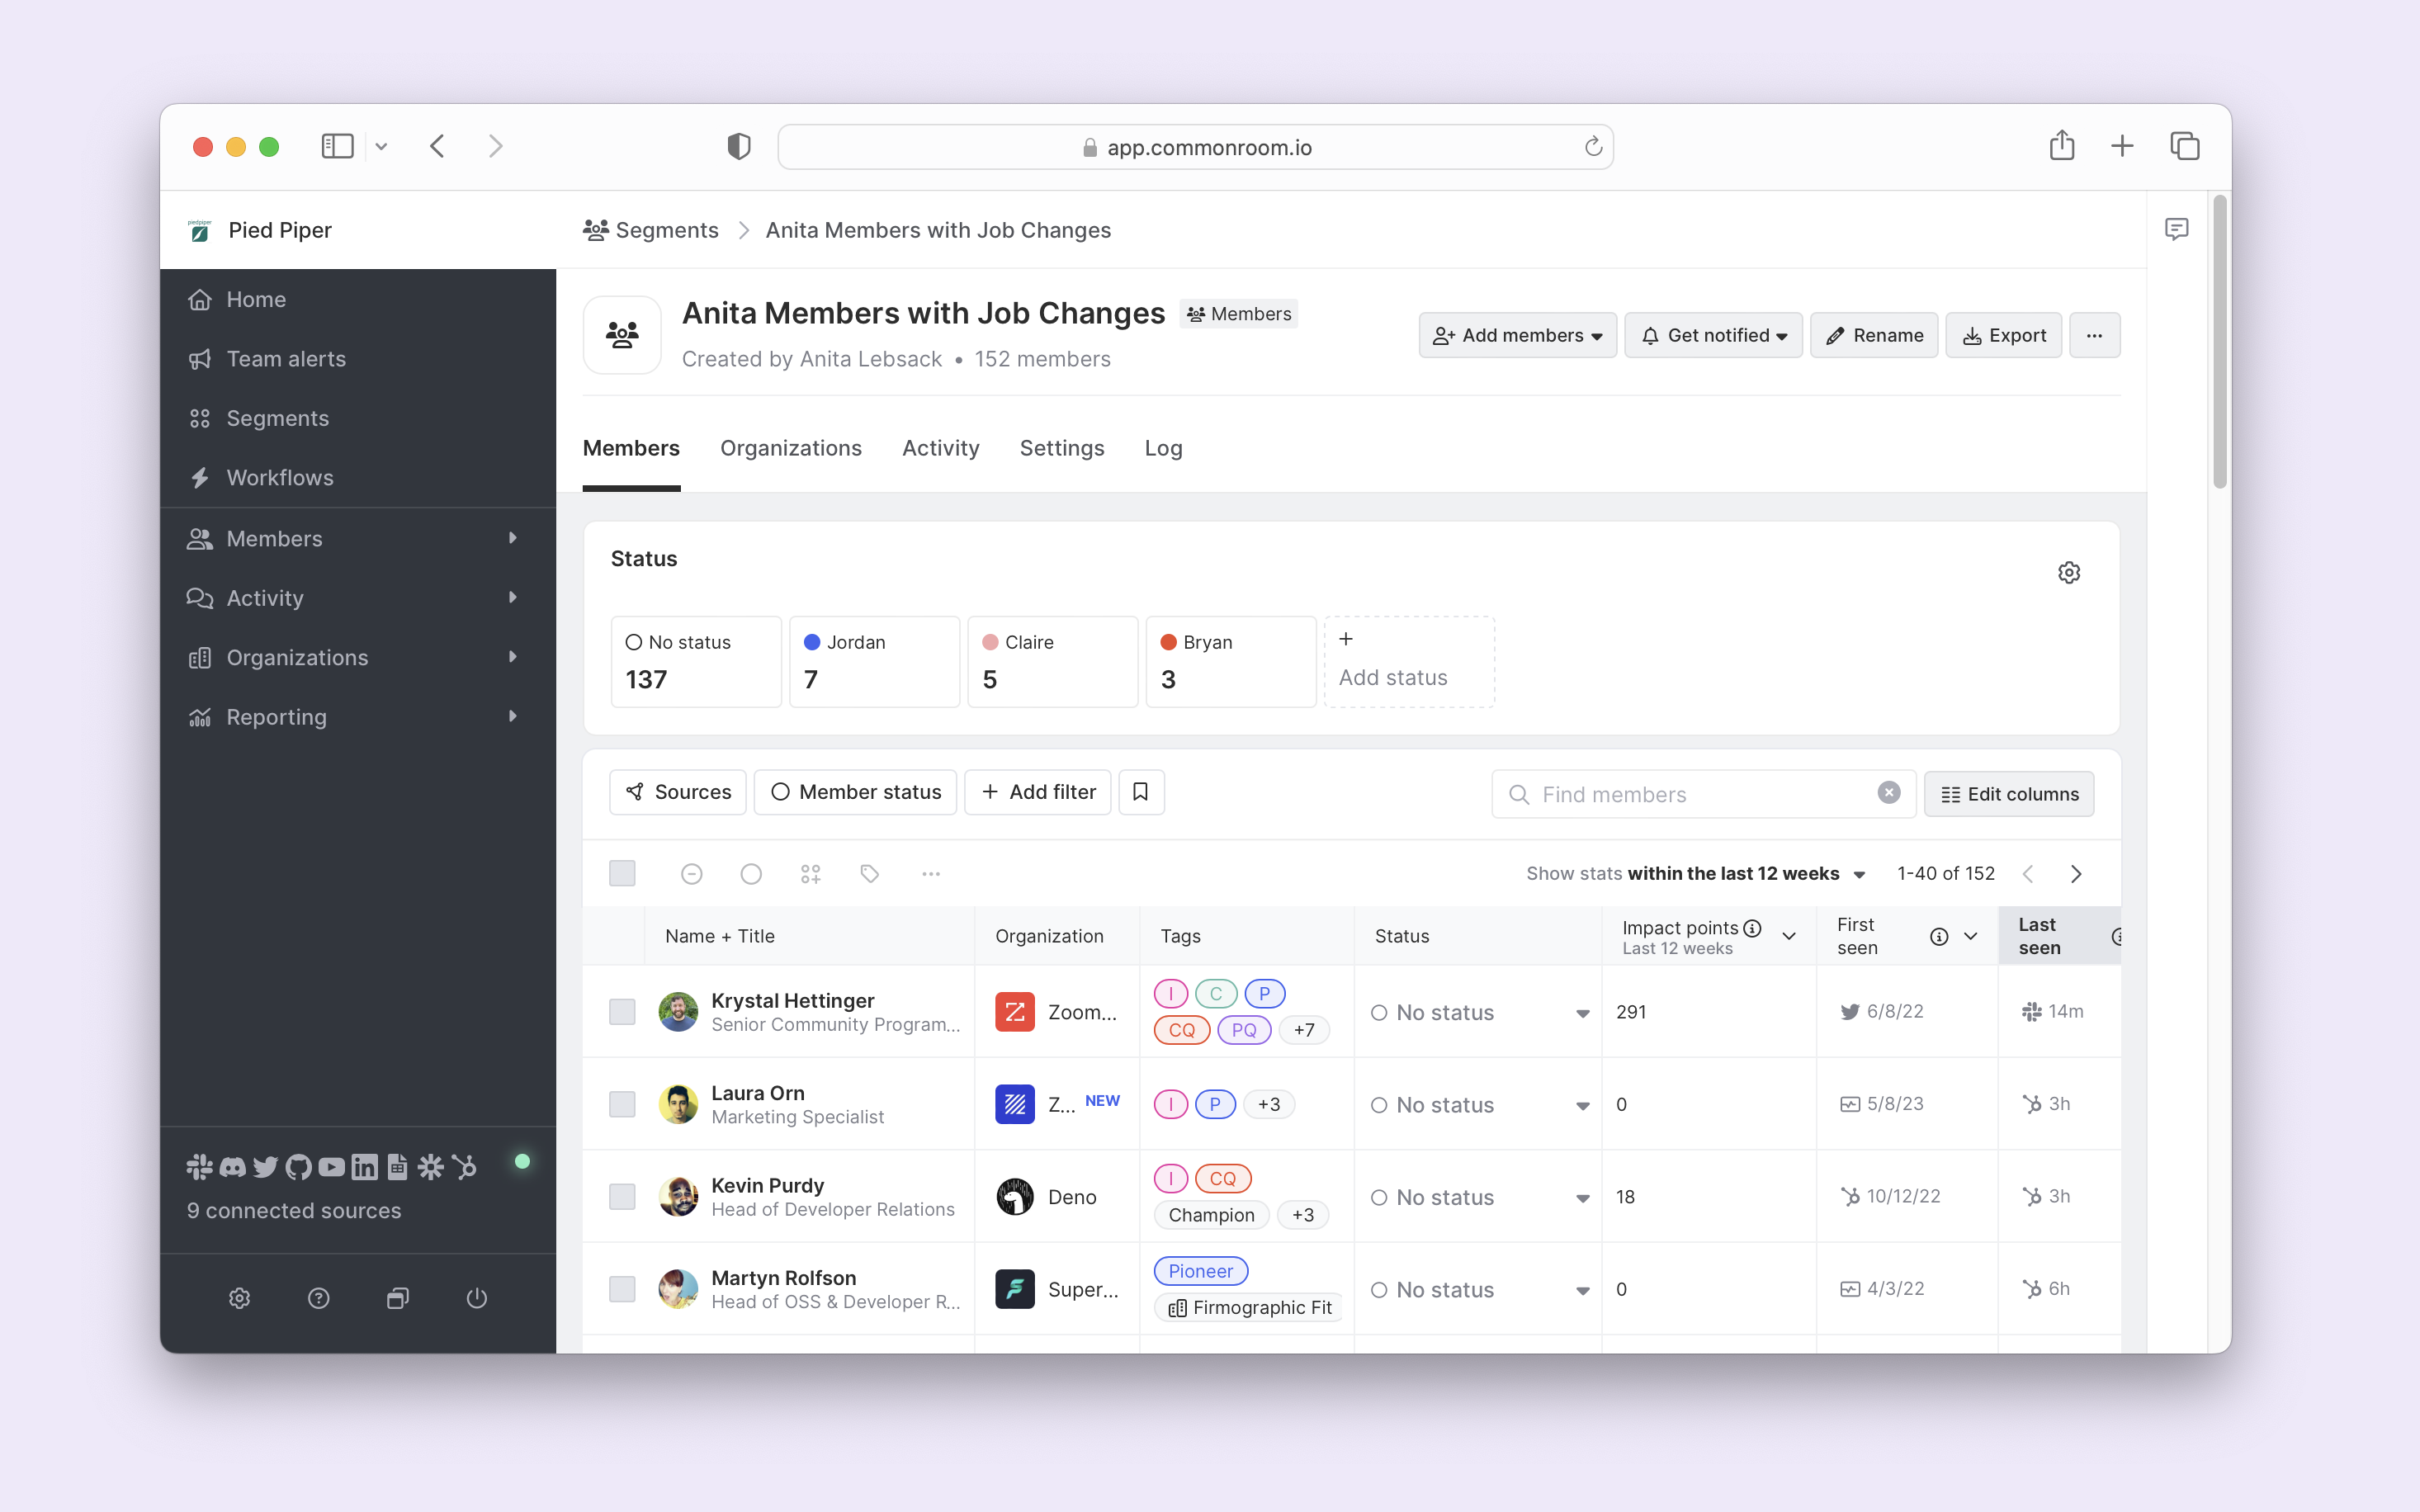
If we click on the Contacts tab within our segment, we can see customers and target prospects who have changed jobs in the six months.
This list alone is powerful. From here, we could have our team members sift through to identify owned accounts and reach out. But we should add more automation to save time for our go-to-market teams. Let’s do that in the following steps.
Step 5: Set automated alerts
Now that we have our segment of key contacts who have recently changed jobs automatically populating, we can set up alerts to get notified when new contacts are added.
It’s super easy to set up notifications. In our segment view, we can simply click the Get notified button located in the top right of our screen.
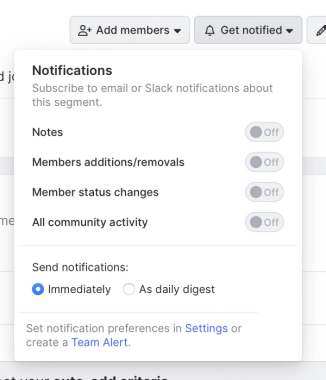
We want to know when there are new additions to our segment, so we can toggle the Contact additions/removals option. And we’ll probably want to get notifications when we set up status changes in the next step. So we’ll toggle that on as well.
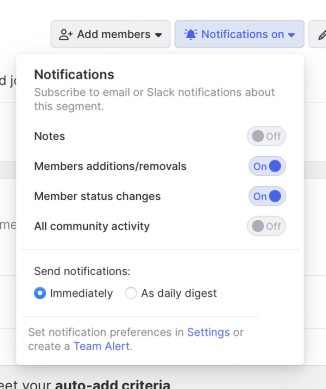
Now, we’ll get an email (or a Slack alert if we set that up) whenever a new contact is added to this segment.
To help our go-to-market teams work more efficiently, we can further refine our new job-change-tracker segment so that reps can work solely with their owned accounts.
To do that, we can turn to the segment status feature by clicking the Settings tab, locating the Status area, and clicking to Set up statuses.
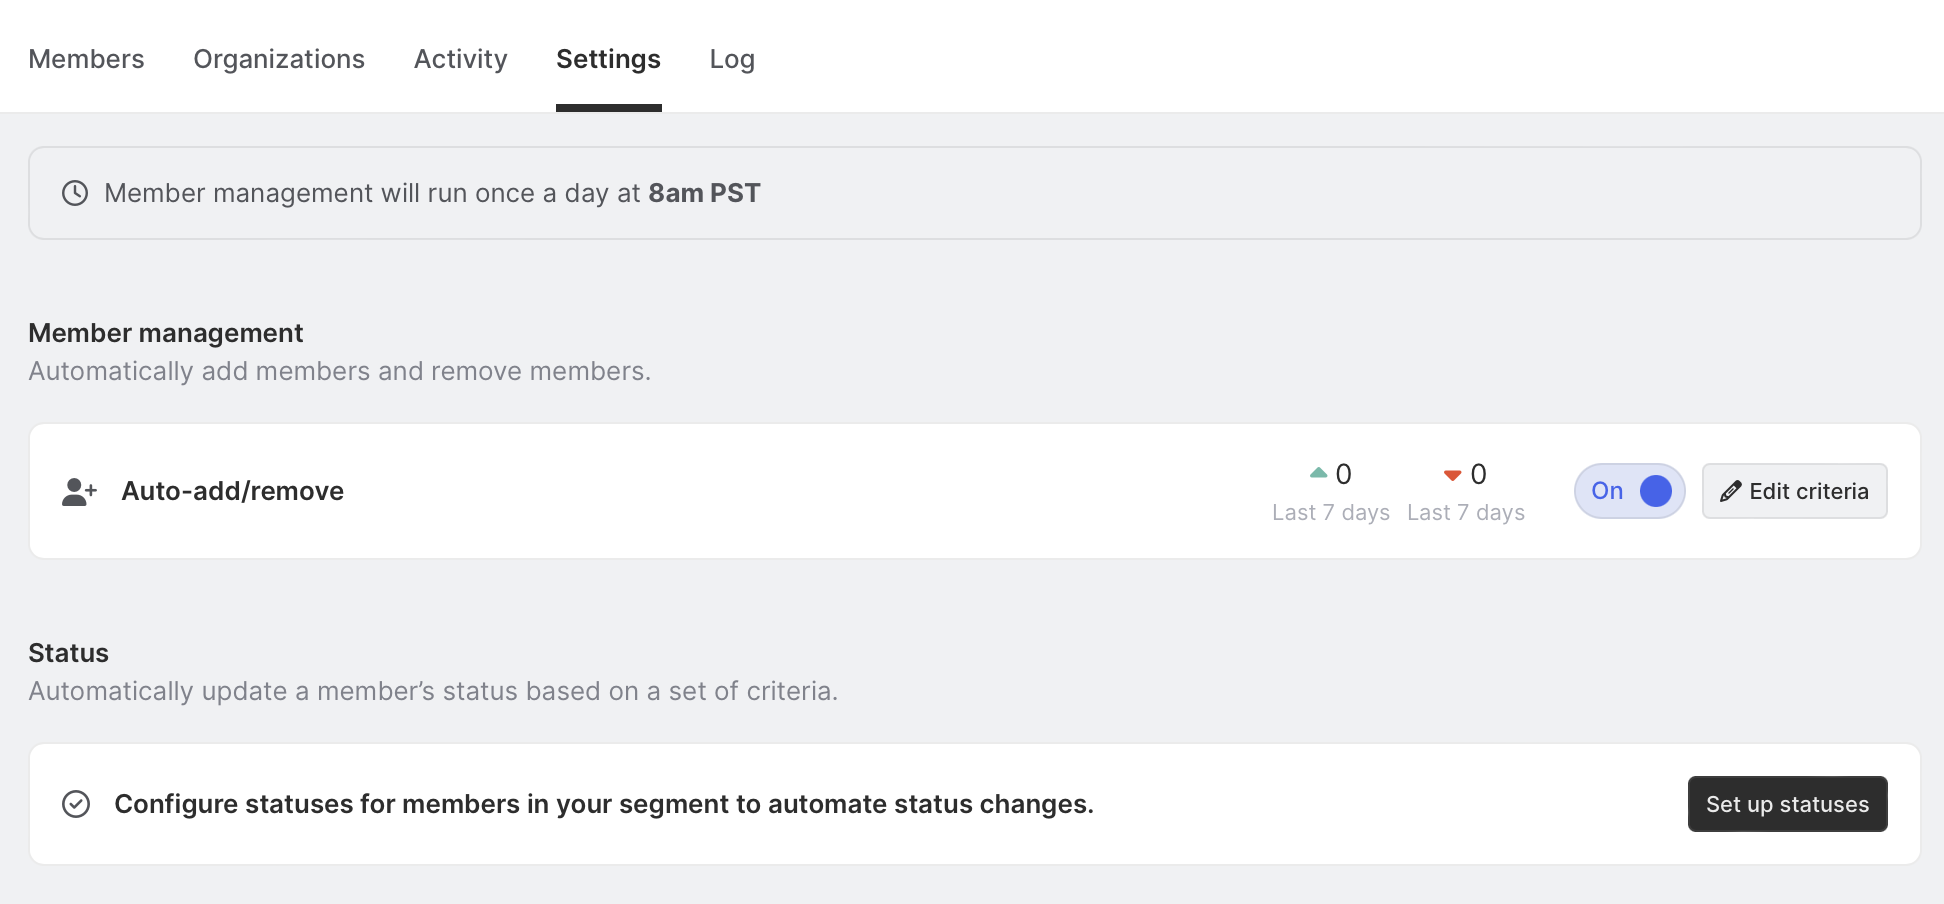
We can name our statuses by team members (what we’ll filter on) and click to Save changes.
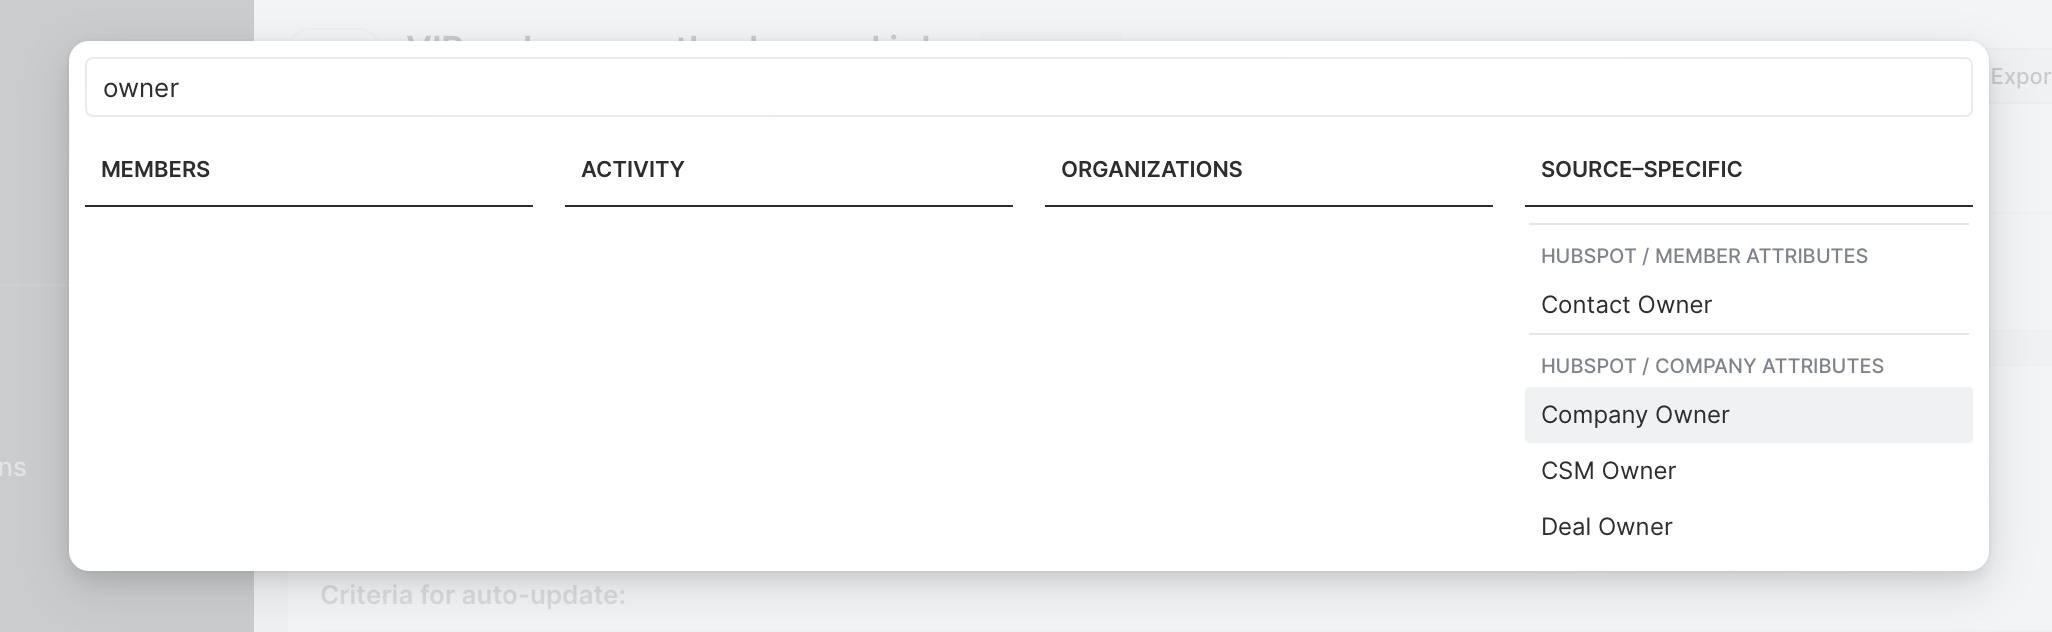
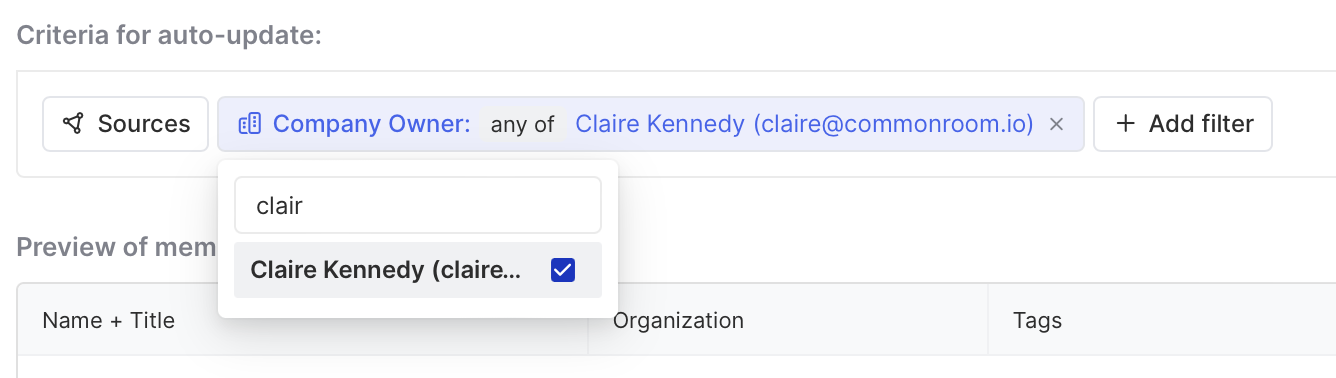
We can click the Set criteria button for the first status we created and choose a source-specific filter of Company Owner.
Now we need to click Save, and contacts of our segment who meet the criteria will have a status with our rep’s name. And we can repeat the same steps for the other reps.
Here’s what that would look like when our segment is built out and fully automated:

Wrapping up
That was a lot! In this playbook, we imported key contacts, set filters to track when they change jobs, and set up views/alerts for our reps to take action.
Our narrative was centered around a sales use case, but the same could be applied to tracking brand advocates, community members, partners, you name it. If it’s filterable in Common Room, you can operationalize it!
Try running this playbook yourself now. Request a demo or get some hands-on help from one of our experts.
We think you'd like these
Playbook
Find buyer intent keywords to track and send your team alerts
Find low-hanging fruit for your go-to-market teams.


Playbook
LinkedIn prospecting on easy mode
Find the signal from the noise on LinkedIn with half the effort.
Playbook
Replenish target accounts for ABM using recent activity
A stale list of target accounts leaves a lot to be desired.
